Watch it draw itself · tap to replay
How to Draw a Kawaii Castle
Draw a kawaii castle in 11 easy steps, about 8 minutes. Free, with a printable worksheet.
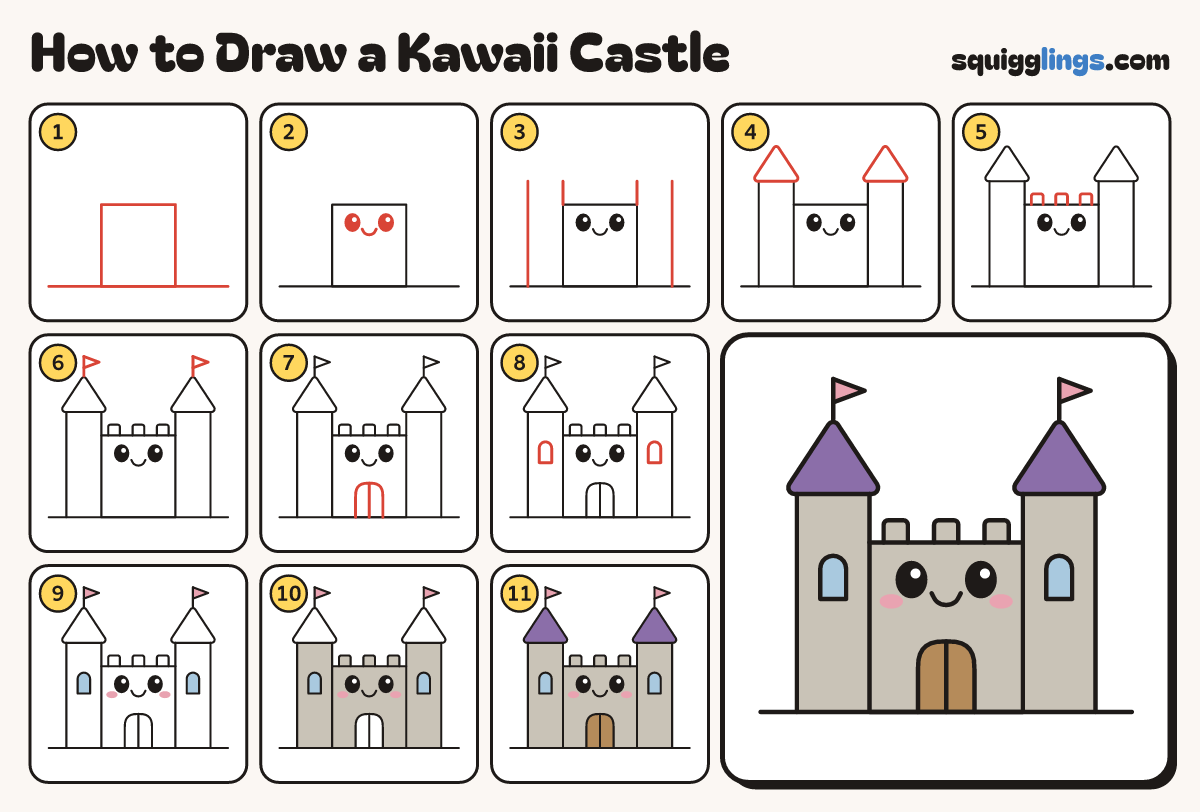
Each picture adds one red line. Draw that line, then scroll to the next picture. Rub out any dashed helper lines at the end. First up: big wall.
Step 1: Big wall
Draw a long ground line. On it draw a wide box for the main wall of the castle.
Tip Leave room on both sides for the towers.
Step 2: Happy face
On the wall draw 2 black oval eyes with white shines. Add a little U smile between them.
Tip Keep the face in the top half of the wall. The door goes below it.
Step 3: Two towers
Start on the ground, then on each top corner of the wall. Draw 4 lines up and stop above it.
Tip Each tower is 2 lines. Stop them all at the same height and leave the tops open.
Step 4: Cone roofs
On top of each tower draw a pointed cone roof. Let it poke out past both sides.
Tip The flat bottom of the roof closes the top of the tower.
Step 5: Three teeth
Start on the top line of the wall. Draw 3 square teeth, each one stopping back on the line.
Tip Put one in the middle and one near each end.
Step 6: Two flags
From each roof tip draw a short pole straight up. Add a pointed flag on each, blowing to the right.
Step 7: Arched door
Start on the ground line. Draw a big arched door and stop on the ground. Add a middle line.
Step 8: Tower windows
On each tower draw 1 arched window with a flat bottom.
Tip Put them level with the eyes.
Step 9: Pink and blue
Colour 2 pink cheek ovals beside the smile. Colour the 2 flags pink and the 2 windows blue.
Step 10: Grey stone
Colour the wall, the 3 teeth and the 2 towers grey, around the face, the windows and the door.
Step 11: Purple roofs, brown door
Colour the 2 cone roofs purple and the door brown. Your kawaii castle is done!
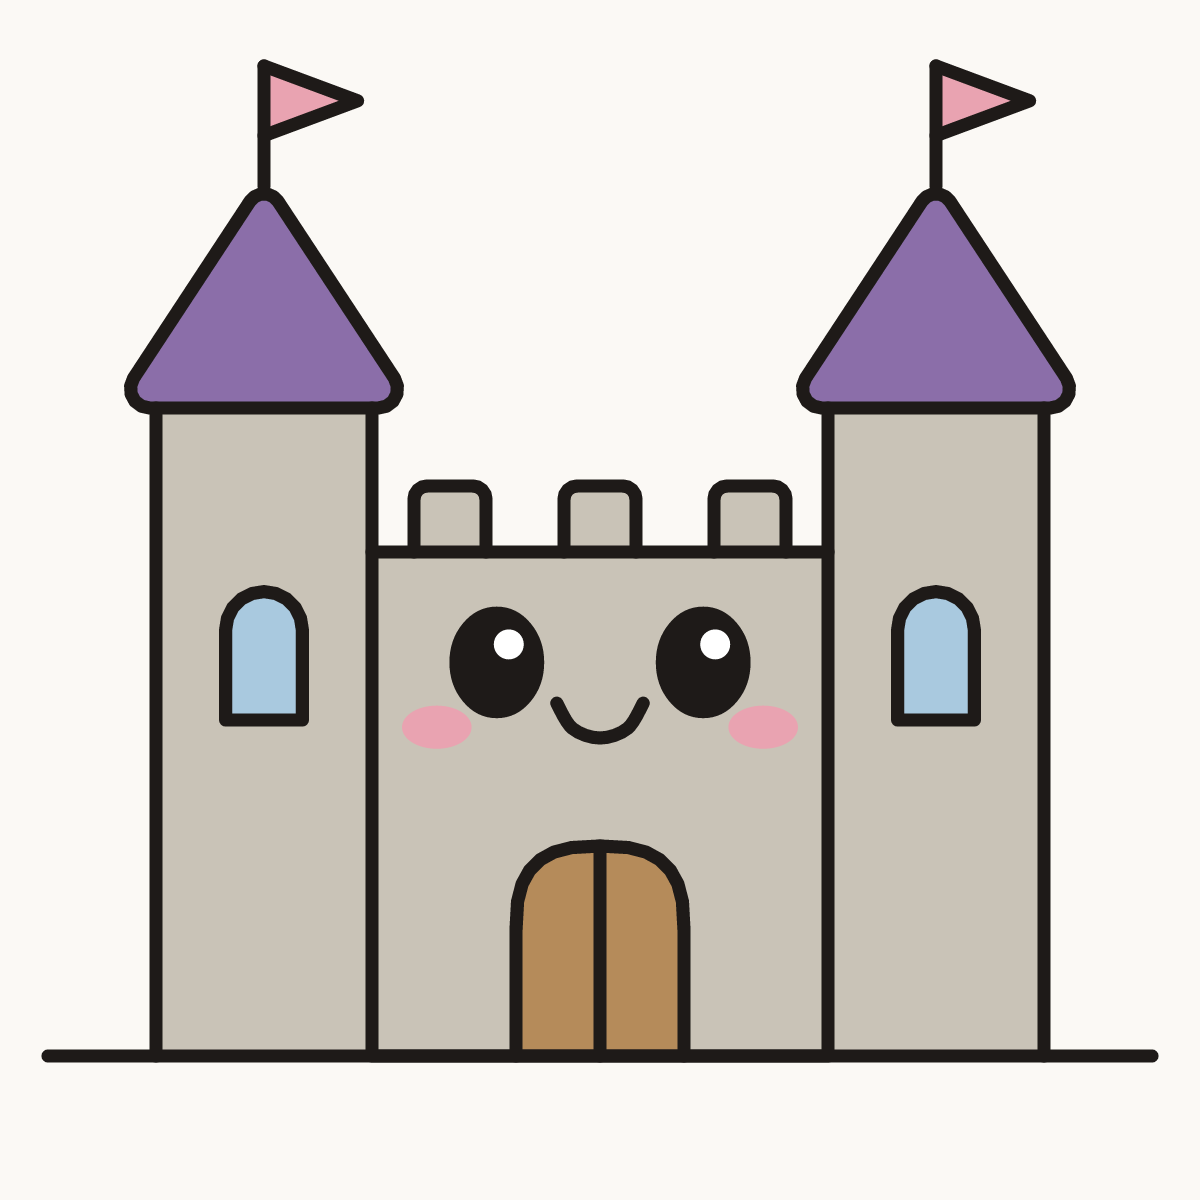
Your finished drawing
Follow the steps above and this is where you end up: a kawaii castle, drawn by you.
Every step in one picture