Watch it draw itself · tap to replay
How to Draw a Kabocha
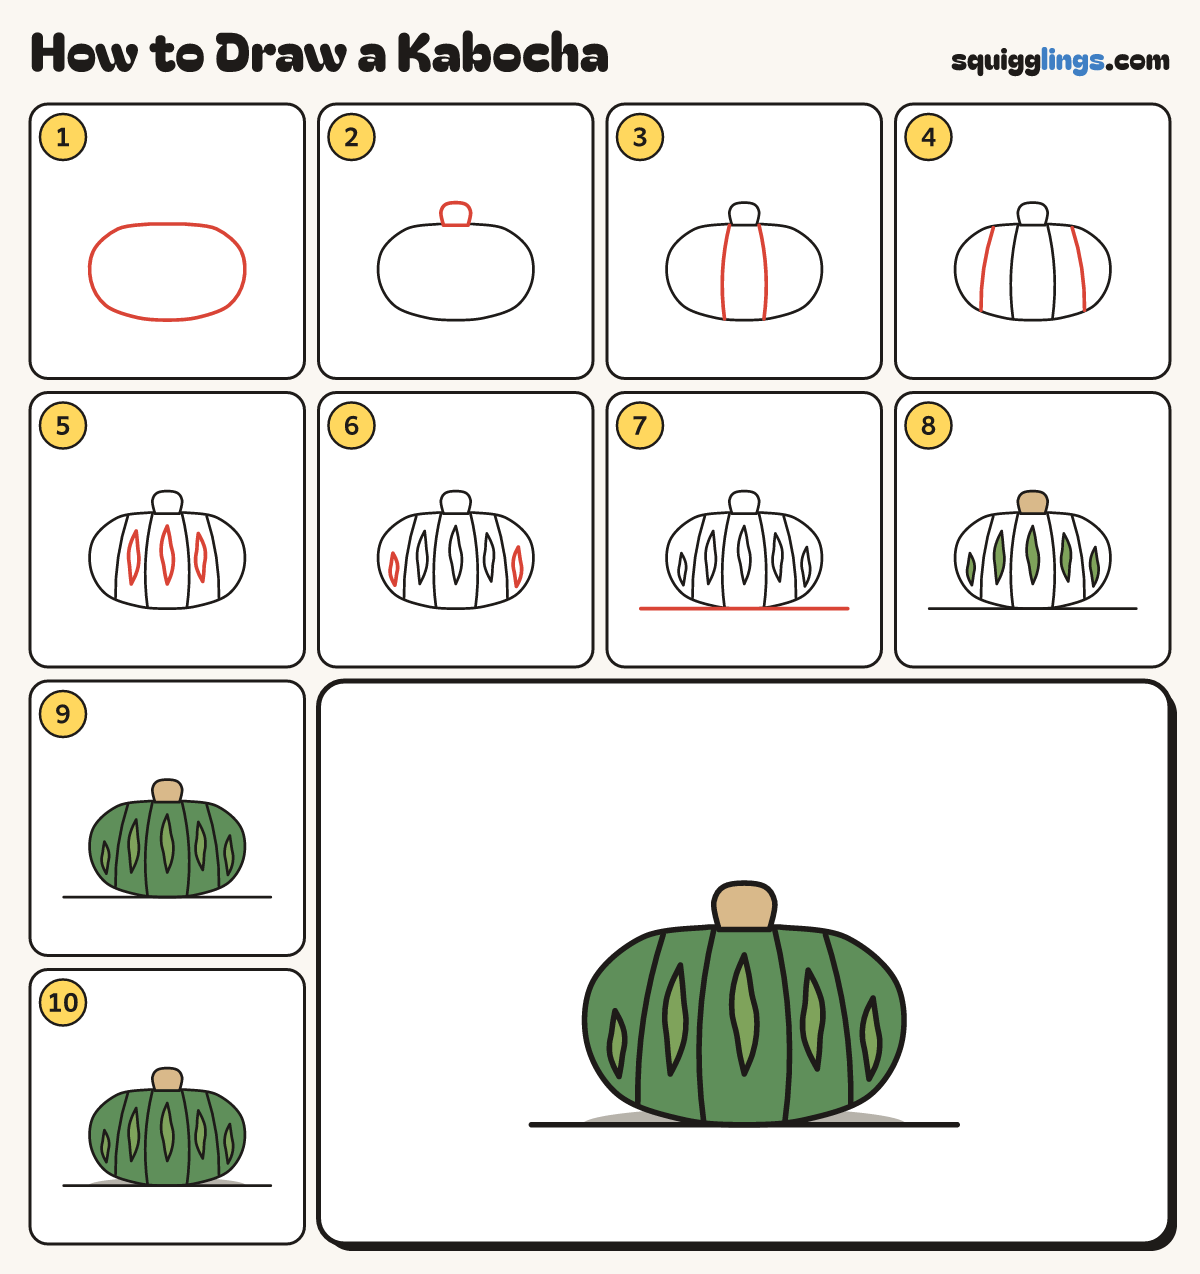
Draw a kabocha in 10 easy steps, about 8 minutes. Free, with a printable worksheet.
Each picture adds one red line. Draw that line, then scroll to the next picture. Rub out any dashed helper lines at the end. First up: the kabocha.
Step 1: The kabocha
In the middle of your paper draw a squat wide pumpkin, wider than tall, with a small dip on top.
Tip A kabocha is a Japanese pumpkin: dark green and squat, with pale streaks.
Step 2: A fat stem
In the dip draw a short fat stem: up one side, a flat rounded top, and down the other side.
Step 3: Two ribs
From each side of the stem draw a soft rib curving down the pumpkin, bowing out, to the bottom edge.
Step 4: Outer ribs
Further out draw two more ribs, each starting on the shoulder and curving down to the lower edge.
Step 5: Pale streaks
In each of the 3 middle sections draw one thin streak, pointed at both ends, not touching the ribs.
Step 6: More streaks
Add a shorter pointed streak in each outer section, near the sides.
Step 7: The ground
From left of the kabocha, draw a flat ground line touching its bottom, and stop right of it.
Step 8: Light green streaks
Go over your lines, then colour the streaks light green and the stem tan.
Step 9: Dark green
Colour the rest of the kabocha dark green, around the pale streaks.
Step 10: Grey shadow
Colour a flat grey shadow just above the ground line under the kabocha, and your kabocha is done!
Your finished drawing
Follow the steps above and this is where you end up: a kabocha, drawn by you.
Every step in one picture