Watch it draw itself · tap to replay
How to Draw a Jump Rope
Draw a jump rope in 10 easy steps, about 8 minutes. Free, with a printable worksheet.
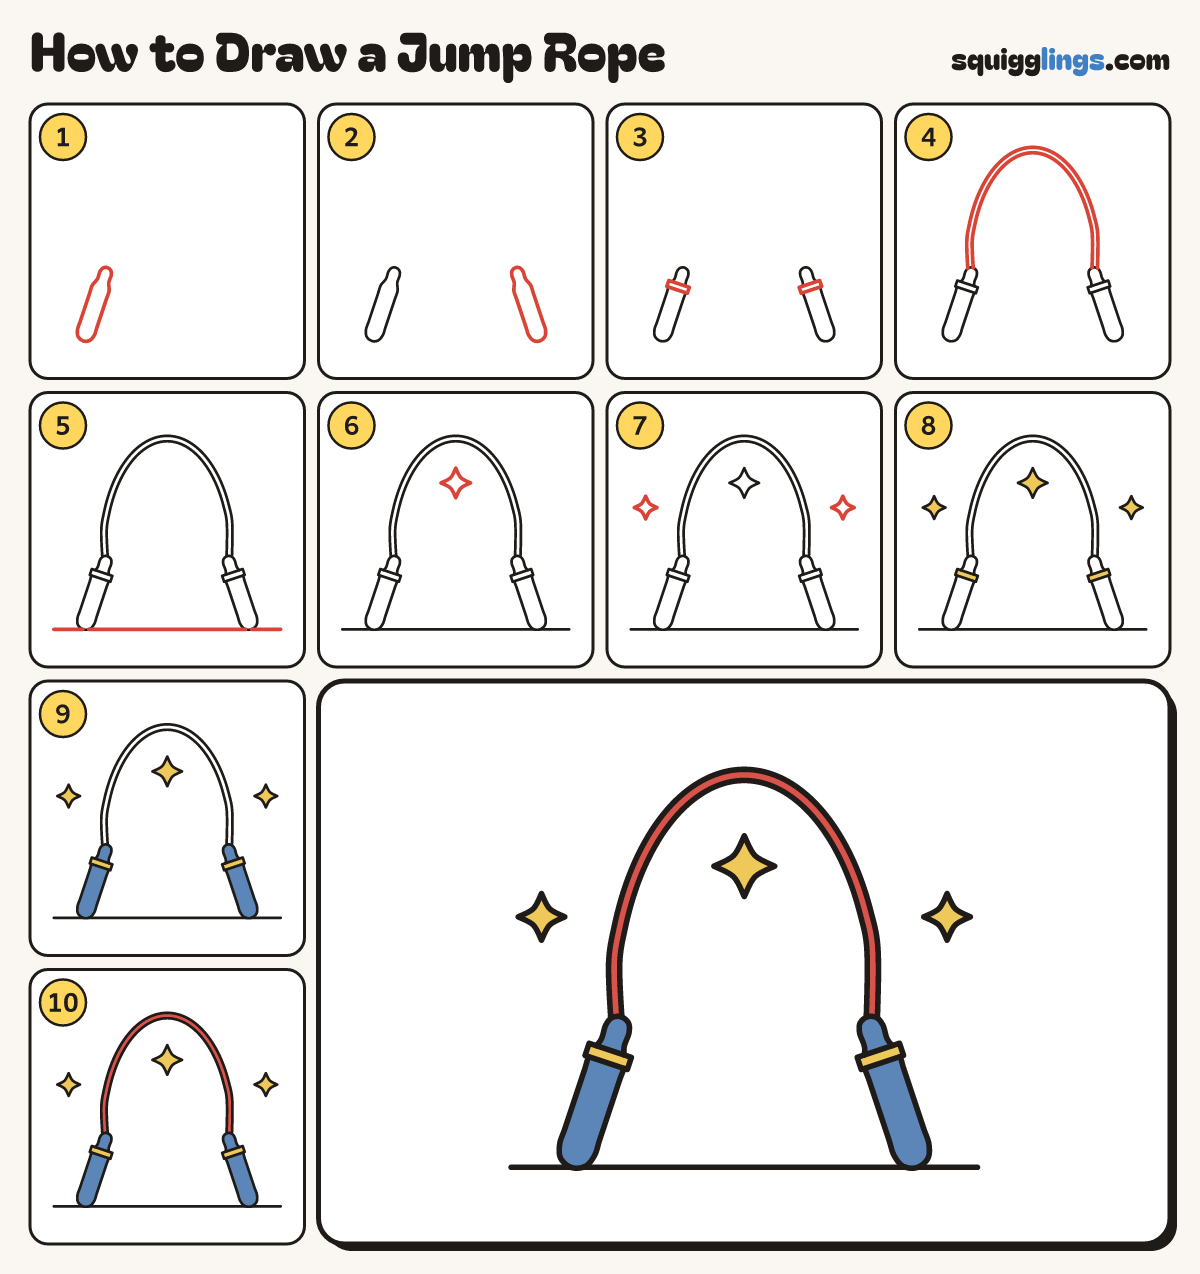
Each picture adds one red line. Draw that line, then scroll to the next picture. Rub out any dashed helper lines at the end. First up: left handle.
Step 1: Left handle
Near the bottom left draw a handle: a fat short stick leaning a little right, round at both ends.
Tip Fat and short, about as long as your thumb.
Step 2: Right handle
Near the bottom right draw the other handle the same, leaning a little left, toward the first one.
Step 3: Handle caps
Near the top of each handle draw a short band across it, a little wider than the handle.
Step 4: The rope
From the left handle draw 1 huge rainbow over to the right handle. Make it 2 lines thick.
Tip The rope goes nearly up to the top of the paper.
Step 5: The ground
Draw a straight ground line across the paper, just touching the bottom of both handles.
Step 6: Big sparkle
In the middle, under the rope, draw 1 big sparkle star, like a plus sign with curvy arms.
Step 7: More sparkles
Add 2 smaller sparkle stars, 1 on each side, outside the rope.
Step 8: Yellow caps and stars
Colour the handle caps and the sparkle stars yellow.
Step 9: Blue handles
Colour both handles blue.
Step 10: Red rope
Colour the thick rope red. Go over all your lines and your jump rope is done!
Your finished drawing
Follow the steps above and this is where you end up: a jump rope, drawn by you.
Every step in one picture