Watch it draw itself · tap to replay
How to Draw a Japanese Garden
Draw a Japanese garden in 12 easy steps, about 9 minutes. Free, with a printable worksheet.
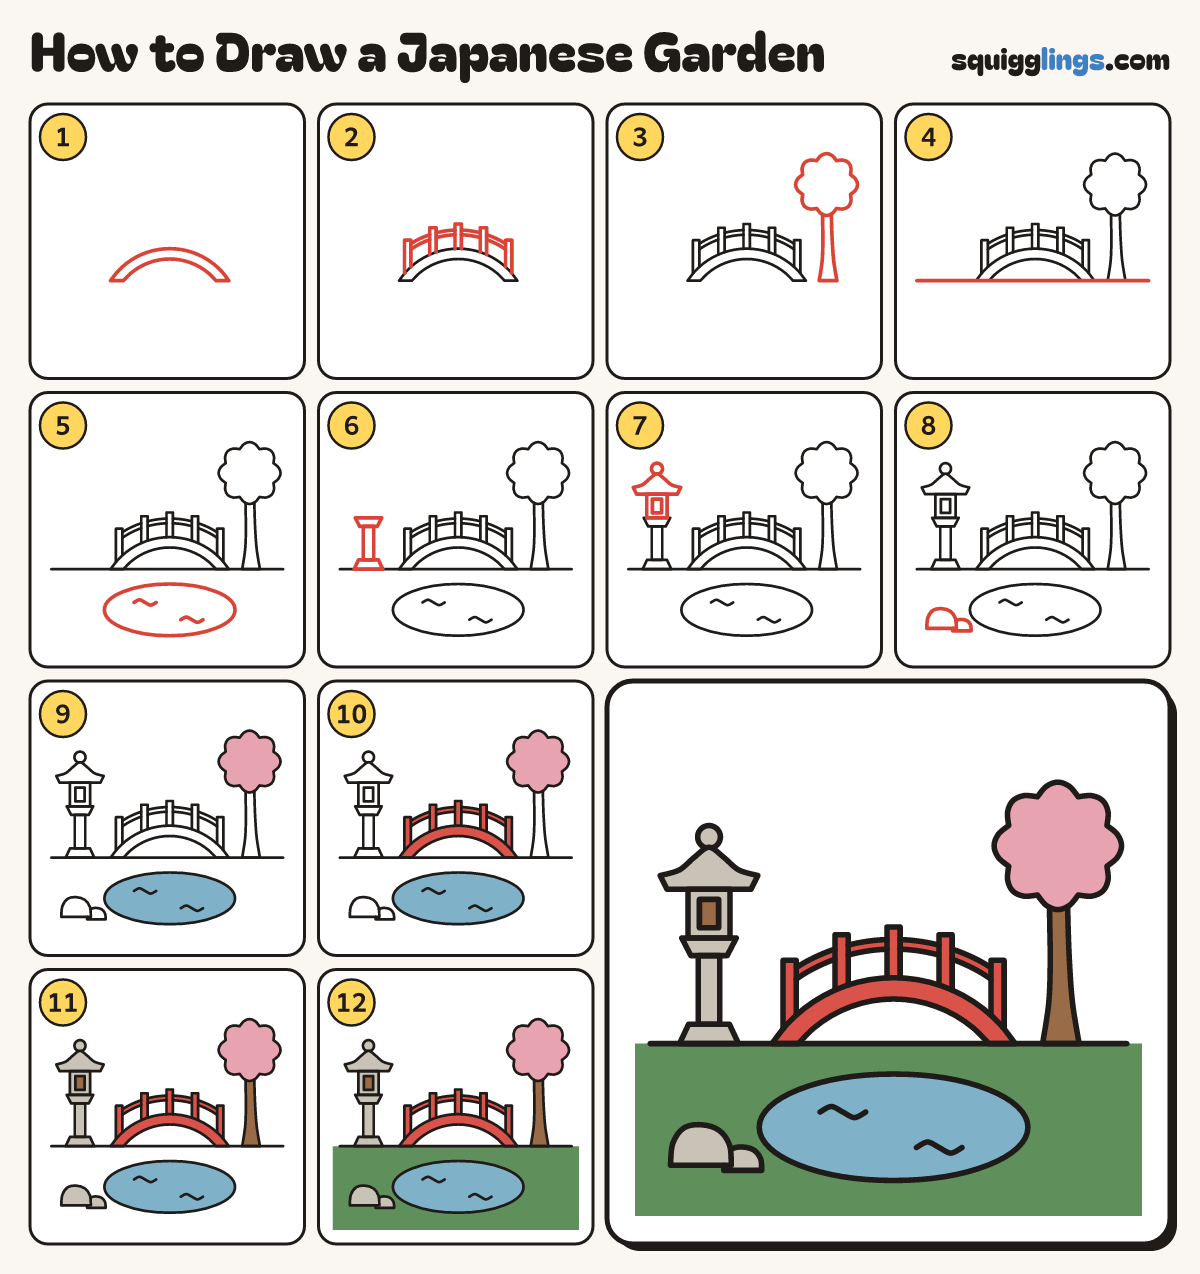
Each picture adds one red line. Draw that line, then scroll to the next picture. Rub out any dashed helper lines at the end. First up: arched bridge.
Step 1: Arched bridge
In the middle draw a big rainbow. Draw a smaller one inside it and join the ends.
Tip The bridge is a thick curved band, like a slice of rainbow.
Step 2: Posts and rail
Stand 5 posts along the top of the bridge. Join them with a curved rail near their tops.
Tip Put one post in the middle first, then one at each end.
Step 3: Blossom tree
On the right draw a tall trunk, wider at the bottom. Top it with a cloud of 8 round bumps.
Tip The trunk starts level with the feet of the bridge.
Step 4: The ground line
Start near the left edge. Draw a flat ground line under the bridge and stop near the right edge.
Step 5: The pond
Below the bridge draw a wide oval pond. Add 2 small wavy ripples inside.
Step 6: Lantern post
On the left draw a stone lantern: a wide foot on the ground, a post, and a shelf on top.
Tip The foot and the shelf are wider than the post.
Step 7: Lantern top
On the shelf draw a box with a window. Add a wide roof with curled-up corners and a ball.
Step 8: Two rocks
On the grass in the bottom left draw a big round rock and a small one tucked behind it.
Step 9: Pink and blue
Go over your lines. Colour the blossom pink and the pond light blue.
Step 10: Red bridge
Colour the bridge red: the curved band, the rail and all 5 posts.
Step 11: Stone and wood
Colour the lantern and both rocks grey. Colour the tree trunk and the lantern window brown.
Step 12: Green grass
Colour the grass green below the ground line, around the pond and rocks. Your Japanese garden is done!
Tip Colour right out to the edges of the paper.
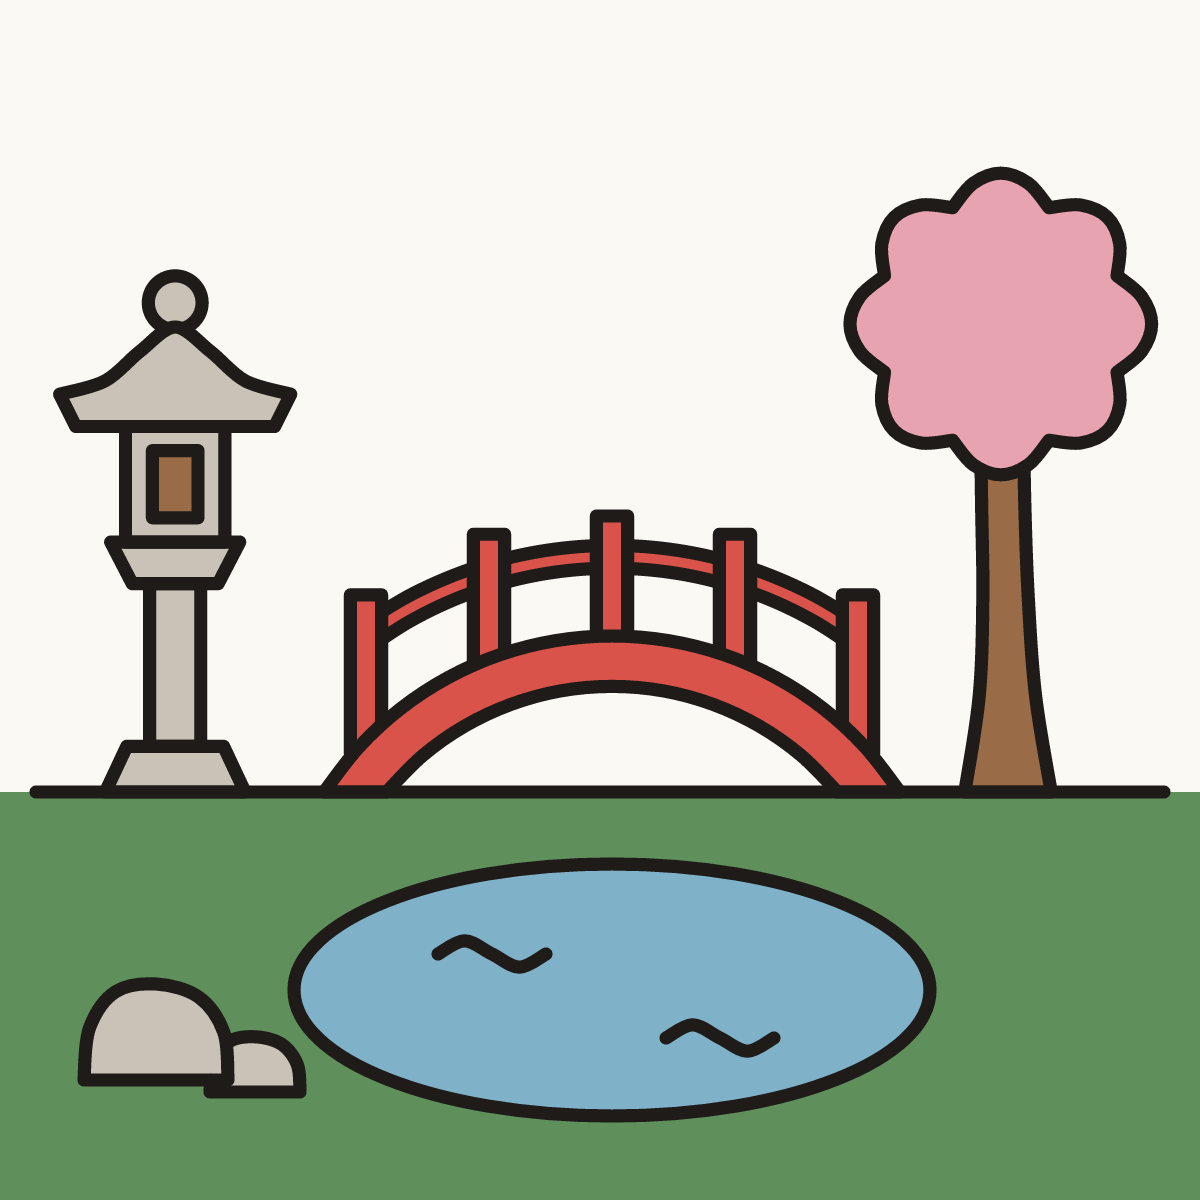
Your finished drawing
Follow the steps above and this is where you end up: a Japanese garden, drawn by you.
Every step in one picture