Watch it draw itself · tap to replay
How to Draw an Inkcap Mushroom
Draw an inkcap mushroom in 10 easy steps, about 8 minutes. Free, with a printable worksheet.
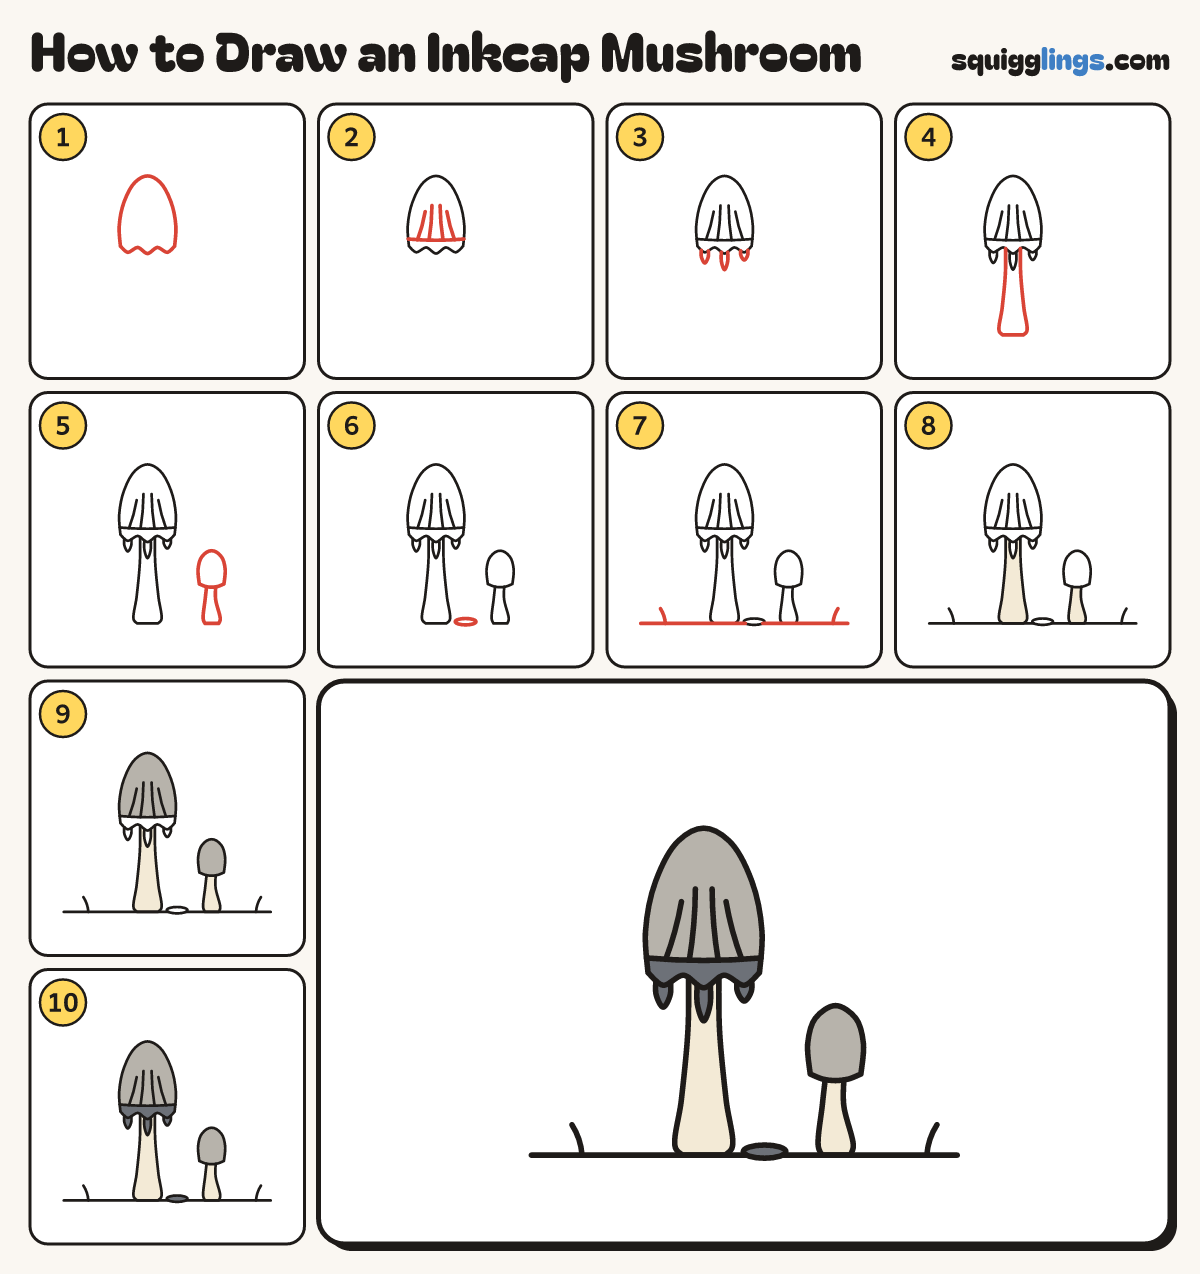
Each picture adds one red line. Draw that line, then scroll to the next picture. Rub out any dashed helper lines at the end. First up: the bell cap.
Step 1: The bell cap
Left of the middle draw a tall bell cap with a round top and a wavy frilly bottom edge.
Tip Inkcaps melt from the edge into black ink.
Step 2: Band and grooves
Draw a band line above the frilly edge, then 4 soft lines from near the top down to it.
Step 3: Ink drips
From the frilly edge draw 3 drips of different lengths, like teardrops, one right in the middle.
Step 4: The stem
From the frilly edge, behind the middle drip, draw a slim stem down to a wide foot and back up.
Step 5: A small one
Draw a small bullet cap on the right. From it draw a short stem down to the big stem's level.
Step 6: An ink puddle
Just right of the big stem's foot draw a small flat oval, a puddle of ink.
Step 7: Ground and grass
Draw the ground line under both stems, well left to well right. Flick a grass blade up at each end.
Step 8: Cream stems
Go over your lines, then colour both stems cream.
Step 9: Grey caps
Colour the big cap above the band and the small cap soft grey.
Step 10: Inky rim
Colour the band, the drips and the puddle dark grey, and your inkcaps are done!
Your finished drawing
Follow the steps above and this is where you end up: an inkcap mushroom, drawn by you.
Every step in one picture