Watch it draw itself · tap to replay
How to Draw a Hockey Rink
Draw a hockey rink in 12 easy steps, about 9 minutes. Free, with a printable worksheet.
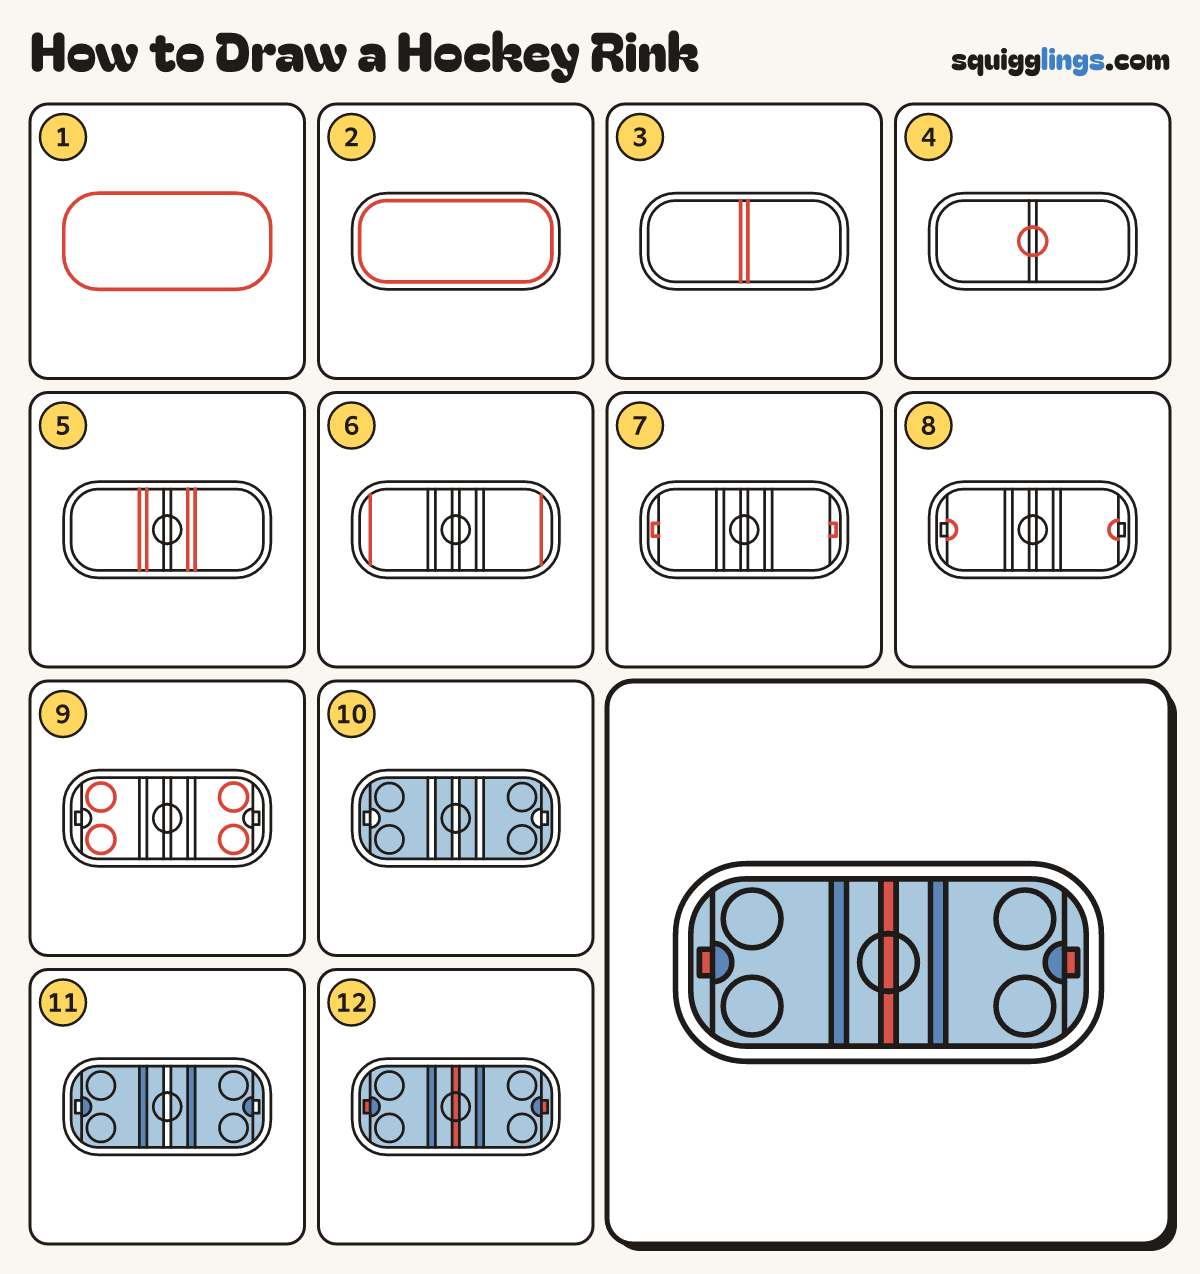
Each picture adds one red line. Draw that line, then scroll to the next picture. Rub out any dashed helper lines at the end. First up: the rink.
Step 1: The rink
Draw a long box with round corners across your paper, more than twice as wide as it is tall.
Tip You are looking down on the rink from above.
Step 2: The boards
Just inside the edge, draw the same shape again. The thin gap is the boards round the ice.
Step 3: Centre line
Down the middle draw 2 lines close together. Start at the top edge of the ice, stop at the bottom.
Step 4: Centre circle
Draw a circle round the middle of the rink, in 2 halves that start and stop on the centre line.
Step 5: Two more stripes
Each side of the circle draw 2 more close lines. Start at the top edge, stop at the bottom edge.
Tip These will be the 2 blue lines.
Step 6: Goal lines
Near each end draw one line from the top edge of the ice down to the bottom edge.
Step 7: Two goals
On the outside of each goal line, in the middle, draw a small box. Start and stop on the line.
Step 8: Goal creases
In front of each goal draw a half circle. Start on the goal line above the goal, stop below it.
Step 9: Face-off circles
At each end draw 2 circles, one above the goal and one below, as big as the middle circle.
Step 10: Light blue ice
Colour the ice light blue, around the goals, the half circles and the 3 thin stripes.
Step 11: Blue lines
Colour the thin stripe each side of the circle blue. Colour the 2 half circles blue too.
Step 12: Red line, red goals
Colour the middle stripe and the 2 goals red. Leave the boards white. Your hockey rink is done!
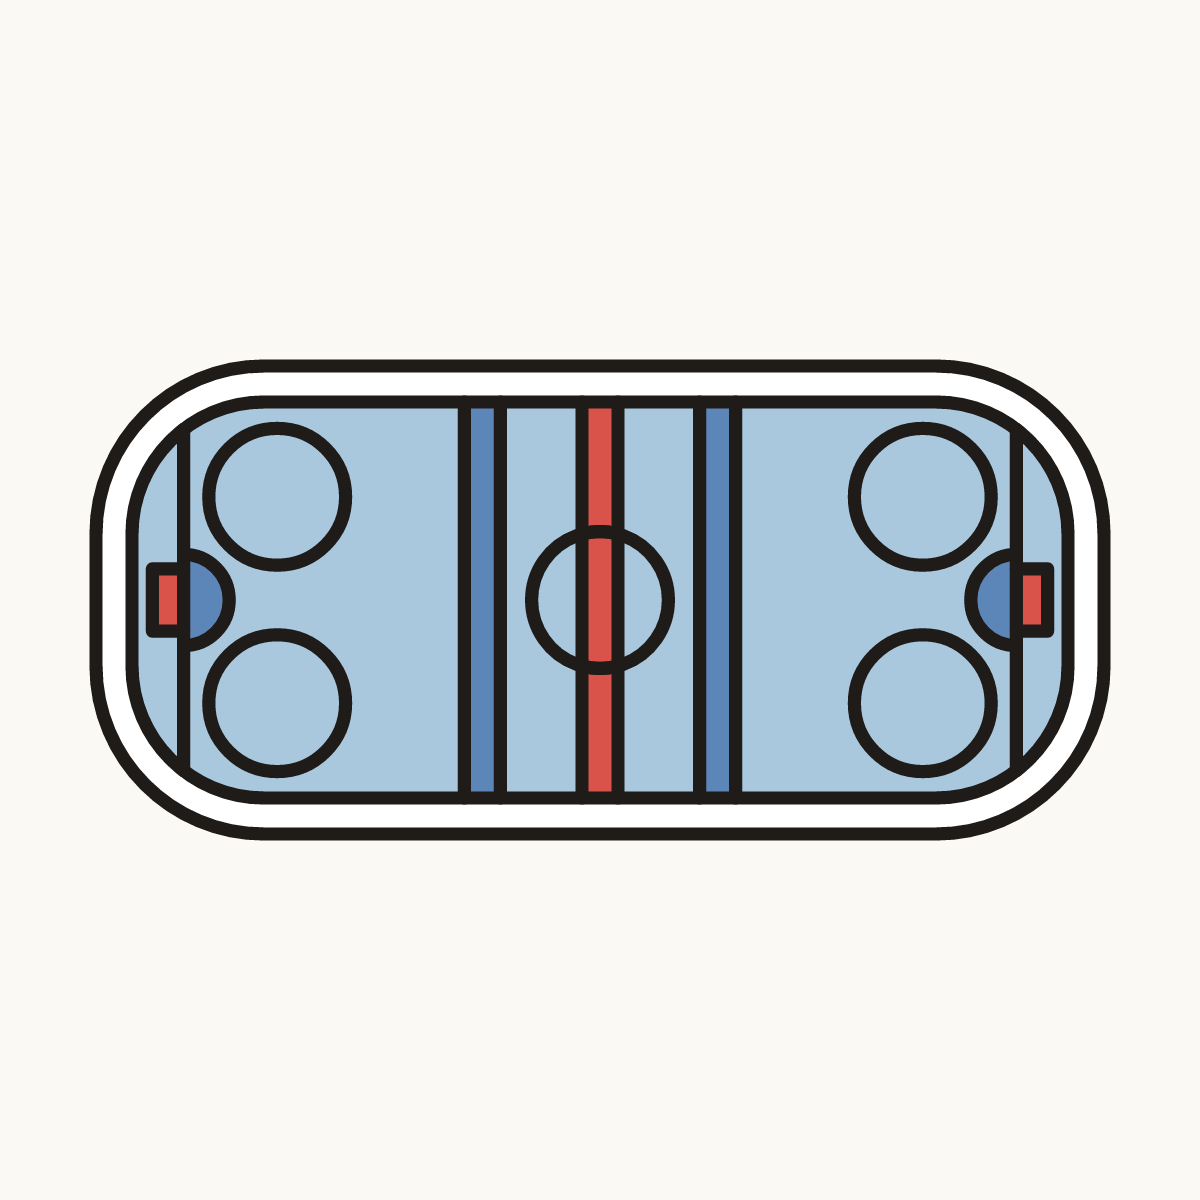
Your finished drawing
Follow the steps above and this is where you end up: a hockey rink, drawn by you.
Every step in one picture