Watch it draw itself · tap to replay
How to Draw a Henna Design
Draw a henna design in 14 easy steps, about 11 minutes. Free, with a printable worksheet.
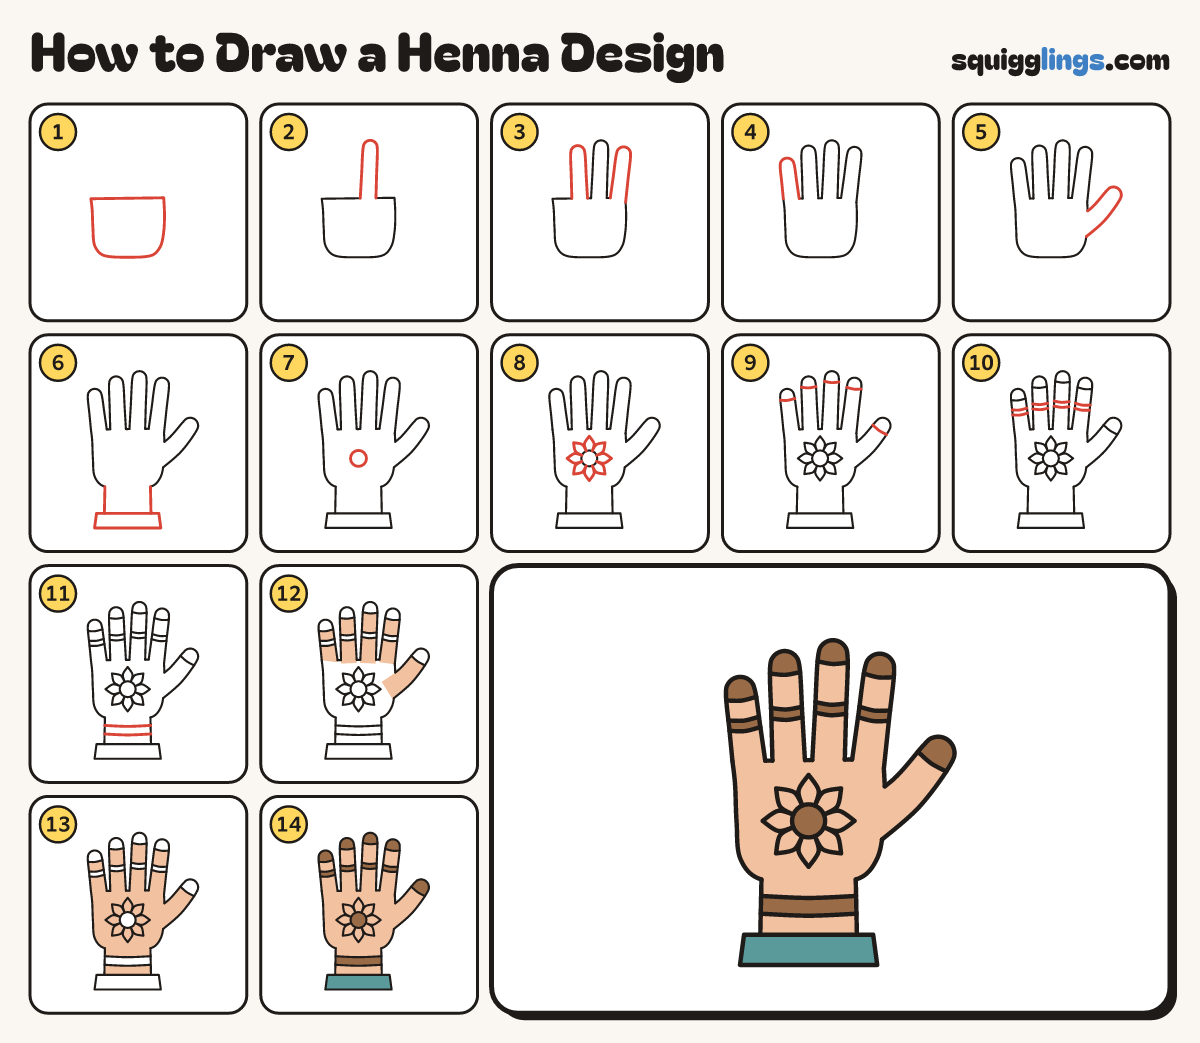
Each picture adds one red line. Draw that line, then scroll to the next picture. Rub out any dashed helper lines at the end. First up: the palm.
Step 1: The palm
In the middle of your paper, a little to the left, draw a big rounded square for the palm.
Tip Leave room above for the fingers and on the right for the thumb.
Step 2: The middle finger
Start on the palm's top, right of the middle. Draw a tall finger: up, round, down. Stop on the palm.
Step 3: Pointing and ring fingers
Draw a shorter finger on each side of it. Start and stop each one on the palm's top.
Tip Leave a small gap between the fingers.
Step 4: The little finger
At the left end draw the shortest finger, leaning out. Start and stop on the palm's top.
Step 5: The thumb
On the palm's right side draw a thumb pointing up and out. Rub out the palm line inside it.
Tip The thumb is shorter and fatter than the fingers.
Step 6: Wrist and sleeve
Under the palm draw 2 wrist lines straight down to a wide flat box, the sleeve.
Step 7: Flower middle
In the middle of the palm draw a small circle. The henna flower grows around it.
Tip Henna is a brown paste used to paint patterns on skin for special days.
Step 8: Eight petals
Draw 8 pointed petals around the circle, like a sun. Each petal starts and stops on the circle.
Step 9: Fingertip caps
Draw a short curved line across each fingertip and across the thumb tip, from edge to edge.
Tip The caps sit like little hats on the fingertips.
Step 10: Finger rings
Lower down, draw 2 lines close together across each finger, from edge to edge, like a ring.
Step 11: Wrist band
Draw 2 lines across the wrist, from edge to edge, like a bracelet.
Step 12: Peach fingers
Go over your lines. Colour the fingers and thumb peach. Leave the tips and the rings blank for now.
Step 13: Peach palm
Colour the palm and the wrist peach, going around the flower's middle and the wrist band.
Step 14: Brown henna
Colour the henna brown: the fingertips, the rings, the flower's middle and the wrist band. Colour the sleeve teal.
Tip Real henna paste dries, flakes off and leaves the pattern on the skin.
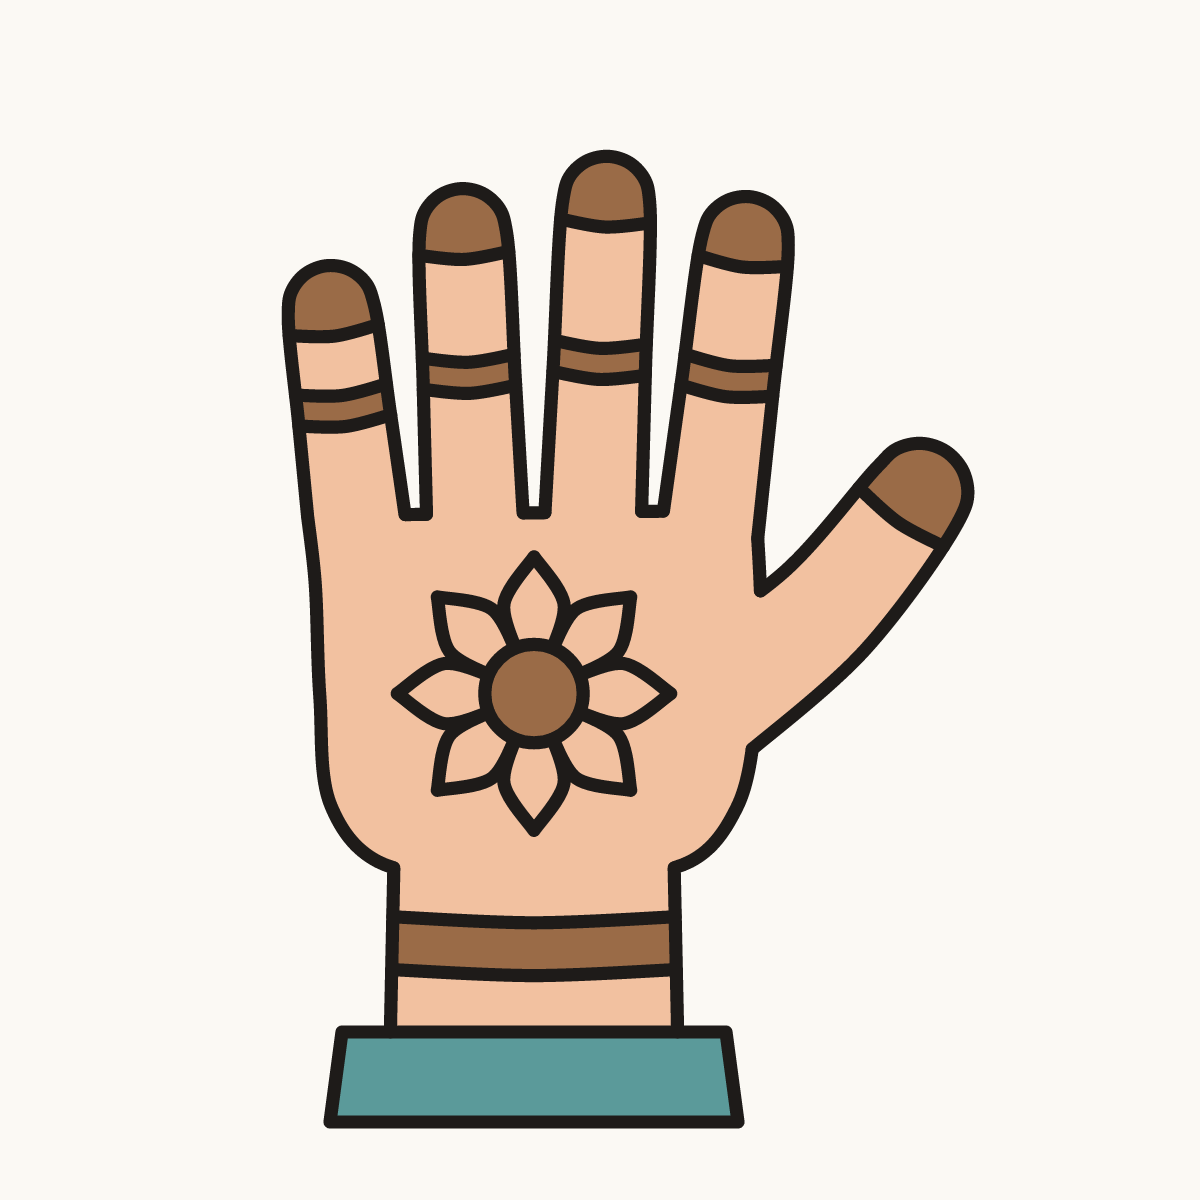
Your finished drawing
Follow the steps above and this is where you end up: a henna design, drawn by you.
Every step in one picture