Watch it draw itself · tap to replay
How to Draw a Feather
Draw a feather in 11 easy steps, about 8 minutes. Free, with a printable worksheet.
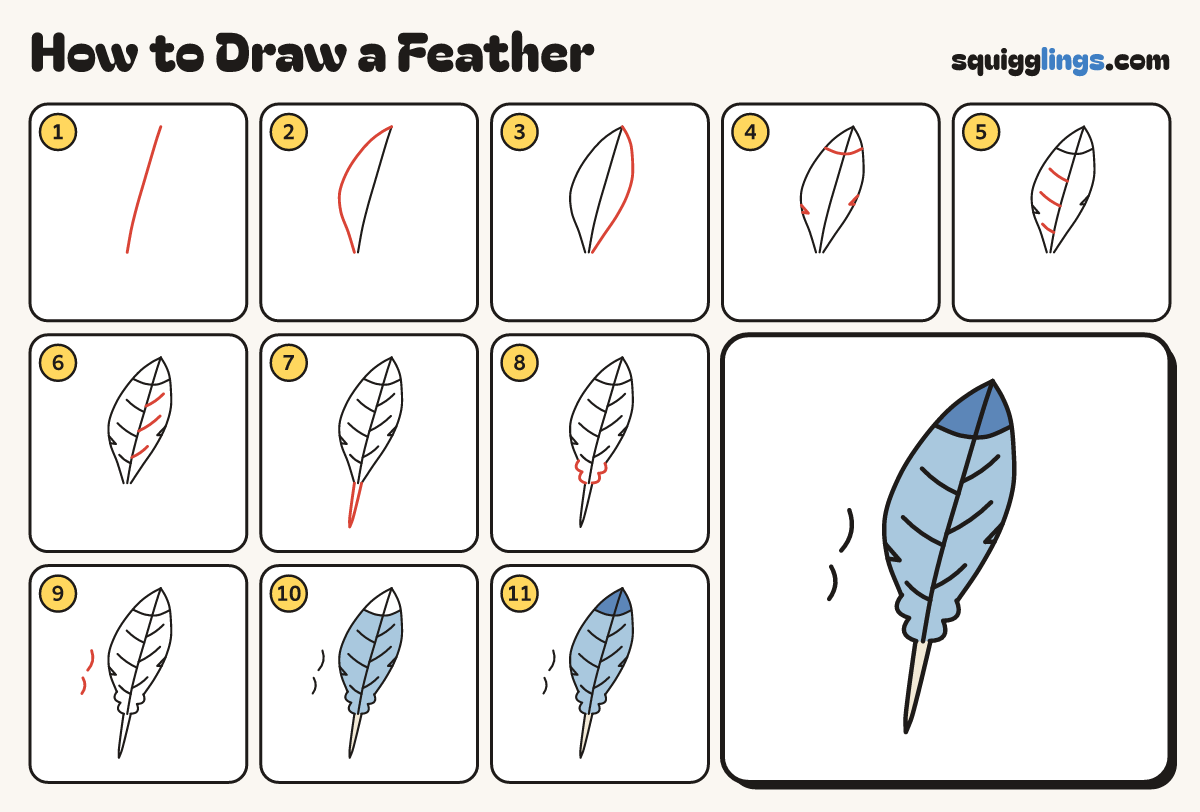
Each picture adds one red line. Draw that line, then scroll to the next picture. Rub out any dashed helper lines at the end. First up: the stem.
Step 1: The stem
Start just below the middle of your paper. Draw one long line up to the right, stopping near the top.
Tip Bend it a tiny bit, like a soft banana.
Step 2: Wide side
Start just left of the stem's bottom. Draw a big bow out left, stopping at the stem's top.
Step 3: Narrow side
Start just right of the stem's bottom. Draw a smaller bow out right, stopping at the stem's top.
Step 4: Splits and tip band
Start on each edge, cut a V split into it. Add a curved line near the top, edge to edge.
Step 5: Wide side lines
On the wide side draw 3 short slanted lines. Start each on the stem and stop before the edge.
Step 6: Narrow side lines
On the narrow side draw 3 more short lines. Start each on the stem and stop before the edge.
Step 7: The quill
From the wide side's bottom, draw a long thin point down and back up to the narrow side's bottom.
Tip The quill is fat at the top and sharp at the bottom.
Step 8: Fluffy bottom
Low on each edge, draw 2 soft bumps down to where the quill starts. Rub out the line inside.
Step 9: Breeze lines
Left of the feather draw 2 short curved lines. Start a thumb away and stop a little lower.
Step 10: Cream quill, sky vane
Colour the quill cream. Colour the vane and its fluffy bumps sky blue, below the curved line.
Step 11: Blue tip
Colour the tip above the curved line darker blue. Go over your lines.
Your finished drawing
Follow the steps above and this is where you end up: a feather, drawn by you.
Every step in one picture