Watch it draw itself · tap to replay
How to Draw a Handprint
Draw a handprint in 10 easy steps, about 8 minutes. Free, with a printable worksheet.
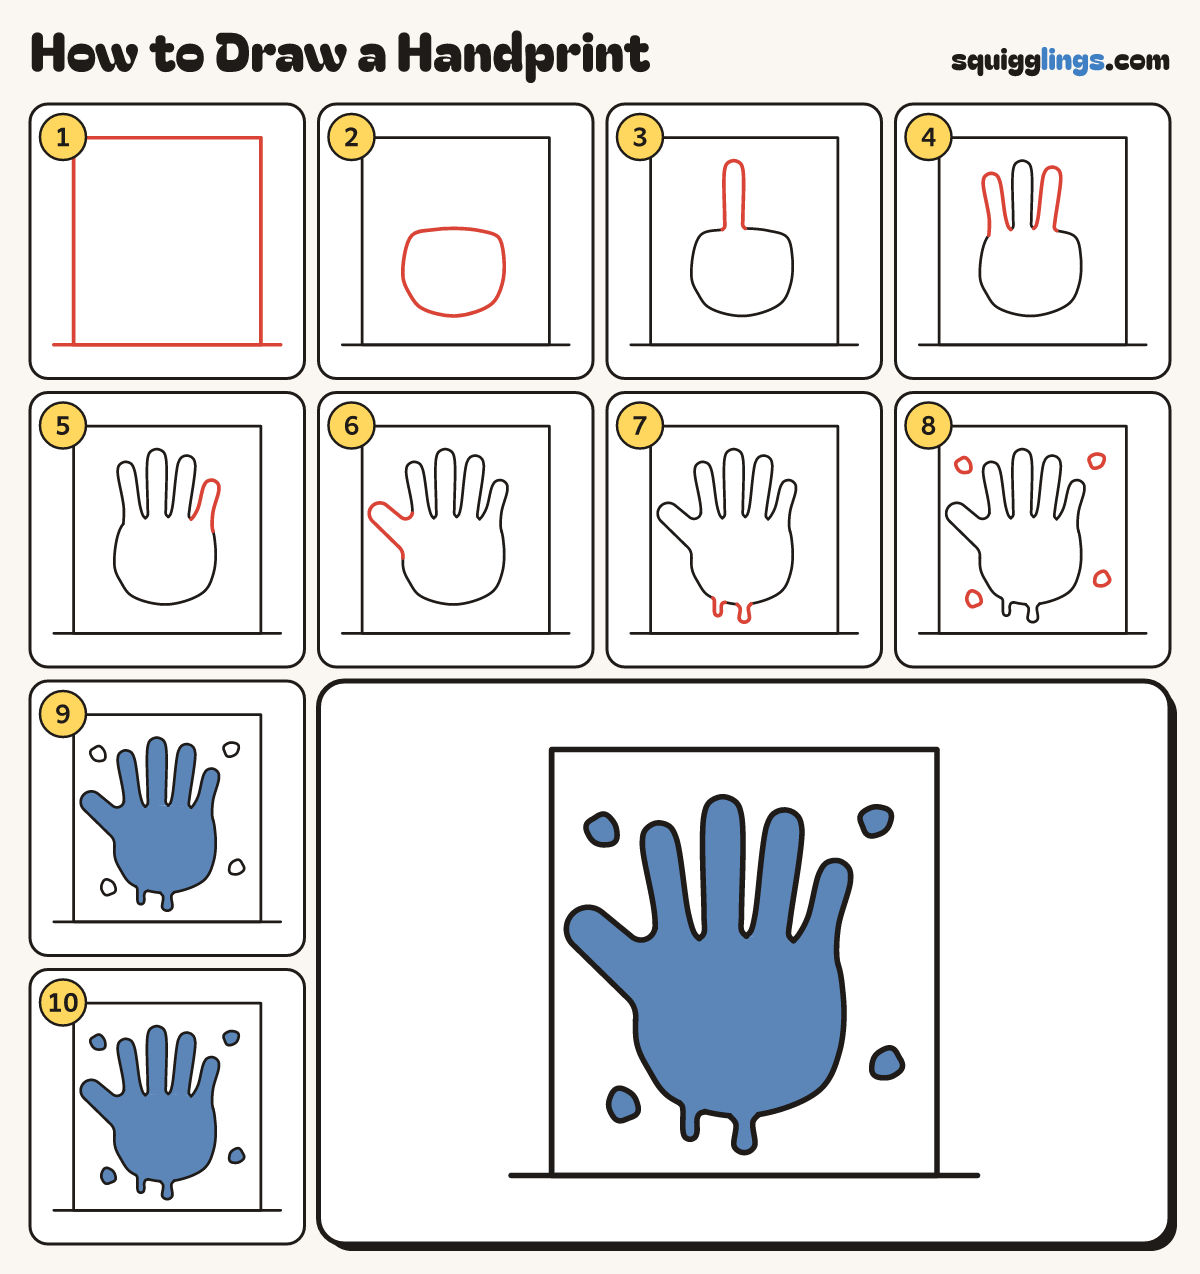
Each picture adds one red line. Draw that line, then scroll to the next picture. Rub out any dashed helper lines at the end. First up: the paper.
Step 1: The paper
Draw a tall rectangle nearly as big as your page. Add a ground line along its bottom edge.
Step 2: The palm
In the middle of the paper draw a big palm like a fat egg, a bit wider than tall.
Tip Leave lots of room above for the fingers.
Step 3: The middle finger
Start near the middle of the palm's top. Draw a tall finger up, round the tip, down to the palm.
Step 4: Pointing and ring fingers
Draw a shorter finger each side of the middle one. Start and stop each on the palm, leaving V gaps.
Step 5: The little finger
On the far right start on the palm. Draw the shortest finger up, round the tip, down to the palm.
Step 6: The thumb
From the palm's left side draw a fat thumb leaning out left, round the tip, and back to the palm.
Step 7: Paint drips
From the bottom of the palm draw 2 paint drips running down, each with a round end.
Step 8: Paint splats
Around the hand draw 4 little bumpy paint splats on the paper, none touching the hand.
Step 9: Blue paint hand
Colour the whole handprint blue, palm, fingers and thumb, so it is one solid shape. Colour the drips too.
Step 10: Blue splats
Colour the paint splats blue too, and leave the paper white.
Your finished drawing
Follow the steps above and this is where you end up: a handprint, drawn by you.
Every step in one picture