Watch it draw itself · tap to replay
How to Draw Clapping Hands
Draw clapping hands in 10 easy steps, about 8 minutes. Free, with a printable worksheet.
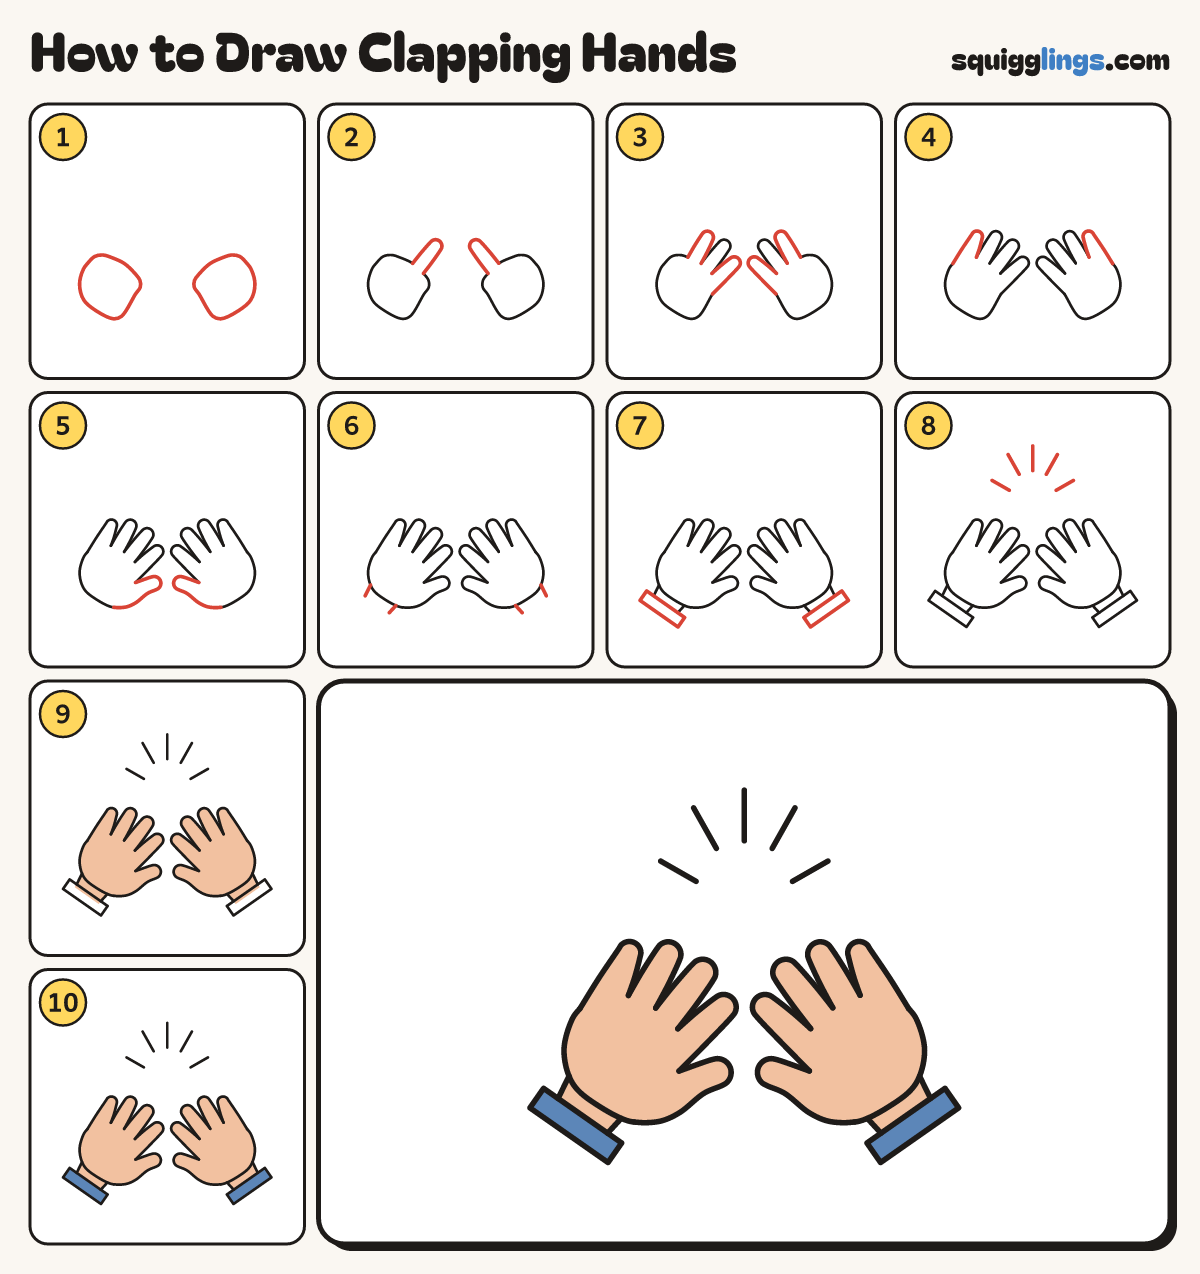
Each picture adds one red line. Draw that line, then scroll to the next picture. Rub out any dashed helper lines at the end. First up: 2 palms.
Step 1: 2 palms
Draw 2 rounded palms side by side, each like a fat egg leaning in toward the middle, a hand apart.
Tip Leave room above each palm for fingers leaning in.
Step 2: Middle fingers
Start on top of each palm. Draw a tall finger leaning in, round the tip, back down to the palm.
Step 3: Pointing and ring fingers
On each hand draw a shorter finger each side of the middle one, starting and stopping on the palm line.
Step 4: Little fingers
On the outside of each hand, from the palm draw the shortest finger up and back to the palm.
Step 5: Thumbs
Low on each palm's inside edge draw a fat thumb pointing in, starting and stopping on the palm.
Step 6: Wrists
Start at the bottom of each palm. Draw 2 short wrist lines down and stop a little below the palm.
Step 7: Sleeves
Join the ends of each pair of wrist lines with a wide slanted box for the sleeve.
Step 8: Clap lines
Between the fingertips at the top draw short straight lines bursting out: one up and 2 fanning each side.
Step 9: Peach hands
Colour both hands and wrists peach.
Step 10: Blue sleeves
Colour both sleeves blue. Go over your lines and your clapping hands are done!
Your finished drawing
Follow the steps above and this is where you end up: clapping hands, drawn by you.
Every step in one picture