Watch it draw itself · tap to replay
How to Draw a Hanbok
Draw a hanbok in 12 easy steps, about 9 minutes. Free, with a printable worksheet.
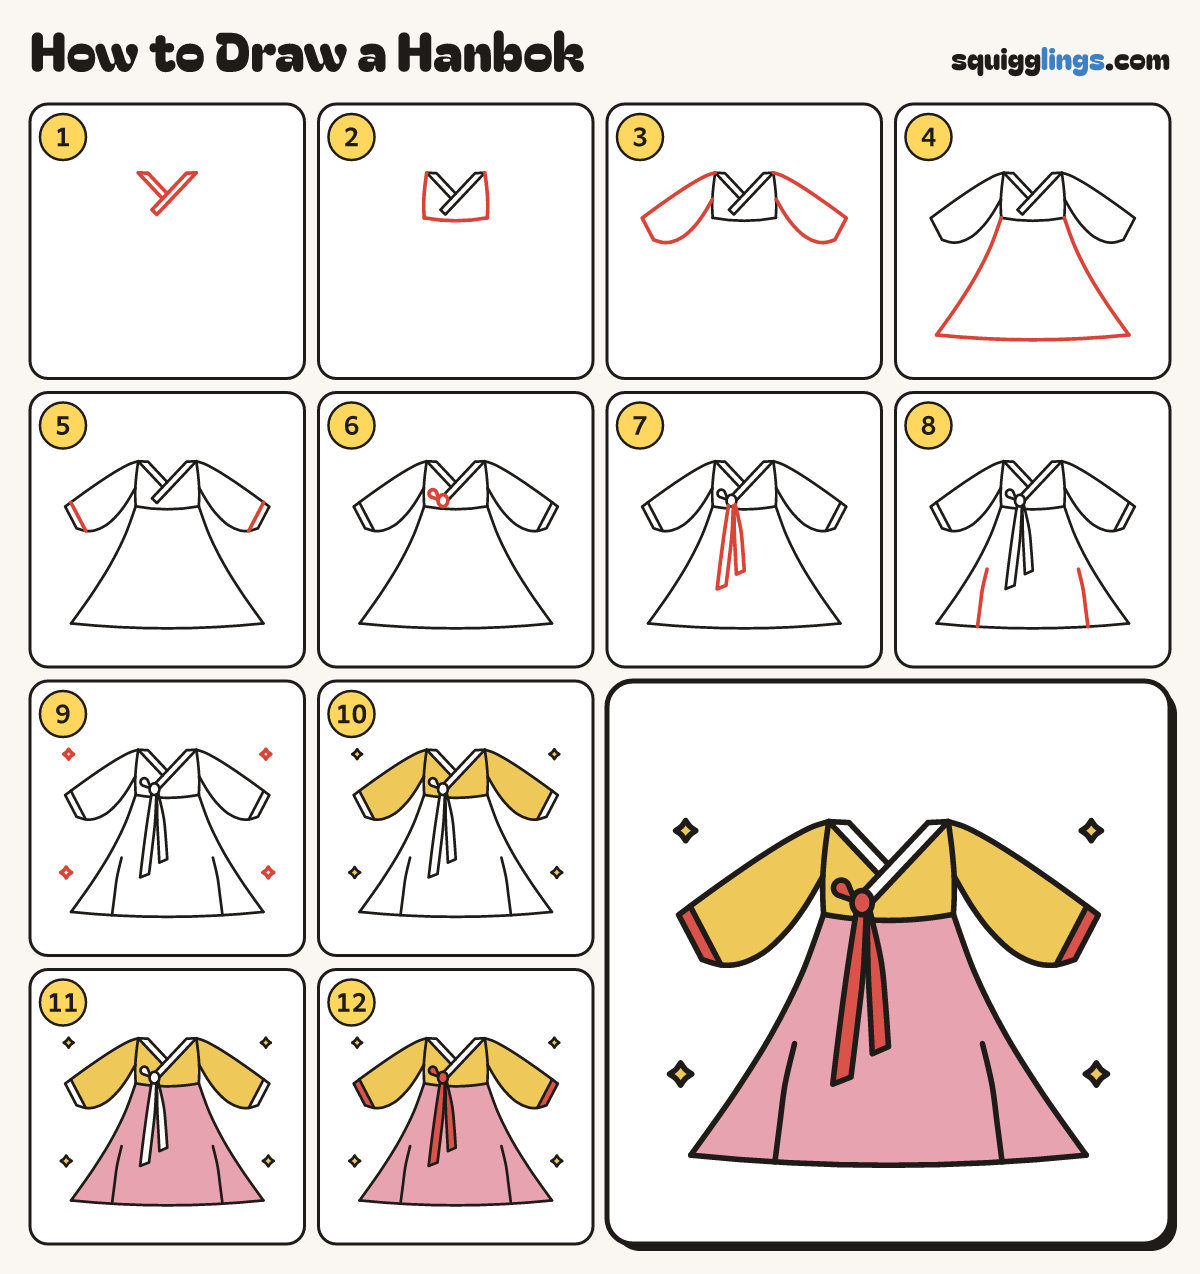
Each picture adds one red line. Draw that line, then scroll to the next picture. Rub out any dashed helper lines at the end. First up: the crossed collar.
Step 1: The crossed collar
Near the top draw a V neck with a band. Let the right band cross over, down to the left.
Step 2: The little jacket
Start at each end of the collar. Draw a short line down, stop a hand below. Join the bottoms.
Step 3: Long curved sleeves
From each shoulder draw a long sleeve sloping down to a cuff. Curve the underside back to the jacket.
Step 4: The long skirt
Start at each bottom corner of the jacket. Draw a long line sloping out like a bell, stop low down.
Step 5: Cuff bands
On each sleeve, near the cuff, start on the top edge, draw a slanted line down to the underside.
Step 6: Ribbon knot and loop
On the end of the collar band draw a small oval knot, with a teardrop loop to its left.
Step 7: 2 long ribbon tails
From under the knot draw 2 long narrow ribbons hanging down over the skirt, a little apart, one longer.
Step 8: Soft pleats
Start on the hem near each corner. Draw a gentle line up the skirt, leaning in, stop half way up.
Step 9: Sparkles
Draw 4 sparkle stars around the hanbok: 2 above the sleeves and 2 beside the skirt.
Step 10: Yellow jacket and sparkles
Go over your lines. Colour the jacket, sleeves and sparkles yellow, leaving the collar, cuffs and ribbon white.
Step 11: Pink skirt
Colour the long skirt pink, leaving the ribbon tails white.
Step 12: Red cuffs and ribbon
Colour the cuff bands, the knot, the loop and both tails red. Your hanbok is done!
Your finished drawing
Follow the steps above and this is where you end up: a hanbok, drawn by you.
Every step in one picture