Watch it draw itself · tap to replay
How to Draw a Halo
Draw a halo in 10 easy steps, about 8 minutes. Free, with a printable worksheet.
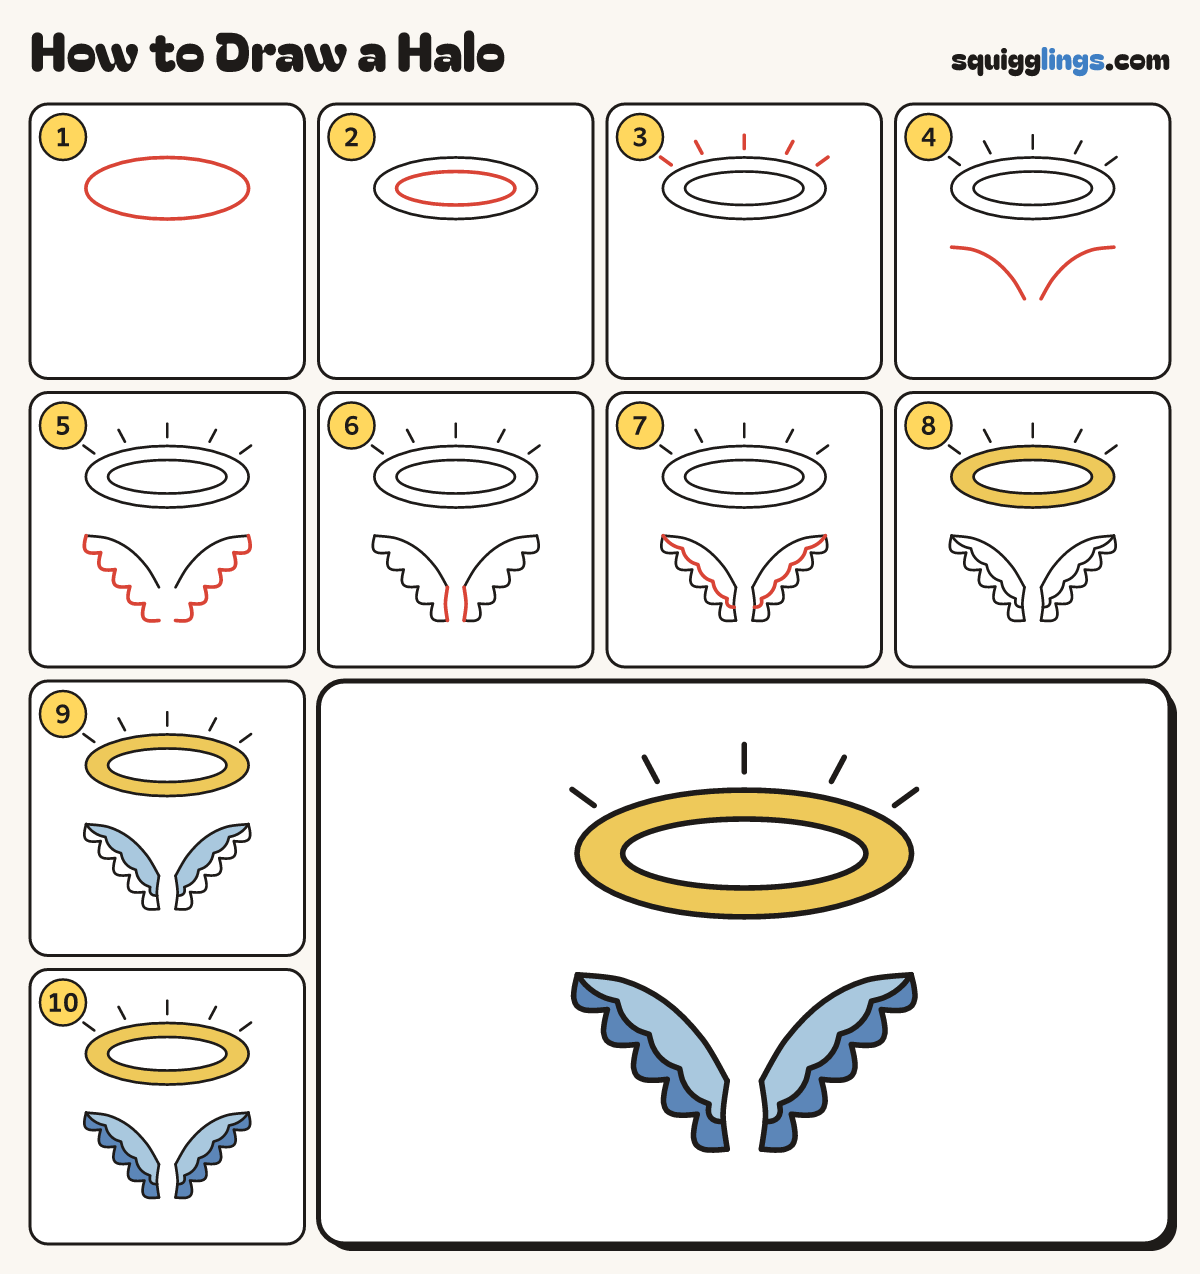
Each picture adds one red line. Draw that line, then scroll to the next picture. Rub out any dashed helper lines at the end. First up: the halo.
Step 1: The halo
Near the top of your paper draw a wide flat oval, like a plate seen from the side.
Tip Go round slowly so both ends are the same roundness.
Step 2: The hole
Inside it draw a smaller flat oval, so there is a band all the way round.
Tip The band is fatter at the sides than at the front and back.
Step 3: Glow lines
Above the halo draw 5 short lines fanning out, like sunshine. Do not touch the halo.
Step 4: Two wing tops
Below the halo, from the middle draw a long arch out to a wing tip. Same on the right.
Tip The 2 top edges make a wide open V, like a seagull far away.
Step 5: Finger feathers
From each wing tip draw 5 round finger feathers, like fat U bumps, stepping back down to the middle.
Tip 5 even bumps, like the fingers of a mitten.
Step 6: The shoulders
On each wing draw a short curve from the top edge down to the last feather, closing the shoulder.
Step 7: Small feathers
Start low on the shoulder line. Draw 5 U bumps under the top edge, ending at the wing tip.
Step 8: Golden halo
Colour the band of the halo yellow. Leave the hole in the middle empty.
Step 9: Sky-blue wings
Colour the top of each wing sky blue, down to the row of small bumps.
Step 10: Blue feathers
Colour the finger feathers a deeper blue. Go over your lines and your halo is shining!
Your finished drawing
Follow the steps above and this is where you end up: a halo, drawn by you.
Every step in one picture