Watch it draw itself · tap to replay
How to Draw a Snow Globe
Draw a snow globe in 13 easy steps, about 10 minutes. Free, with a printable worksheet.
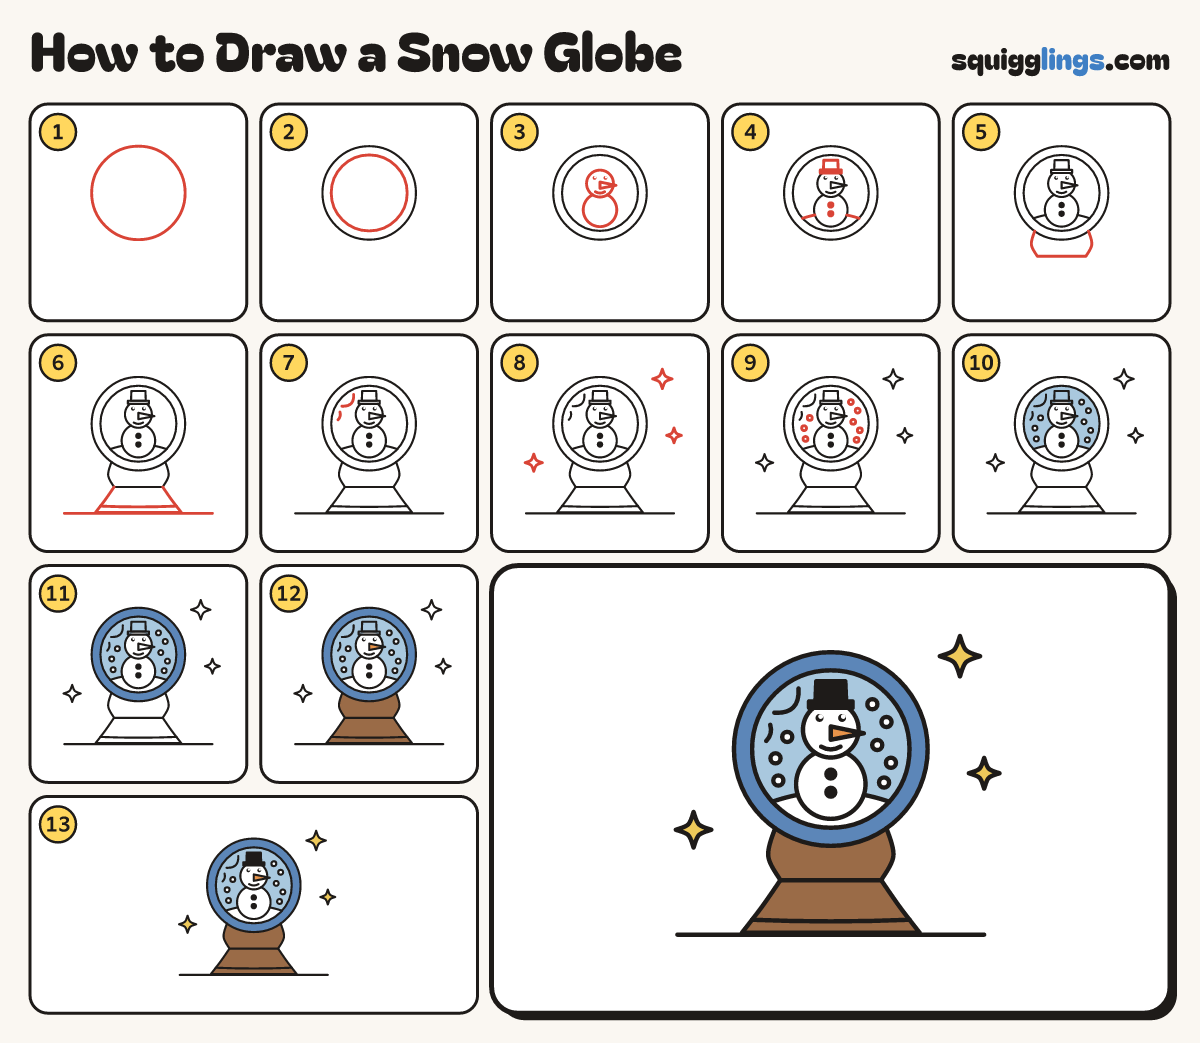
Each picture adds one red line. Draw that line, then scroll to the next picture. Rub out any dashed helper lines at the end. First up: the big ball.
Step 1: The big ball
In the middle of your paper, a little high, draw one big circle as big as your fist.
Step 2: The glass rim
Inside it draw a second circle a finger in, so the ball has a thick rim.
Step 3: A snowman inside
Inside the ball draw a body, a smaller head on top, shiny eyes, a smile and a long carrot nose.
Step 4: Hat and snow hill
Add a top hat and buttons. Draw a snow hill from one side of the glass across to the other.
Step 5: The stand
Start low on the left of the ball. Draw a cup down, across, and back up to the ball.
Step 6: Foot and table
From the cup's corners flare 2 lines down and join them. Add a band across, and a table line under.
Step 7: Shines
In the top left of the glass draw one long curved shine line and a short one under it.
Step 8: Sparkles
Draw 3 sparkle stars around the glass: 4 dots like a plus sign joined by curves that dip in.
Step 9: Falling snow
Around the snowman draw 8 tiny circles for falling snow, keeping them off the other lines.
Step 10: Sky glass
Colour the glass sky blue, going around the snowman, the snow and the hill so they stay white.
Step 11: Blue rim
Colour the thick rim around the glass blue.
Step 12: Orange nose, wooden base
Colour the carrot nose orange. Colour the cup and foot brown, like a wooden base.
Step 13: Yellow sparkles, black hat
Colour the sparkles yellow and the hat black. Go over your lines and your snow globe is done!
Your finished drawing
Follow the steps above and this is where you end up: a snow globe, drawn by you.
Every step in one picture