Watch it draw itself · tap to replay
How to Draw a Greek Vase
Draw a Greek vase in 12 easy steps, about 9 minutes. Free, with a printable worksheet.
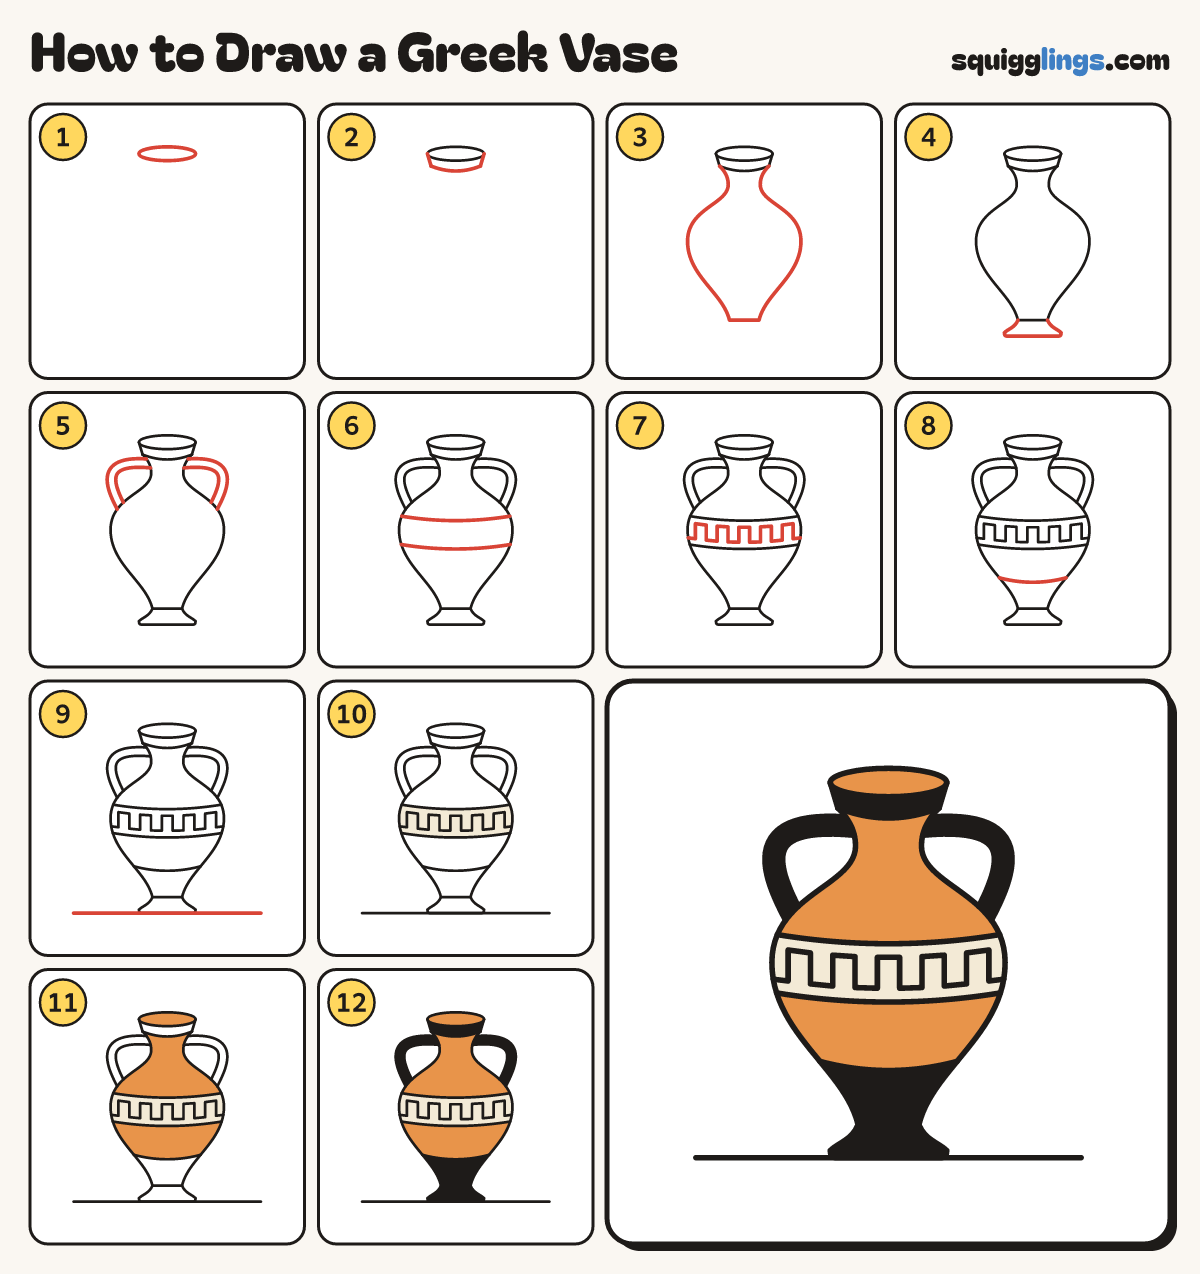
Each picture adds one red line. Draw that line, then scroll to the next picture. Rub out any dashed helper lines at the end. First up: the rim.
Step 1: The rim
Near the top draw a small flat oval for the mouth of the vase, 2 fingers wide.
Step 2: The lip
From each end of the oval draw a short line down. Join them with a curve like the oval's front.
Step 3: The body
From the lip curve in for a neck, out to a wide belly and in to a narrow flat bottom.
Tip Make both sides match. The widest part is near the middle.
Step 4: The foot
From each bottom corner slant a short line out and down to a wide flat base.
Step 5: Two handles
From each side of the neck draw a handle out and down to the shoulder. Give each a second line.
Tip Keep the two lines the same distance apart, like a ribbon.
Step 6: Band lines
Draw 2 gently curved lines across the belly, a finger apart. Each one starts and ends on the outline.
Step 7: Key pattern
Between the lines draw a castle wall line: up, across, down, across, from the left edge to the right.
Tip This old Greek pattern is called a key or meander.
Step 8: Bottom line
Lower down draw one more curved line from the left side across to the right side.
Step 9: The table
Draw a long table line under the foot, from left to right.
Step 10: Cream band
Colour the band behind the castle wall line cream.
Tip Light colours go first.
Step 11: Orange vase
Colour the neck, the shoulders and the part under the band orange. Colour inside the oval orange too.
Step 12: Black parts
Colour the lip, the handles, the bottom part and the foot black. Your Greek vase is done!
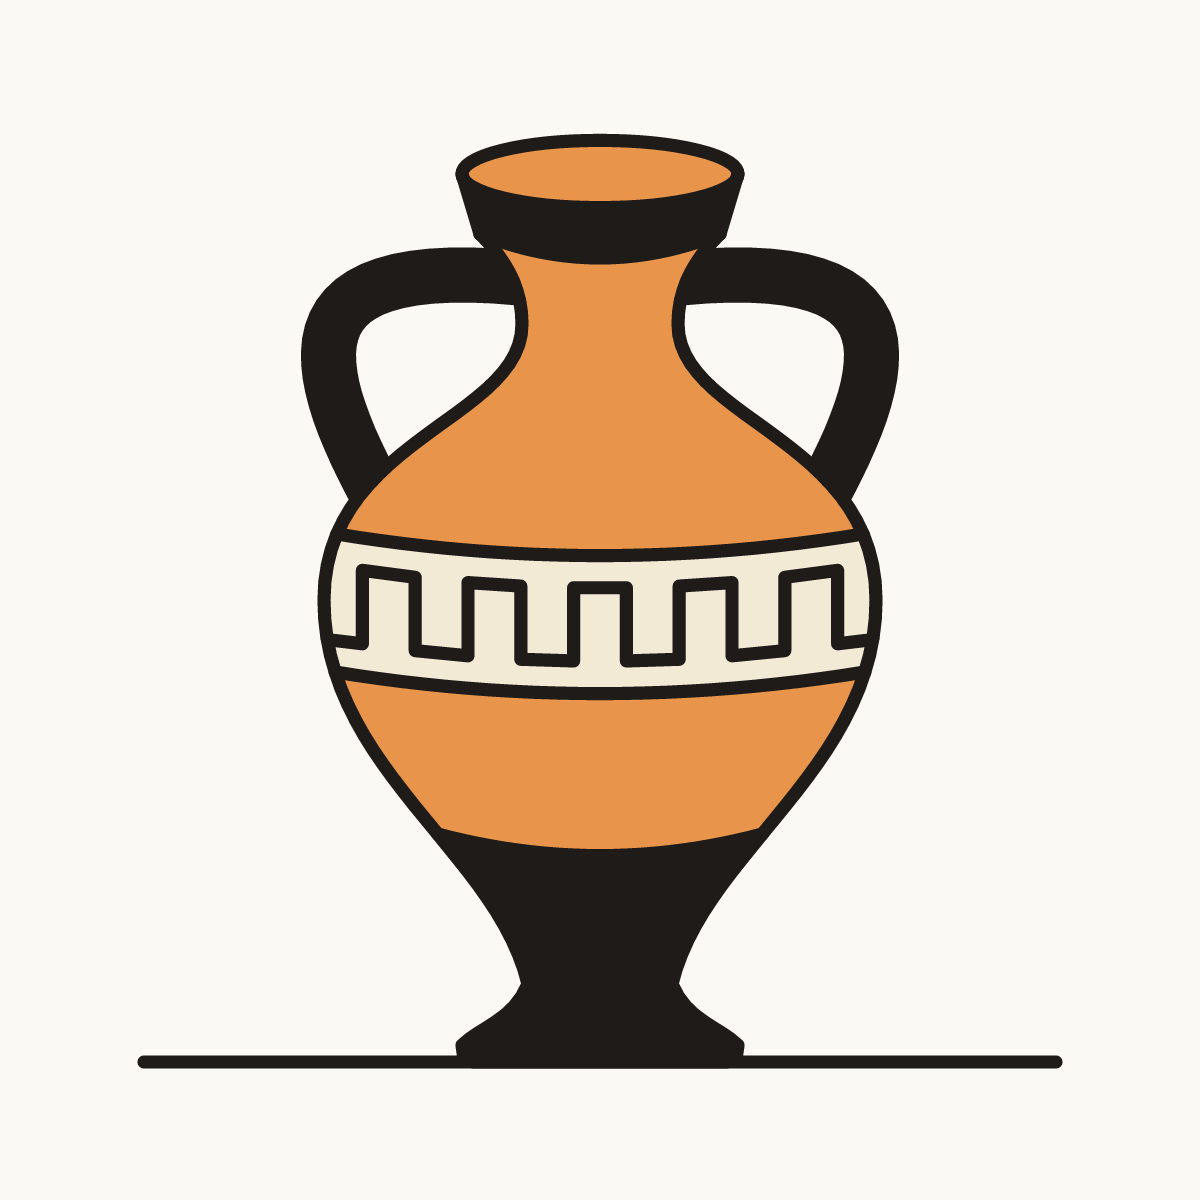
Your finished drawing
Follow the steps above and this is where you end up: a Greek vase, drawn by you.
Every step in one picture