Watch it draw itself · tap to replay
How to Draw a Cold Frame
Draw a cold frame in 12 easy steps, about 9 minutes. Free, with a printable worksheet.
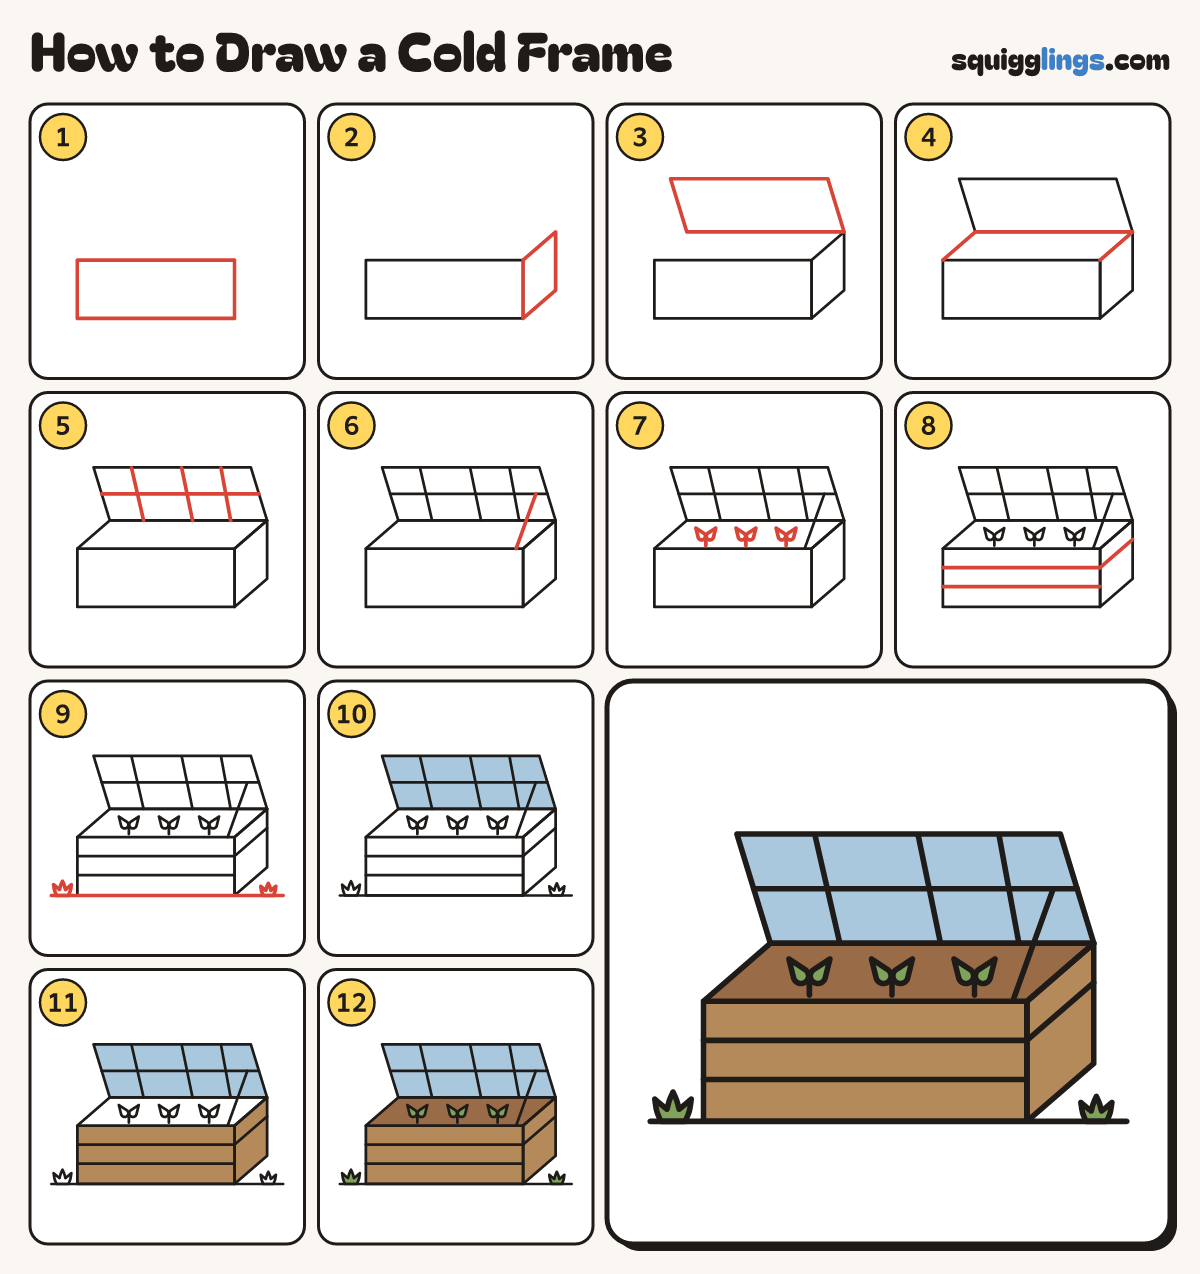
Each picture adds one red line. Draw that line, then scroll to the next picture. Rub out any dashed helper lines at the end. First up: the box front.
Step 1: The box front
A little below the middle of your paper draw a long flat box on the ground, much wider than tall.
Tip A cold frame's glass lid keeps seedlings warm in spring.
Step 2: The side
On the right end of the front draw the side of the box, like a slanted door leaning back.
Step 3: Lid frame
From the back of the box draw 2 lines slanting up, joined across the top, for the open lid.
Step 4: Back edge
For the back edge, draw a slanted line from the front's top left corner up to the lid's left end.
Step 5: Panes
On the lid draw 3 slanted lines from the bottom edge up to the top, and one across the middle.
Step 6: Prop stick
Draw a prop stick from the front edge, near its right end, slanting up to the lid's middle line.
Step 7: Three seedlings
Inside the box draw 3 little seedlings: a short stem from the soil up to a fat leaf each side.
Step 8: Planks
Draw 2 long lines across the front and one across the side for the plank joins.
Step 9: Ground and grass
Draw a ground line under the box from left to right, with a 3-blade grass tuft at each end.
Step 10: Sky glass
Go over your lines, then colour the lid glass sky blue.
Step 11: Wood box
Colour the front and the side of the box wood brown.
Step 12: Seedlings and soil
Colour the leaves and grass green, then the soil dark brown around the seedlings. Grow, little plants!
Your finished drawing
Follow the steps above and this is where you end up: a cold frame, drawn by you.
Every step in one picture