Watch it draw itself · tap to replay
How to Draw a Coat of Arms
Draw a coat of arms in 12 easy steps, about 9 minutes. Free, with a printable worksheet.
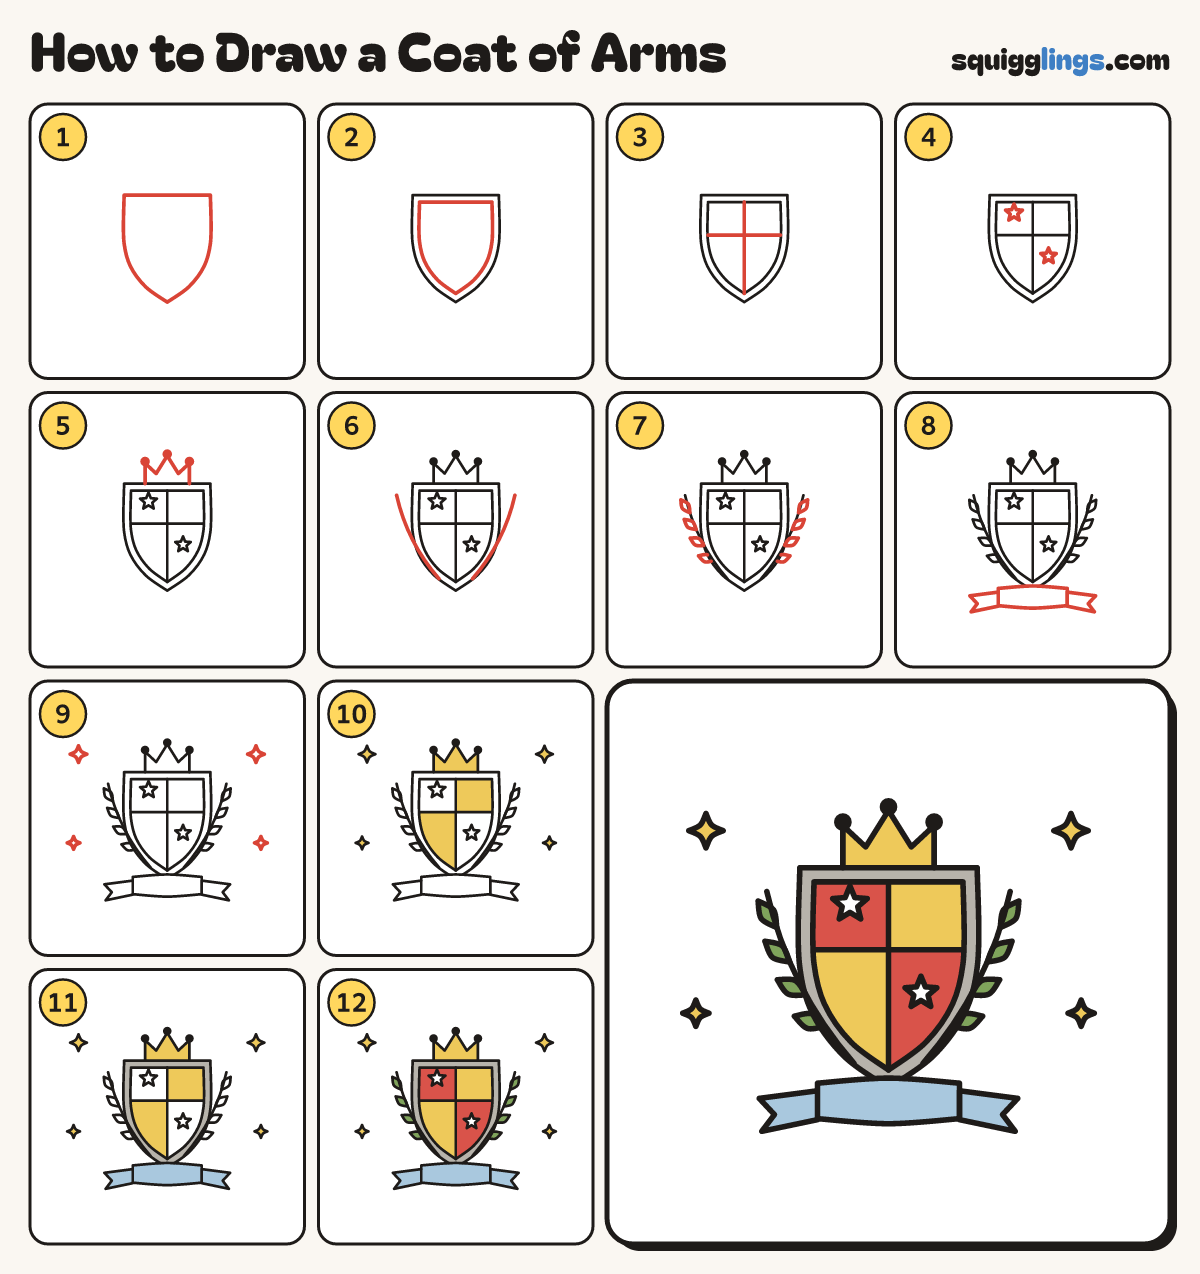
Each picture adds one red line. Draw that line, then scroll to the next picture. Rub out any dashed helper lines at the end. First up: the shield.
Step 1: The shield
In the middle draw a shield: a flat top, 2 straight sides, then curving in to a bottom point.
Tip Leave room above for a crown and below for a ribbon.
Step 2: The rim
Inside the shield draw the same shape again, a finger in from the edge all round.
Step 3: 4 quarters
Start at the rim's top. Draw a line down to the point. Add a line across, stopping at the rim.
Step 4: 2 stars
Draw a 5-pointed star in the top left quarter and a smaller one in the bottom right quarter.
Step 5: A crown on top
Start a quarter of the way along the top. Zigzag up over 3 points, then back down to the edge.
Tip Dot a jewel on each point.
Step 6: Leafy stems
On each side, start on the lower edge near the point. Sweep a curved stem up, stopping beside the corner.
Step 7: Leaves
Along each stem draw 4 little pointed leaves growing out, one above the other, leaning up and out.
Step 8: A ribbon banner
Across the shield's point draw a long rounded ribbon. Add a tail with a V cut behind each end.
Tip Rub out the tip of the point inside the ribbon.
Step 9: Sparkles
Draw 4 sparkle stars round the picture: one high and one lower down on each side.
Step 10: Yellow quarters and crown
Colour the top right and bottom left quarters yellow, and the crown and sparkles too.
Step 11: Blue ribbon, grey rim
Colour the ribbon and its tails light blue. Colour the rim grey.
Step 12: Green leaves, red quarters
Colour the leaves green and the last 2 quarters red, leaving the stars white. Your coat of arms is done!
Your finished drawing
Follow the steps above and this is where you end up: a coat of arms, drawn by you.
Every step in one picture