Watch it draw itself · tap to replay
How to Draw a Great Gray Owl
Draw a great gray owl in 14 easy steps, about 11 minutes. Free, with a printable worksheet.
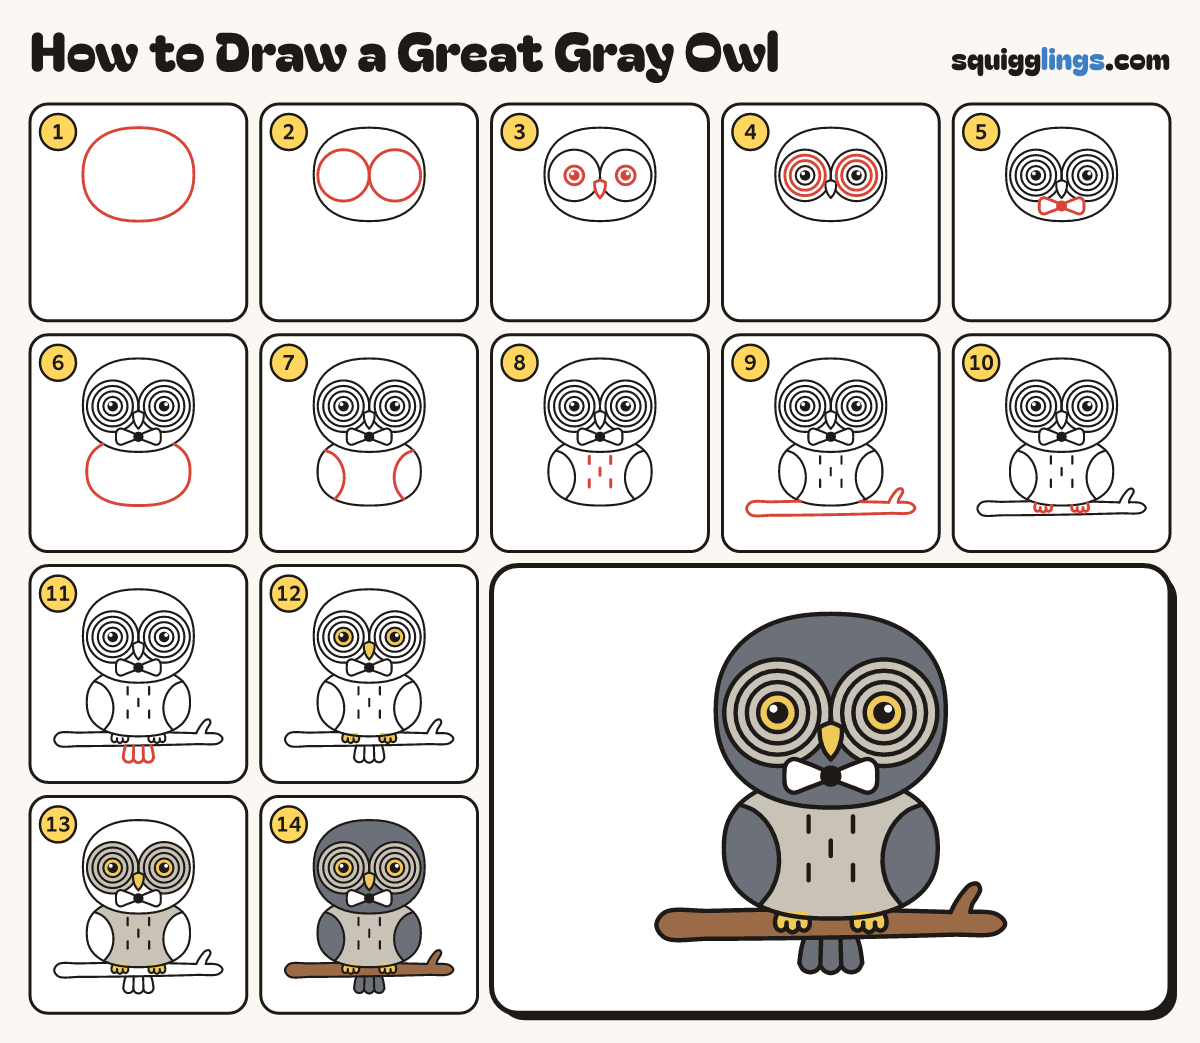
Each picture adds one red line. Draw that line, then scroll to the next picture. Rub out any dashed helper lines at the end. First up: big round head.
Step 1: Big round head
Near the top, draw a very big round head, a little wider than tall.
Tip It fills the top half of your page.
Step 2: Two face circles
Inside the head, draw 2 big circles side by side. They touch in the middle.
Tip Leave a rim of head all the way round them.
Step 3: Eyes and beak
In the middle of each circle, draw a small eye with a black dot. Add a pointed beak between them.
Tip Leave a tiny white shine in each eye.
Step 4: Face rings
Round each eye, draw 2 rings, one inside the other, like a target.
Tip Keep the rings evenly spaced.
Step 5: White bow tie
Under the beak, draw a small dark knot. Add a soft triangle on each side, like a bow tie.
Step 6: Plump body
Under the head, draw a big round body, a little narrower than the head.
Tip The top of the body hides behind the head.
Step 7: Folded wings
Start on each shoulder. Draw a curved line down and stop on the side of the body.
Tip Each wing bows in toward the tummy.
Step 8: Streaky chest
Between the wings, draw 5 short lines pointing down for streaky feathers.
Step 9: The branch
Draw a long branch across the bottom of the body, with round ends. Add a small twig.
Step 10: Gripping feet
On top of the branch, under the body, draw 2 feet with 3 round toes each.
Tip The toes curl over the top of the branch.
Step 11: Short tail
Under the branch, in the middle, draw a short tail with 3 round feather tips.
Step 12: Yellow eyes
Colour the eyes, the beak and the feet yellow. Leave the bow tie white.
Step 13: Pale grey face
Colour the 2 ringed face circles and the tummy pale grey, around the bow tie.
Step 14: Colour the owl
Colour the head, wings and tail dark grey and the branch brown. Your great grey owl is done!
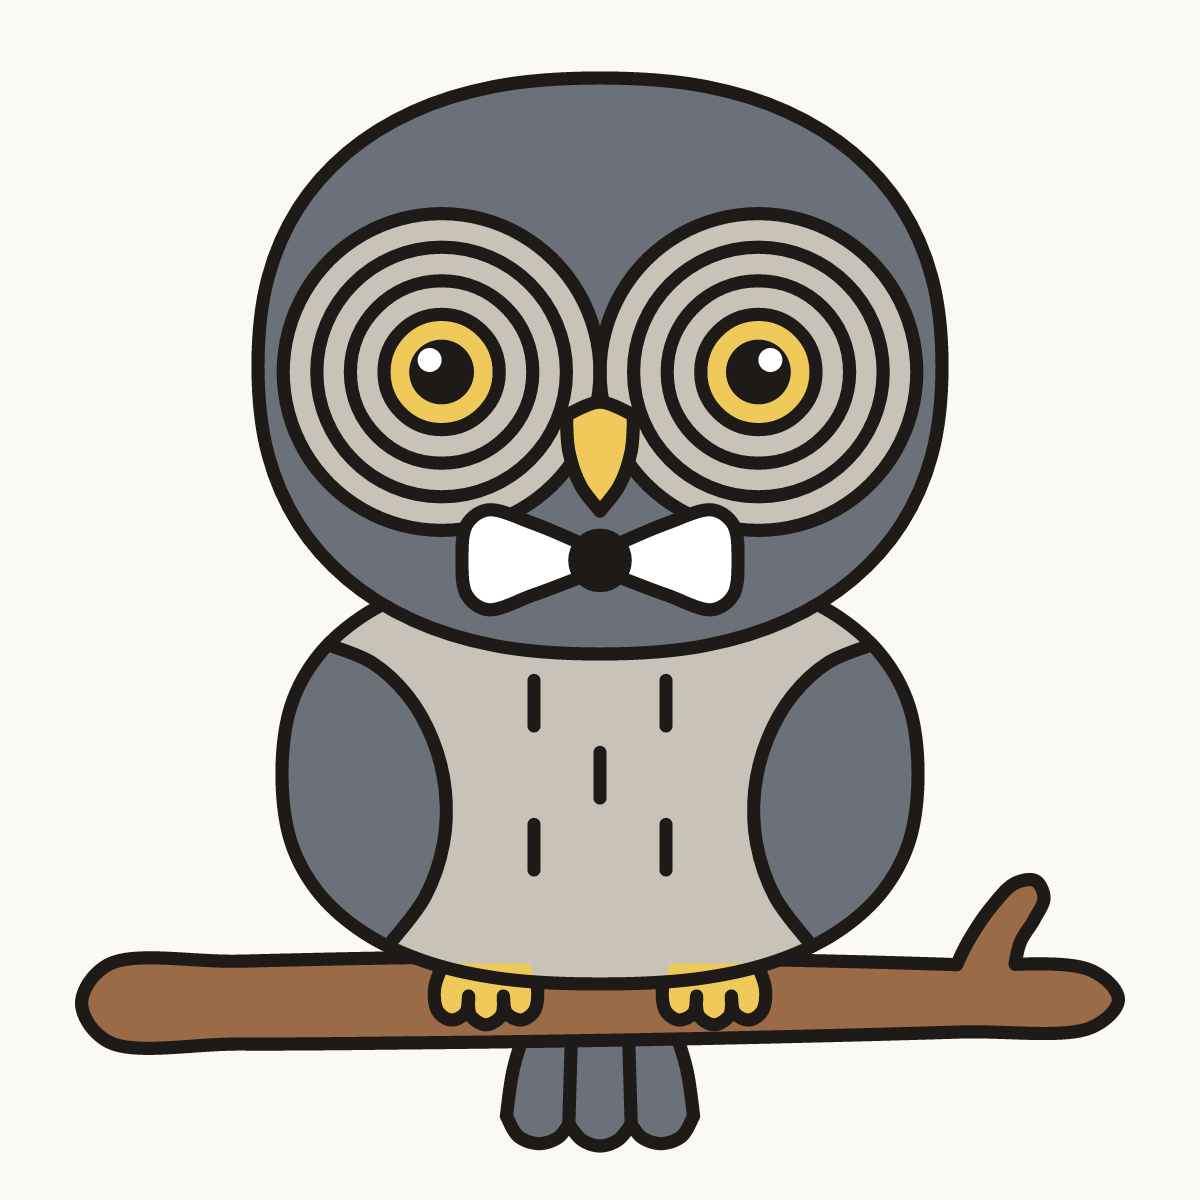
Your finished drawing
Follow the steps above and this is where you end up: a great gray owl, drawn by you.
Every step in one picture