Watch it draw itself · tap to replay
How to Draw a Binturong
Draw a binturong in 11 easy steps, about 8 minutes. Free, with a printable worksheet.
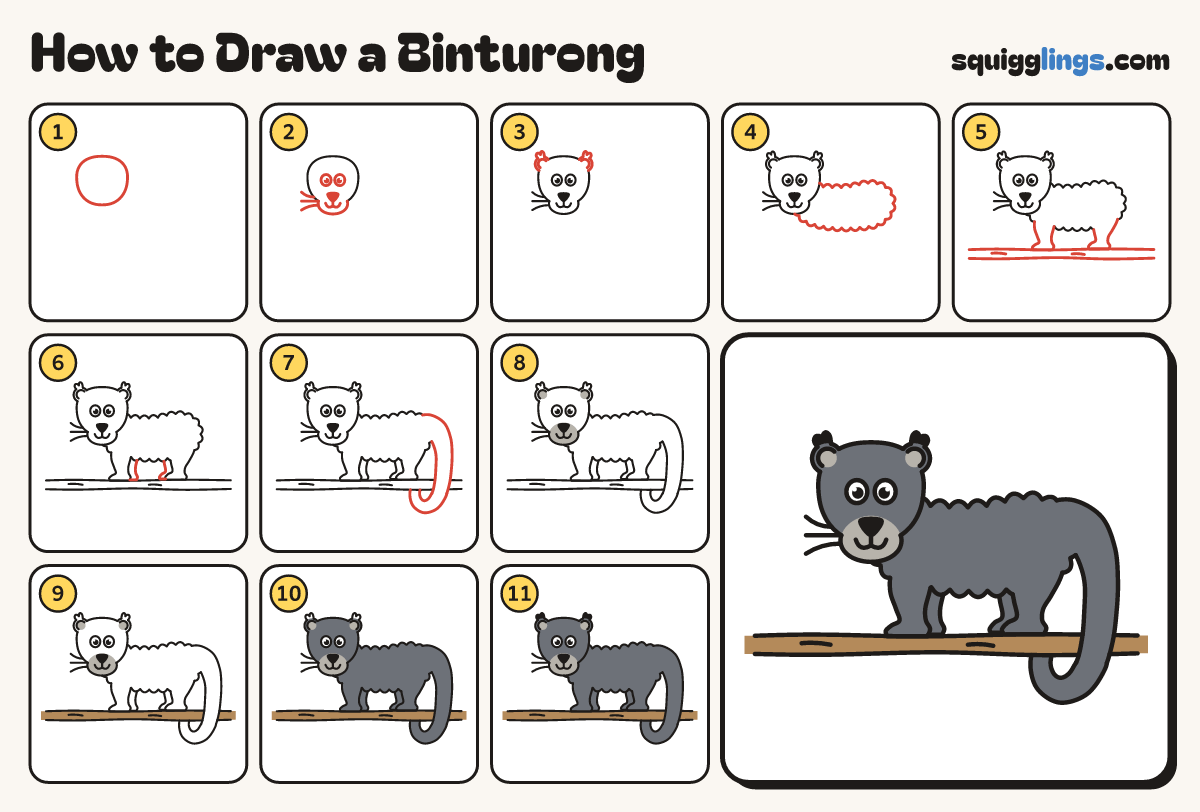
Each picture adds one red line. Draw that line, then scroll to the next picture. Rub out any dashed helper lines at the end. First up: the head.
Step 1: The head
Near the top left of your paper draw a big round head, a little wider than tall.
Tip A big head is what makes it cute.
Step 2: Eyes and nose
Draw 2 big eyes and an egg nose under them. Whiskers from the nose out to the cheeks.
Tip Eyes sit at the middle of the head; nothing touches them.
Step 3: Tufted ears
On each top corner of the head draw a round ear with a curve inside, topped with a fluffy tuft.
Step 4: The body
Start on the back of the head below the ear. Draw a big bean body and stop under the cheek.
Tip No neck: the head sits right on the shoulders.
Step 5: Branch and legs
Draw 2 wavy lines across your paper for a branch. Add a front and a back leg with round paws.
Step 6: The far legs
Draw a thin far leg peeking out behind each leg, down to a paw on the branch.
Step 7: Thick tail
From the back end draw a thick tail over the branch. Curl it under and tuck the tip behind.
Tip Make it as thick as a leg. Rub out the branch and back end lines inside it.
Step 8: Grey nose and ears
Go over your lines. Colour the nose area and the ear insides light grey.
Step 9: Brown branch
Colour the branch wood brown.
Step 10: Dark grey fur
Colour the head, body, legs and tail dark grey around the light grey nose and ears. Leave the eyes white.
Step 11: Black tufts
Colour the ear tufts black. Your binturong is done!
Your finished drawing
Follow the steps above and this is where you end up: a binturong, drawn by you.
Every step in one picture