Watch it draw itself · tap to replay
How to Draw a Gooseberry
Draw a gooseberry in 10 easy steps, about 8 minutes. Free, with a printable worksheet.
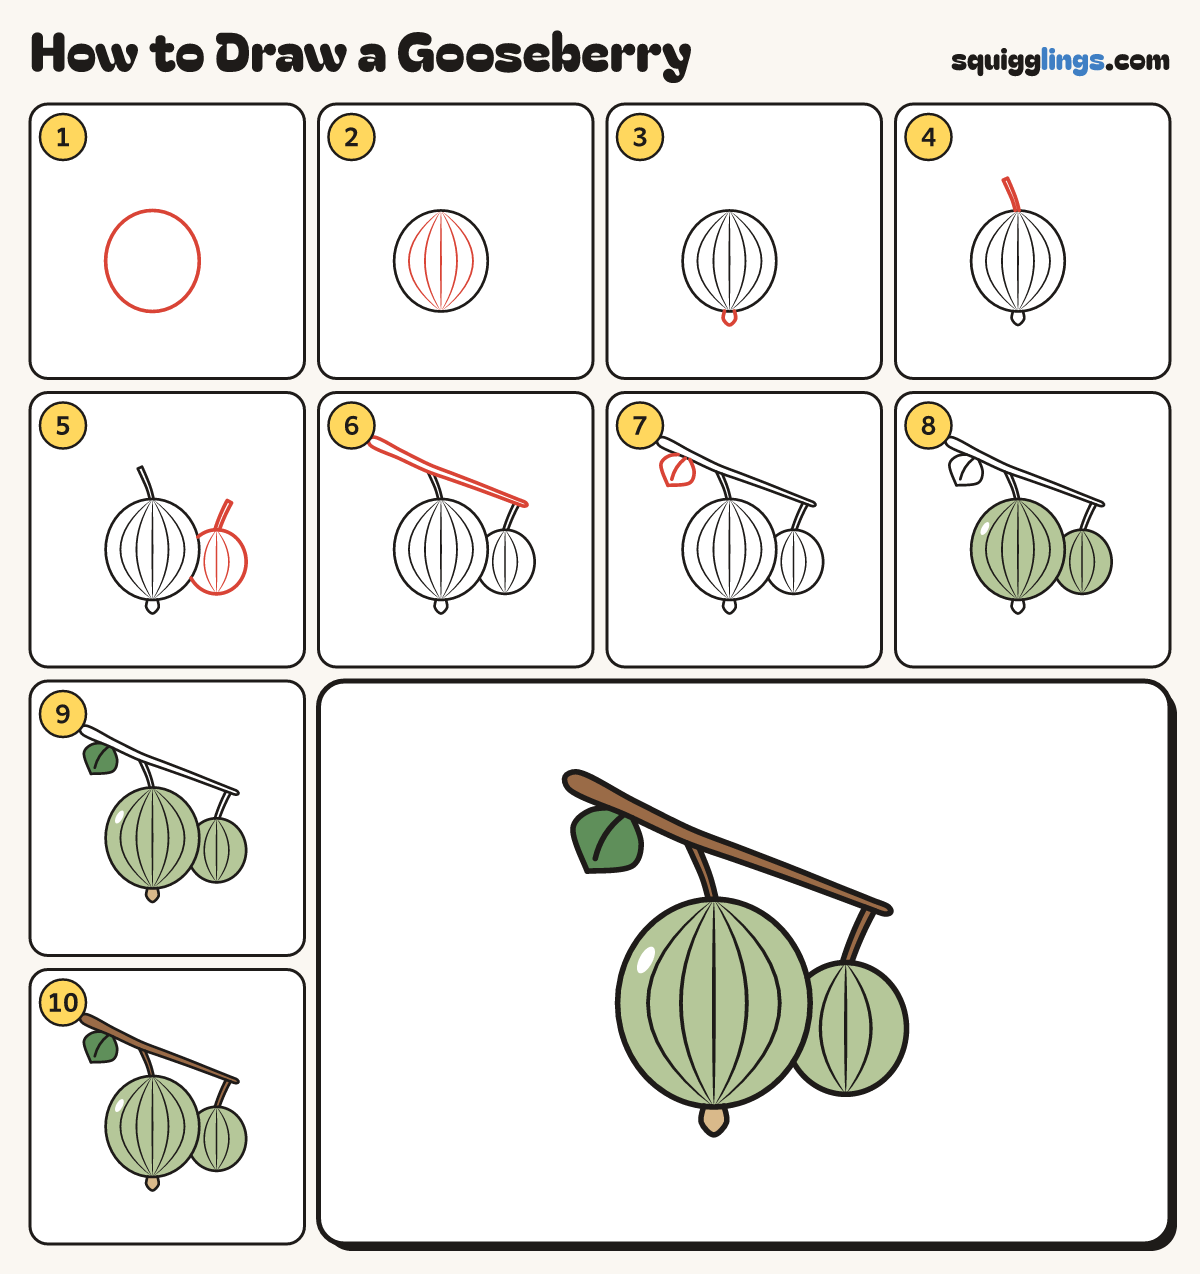
Each picture adds one red line. Draw that line, then scroll to the next picture. Rub out any dashed helper lines at the end. First up: the berry.
Step 1: The berry
In the middle draw a big round berry, a little taller than wide, about as big as your fist.
Tip Gooseberries are pale see-through green berries with thin lines and a little dry tail.
Step 2: Thin veins
Inside the berry draw 5 thin curved lines from the top down to the bottom. They all meet at both ends.
Step 3: The tail
Under the berry draw a tiny tuft: start left of middle, dip to a round tip, stop right of middle.
Tip Like a little dry beard.
Step 4: The stem
From the top of the berry draw a thin stem going up-left, getting a little wider at the top.
Step 5: Smaller berry
Down right draw a smaller berry tucked behind the big one, with 3 thin lines and a stem going up-right.
Step 6: The twig
Draw a twig from the top left, sloping down right from thick to thin. Both stems end on it.
Step 7: A leaf
Near the top of the twig draw a pointed leaf hanging down-left, with a bowed line down its middle.
Step 8: Light green berries
Go over your lines. Colour both berries light green, leaving a little shine at the big berry's top left.
Step 9: Tan tail, green leaf
Colour the little tail tan and the leaf green.
Step 10: Brown twig
Colour the twig and both stems brown. Your gooseberry is done!
Your finished drawing
Follow the steps above and this is where you end up: a gooseberry, drawn by you.
Every step in one picture