Watch it draw itself · tap to replay
How to Draw a Gold Nugget
Draw a gold nugget in 10 easy steps, about 8 minutes. Free, with a printable worksheet.
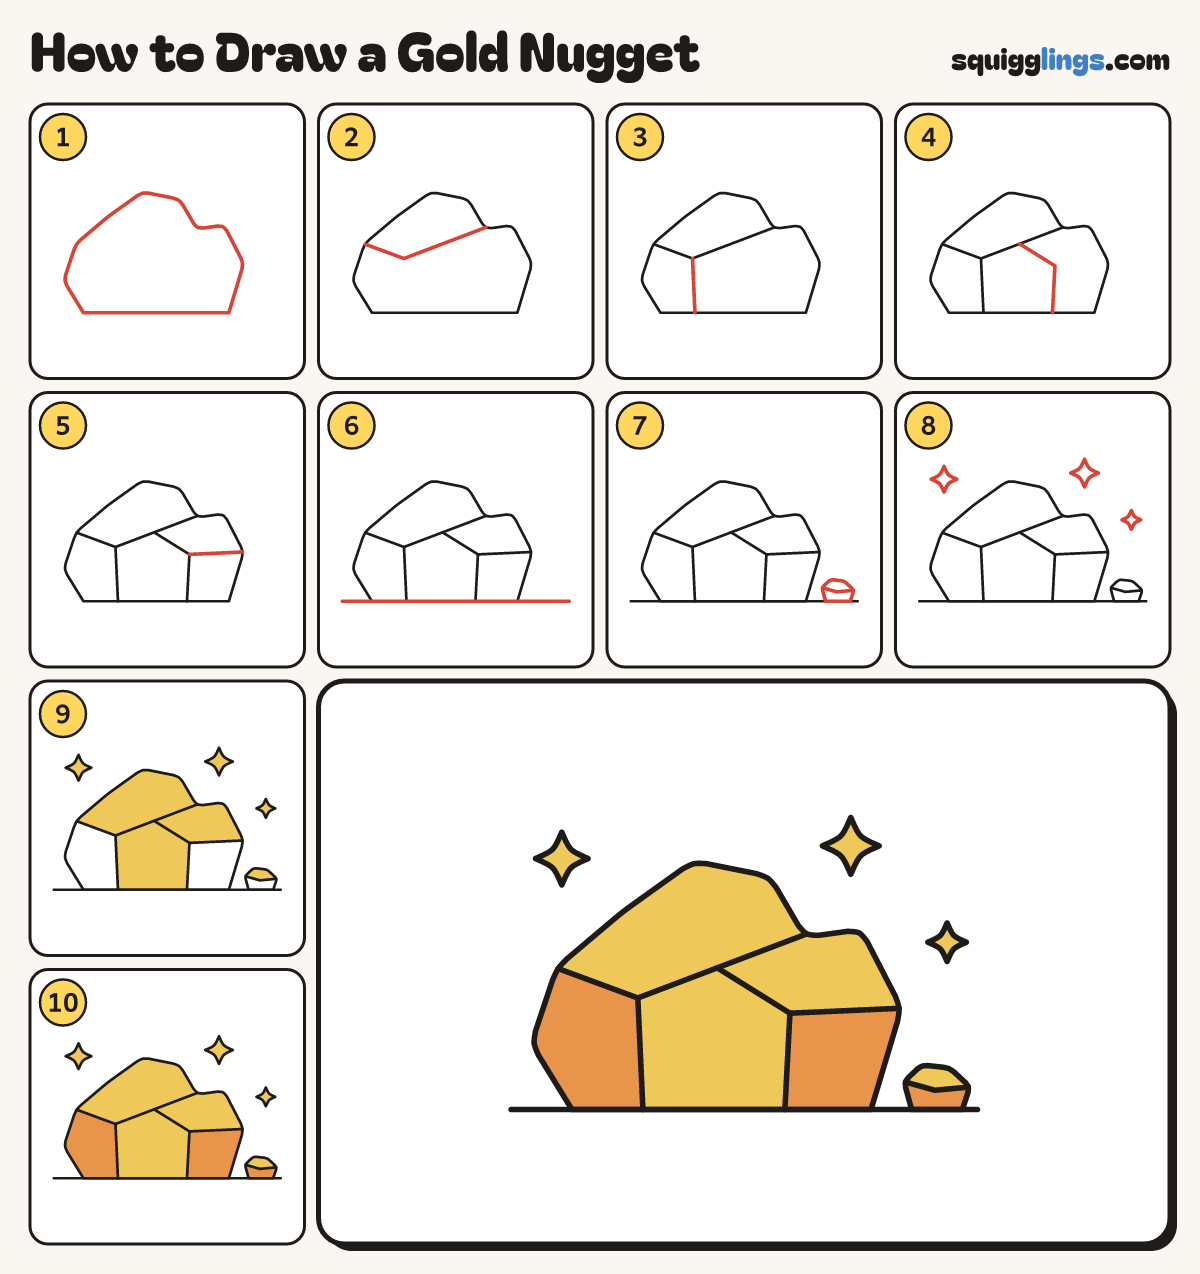
Each picture adds one red line. Draw that line, then scroll to the next picture. Rub out any dashed helper lines at the end. First up: the big lump.
Step 1: The big lump
In the middle draw a big lumpy rock shape with a flat bottom, soft corners and a dip on top.
Tip A nugget is a bumpy chunk, so no two sides match.
Step 2: Top edge
Start at the left corner. Draw a bent line across the lump and stop at the dip on top.
Tip The line goes down a little, then climbs up to the right.
Step 3: Front crease
Start at the bend. Draw a line straight down and stop at the flat bottom.
Step 4: Middle crease
Start in the middle of the long sloping line. Draw a line down, bend it, and stop at the bottom.
Step 5: Side crease
Start where that line bends. Draw a line across to the right and stop at the corner.
Tip Now the lump has 5 flat faces, like a chunk of metal.
Step 6: The ground
Draw a ground line along the flat bottom, from one side of the paper to the other.
Step 7: A little nugget
On the ground to the right draw a small lump. Add a bent line across it, edge to edge.
Step 8: Sparkles
Draw 3 sparkle stars around the nugget, each with 4 points. They show that gold is shiny.
Step 9: Yellow gold
Go over your lines. Colour the sparkles, the 2 top faces, the middle face and the little top yellow.
Step 10: Orange sides
Colour the 2 side faces orange, and the front of the little nugget. Your gold nugget is done!
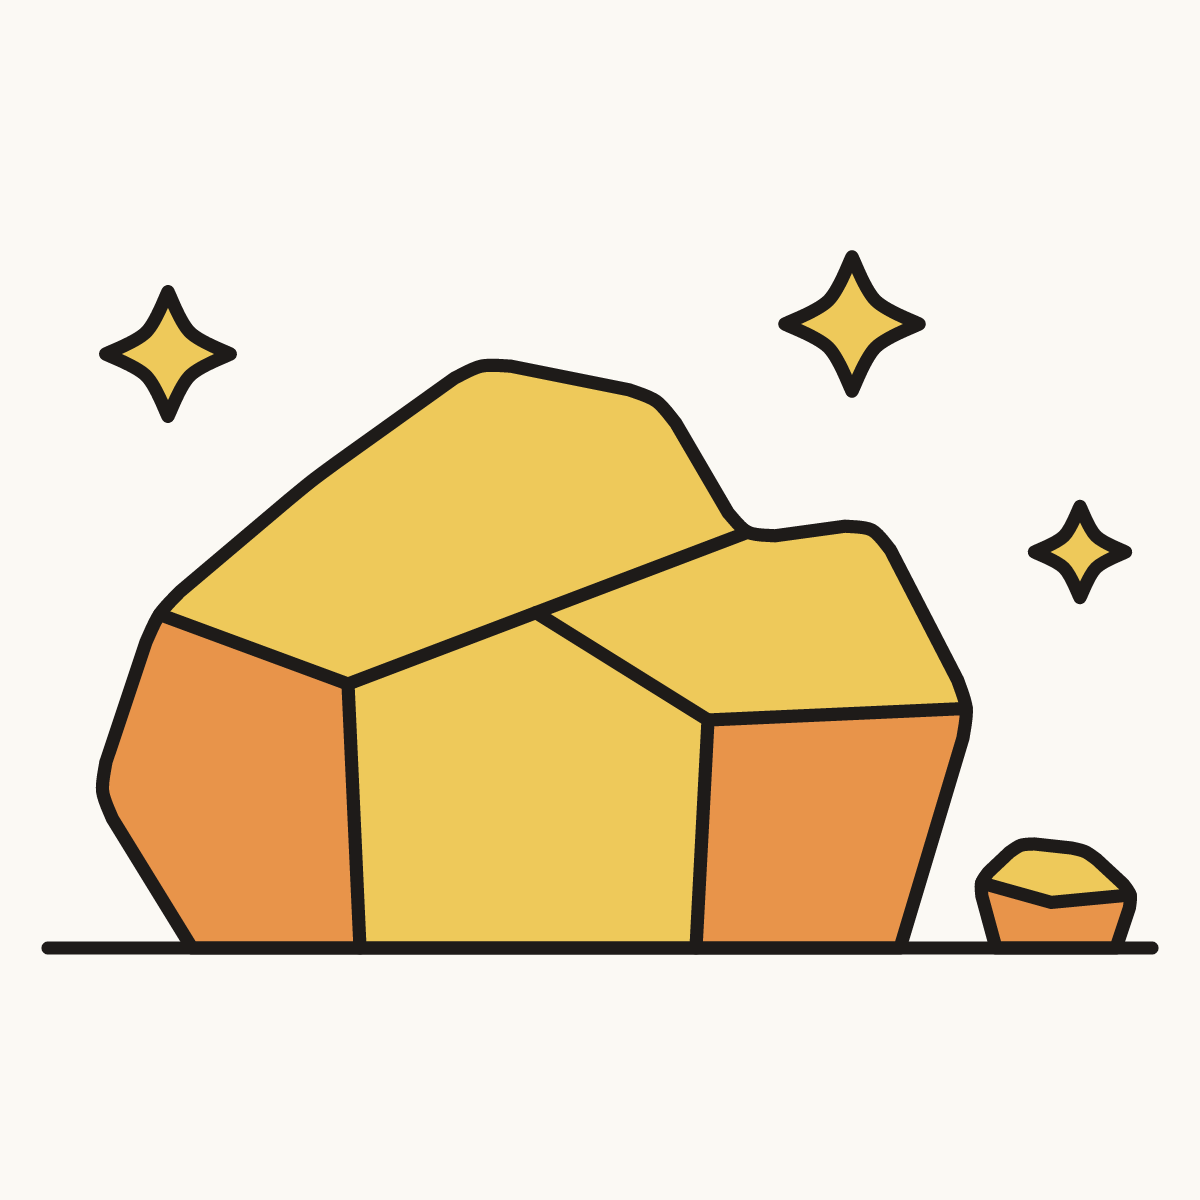
Your finished drawing
Follow the steps above and this is where you end up: a gold nugget, drawn by you.
Every step in one picture