Watch it draw itself · tap to replay
How to Draw a Campfire
Draw a campfire in 10 easy steps, about 8 minutes. Free, with a printable worksheet.
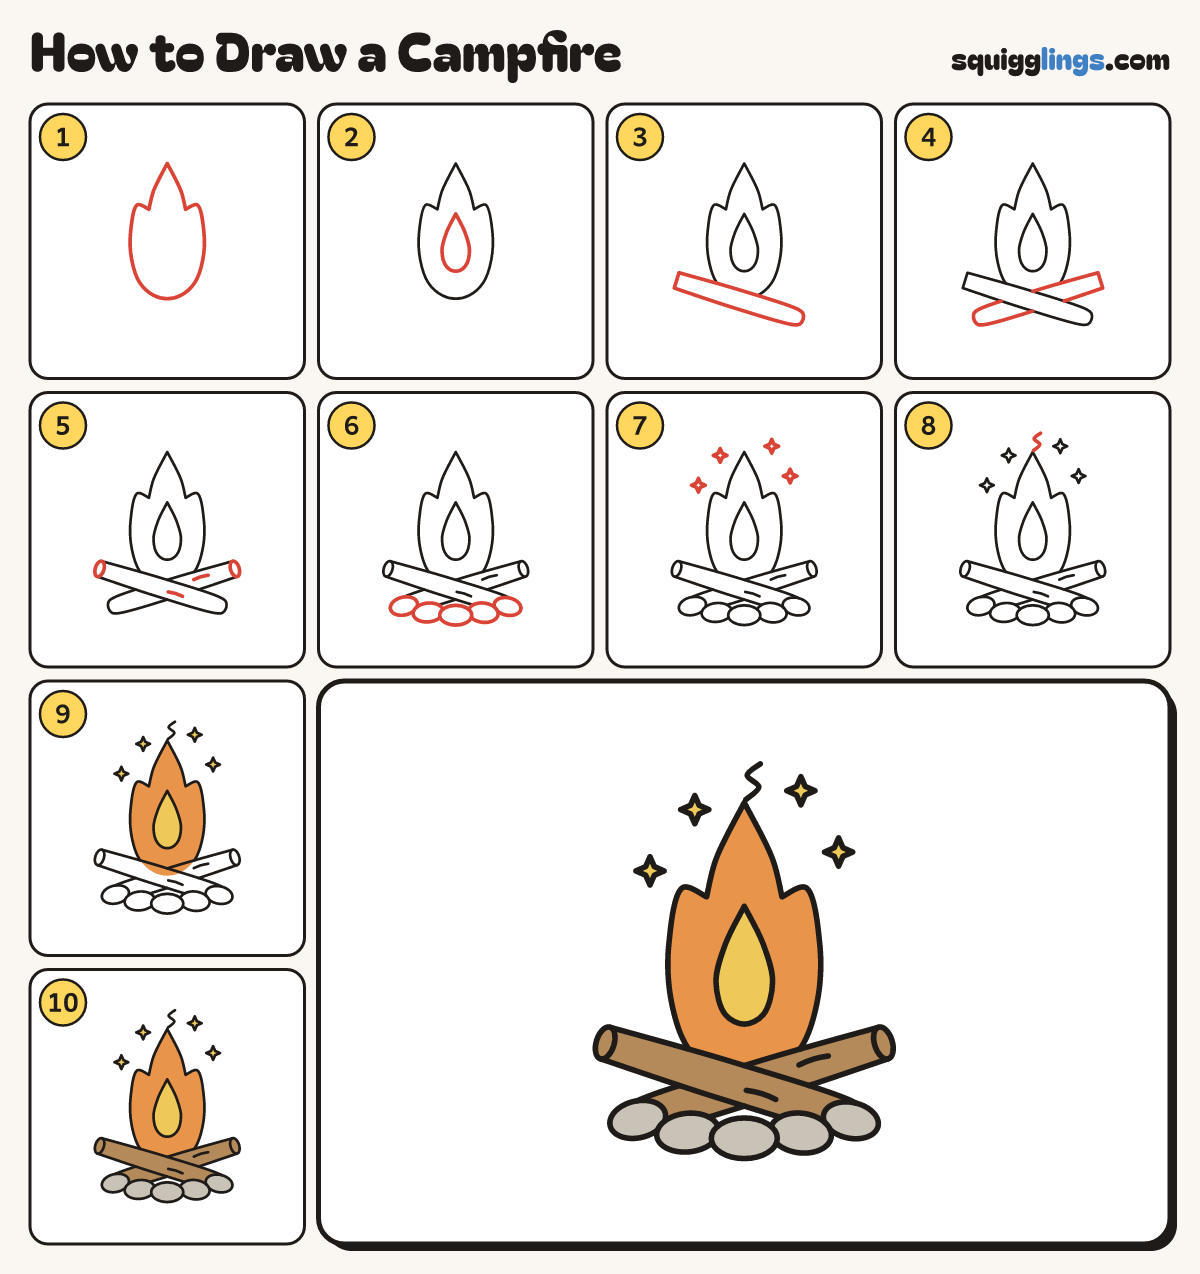
Each picture adds one red line. Draw that line, then scroll to the next picture. Rub out any dashed helper lines at the end. First up: big flame.
Step 1: Big flame
In the middle, draw a big wobbly flame with a pointy tip on top and a round bottom.
Step 2: Flame inside
Inside the big flame, draw a smaller pointy teardrop flame, the same way.
Step 3: One log
Across the flame's bottom, draw a long round log leaning up to the left. Round off its low end.
Step 4: Crossed log
Draw a second round log leaning up to the right, crossing behind the first log.
Step 5: Log ends and bark
On each high log end, draw an oval for the cut wood. Add a short bark line on each log.
Step 6: Ring of stones
In front of the logs, draw 5 round stones in a smile curve. Hide the low log ends.
Step 7: Sparks
Above and beside the flame, draw 4 tiny 4-point stars for sparks flying up.
Step 8: Curl of smoke
Start at the tip of the flame. Draw a short wiggly line curling up.
Step 9: Yellow and orange flame
Colour the small flame and sparks yellow. Colour the big flame orange around it, down to the logs.
Step 10: Wood logs, stone ring
Colour both logs wood brown and the stones grey.
Your finished drawing
Follow the steps above and this is where you end up: a campfire, drawn by you.
Every step in one picture