Watch it draw itself · tap to replay
How to Draw a Geode
Draw a geode in 11 easy steps, about 8 minutes. Free, with a printable worksheet.
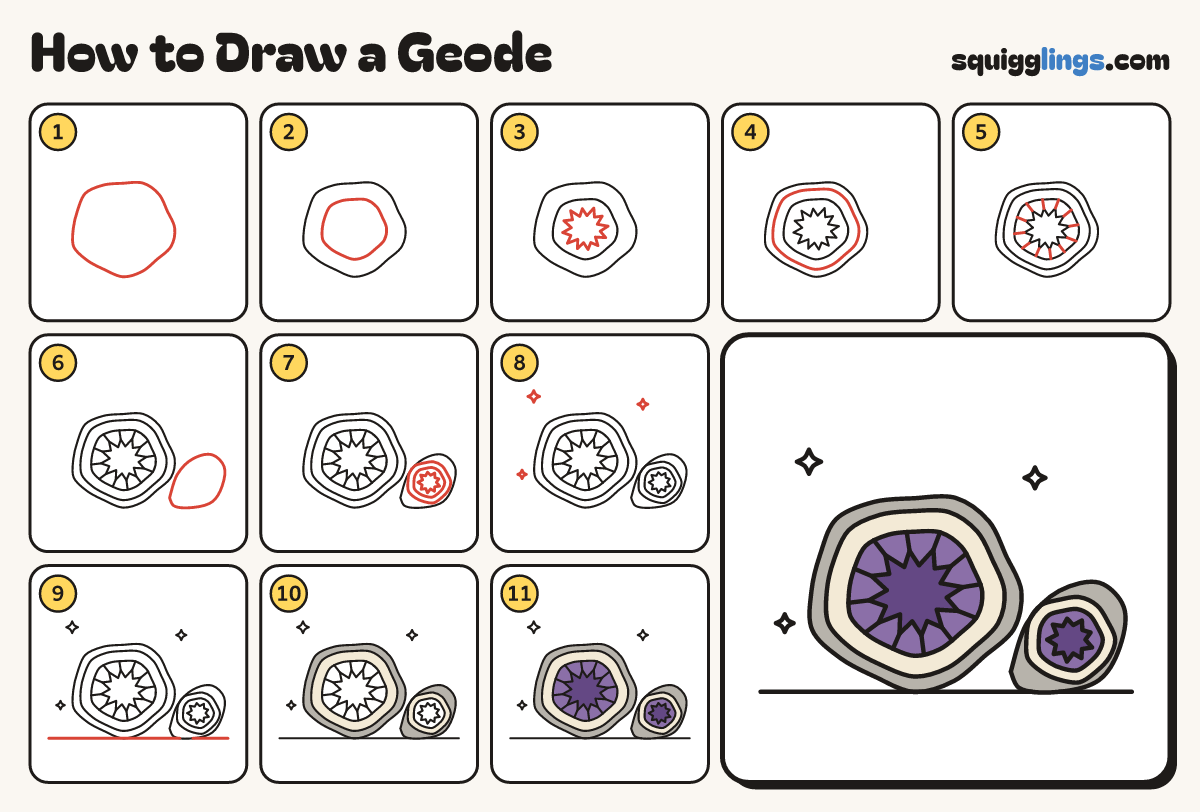
Each picture adds one red line. Draw that line, then scroll to the next picture. Rub out any dashed helper lines at the end. First up: the geode.
Step 1: The geode
A little left of the middle, draw a big lumpy round rock as big as your fist, with soft bumps.
Tip A geode is a rock that is hollow and full of crystals inside.
Step 2: The crystal ring
Inside the rock, draw a smaller lumpy round for the crystal ring, leaving a thick edge all the way round.
Step 3: Crystal points
Inside the ring, draw a zigzag all the way round, with 12 small sharp points pointing in to the middle.
Tip The little space left in the middle is the hollow.
Step 4: The rock band
Between the rock's edge and the crystal ring, draw a second lumpy round just inside the edge.
Step 5: Crystal lines
From each dip between the points, draw a short straight line out to the ring.
Step 6: The other half
On the ground to the right, tucked behind, draw the other half: a smaller lumpy shape, cut face towards you.
Step 7: Inside the other half
Inside the other half, draw a smaller rock band, a crystal ring and a zigzag of 9 points pointing in.
Step 8: Sparkles
Add 3 little four-point sparkles in the air around the rocks, not touching them.
Step 9: The ground
Draw a long straight ground line under both halves.
Step 10: Cream band, grey rock
Colour the band cream, then the outside of both halves grey, around the band.
Step 11: Purple crystals
Go over your lines. Colour the crystals purple, then the hollow in the middle of each half dark purple.
Your finished drawing
Follow the steps above and this is where you end up: a geode, drawn by you.
Every step in one picture