Watch it draw itself · tap to replay
How to Draw the Four Seasons
Draw the four seasons in 12 easy steps, about 9 minutes. Free, with a printable worksheet.
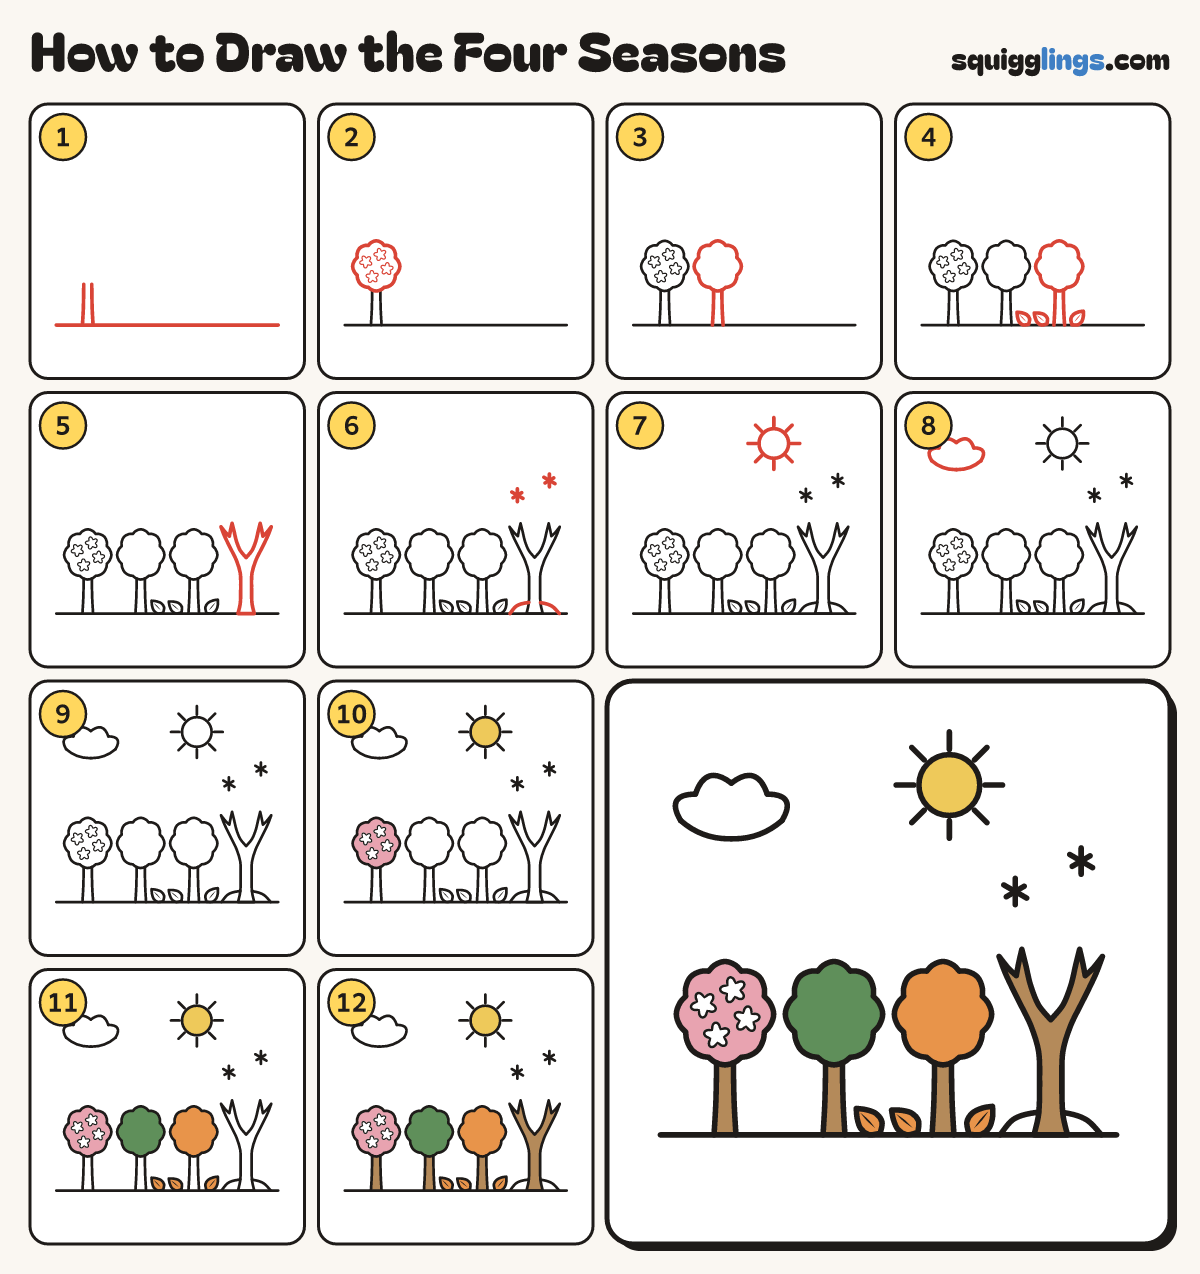
Each picture adds one red line. Draw that line, then scroll to the next picture. Rub out any dashed helper lines at the end. First up: ground and first trunk.
Step 1: Ground and first trunk
Draw a ground line near the bottom. Far left, 2 trunk lines rise from the ground, stopping a hand high.
Step 2: The spring tree
On the trunk draw a lumpy cloud of leaves. Inside it draw 4 little 5-petal blossoms. This is spring.
Tip 4 trees, one for each season: spring, summer, autumn and winter.
Step 3: The summer tree
Draw a second tree beside it: trunk lines from the ground up to a lumpy top. This is summer.
Step 4: The autumn tree
Draw trunk lines from the ground up to a lumpy top. Add 3 fallen pointy leaves with middle lines.
Step 5: The winter tree
On the far right draw a bare tree like a tall Y, each arm splitting into 2 little prongs.
Tip No leaves in winter: just bare branches.
Step 6: Snow and snowflakes
Under the winter tree draw a low snow mound. Above it draw 2 snowflakes: 3 lines crossing like a star.
Step 7: The sun
In the top right draw a round sun as big as a plum, with 8 short rays.
Step 8: A cloud
In the top left corner draw a small puffy cloud, well away from the sun.
Step 9: White snow
Colour the snow, the cloud and the 4 blossoms white.
Step 10: Yellow sun, pink spring
Colour the sun yellow. Colour the spring tree pink, around the white blossoms.
Step 11: Orange autumn, green summer
Colour the autumn tree and its 3 leaves orange, and the summer tree green.
Step 12: Wood trunks
Colour all 4 trunks wood brown, and your four seasons are done!
Your finished drawing
Follow the steps above and this is where you end up: the four seasons, drawn by you.
Every step in one picture