Watch it draw itself · tap to replay
How to Draw a Dead Tree
Draw a dead tree in 10 easy steps, about 8 minutes. Free, with a printable worksheet.
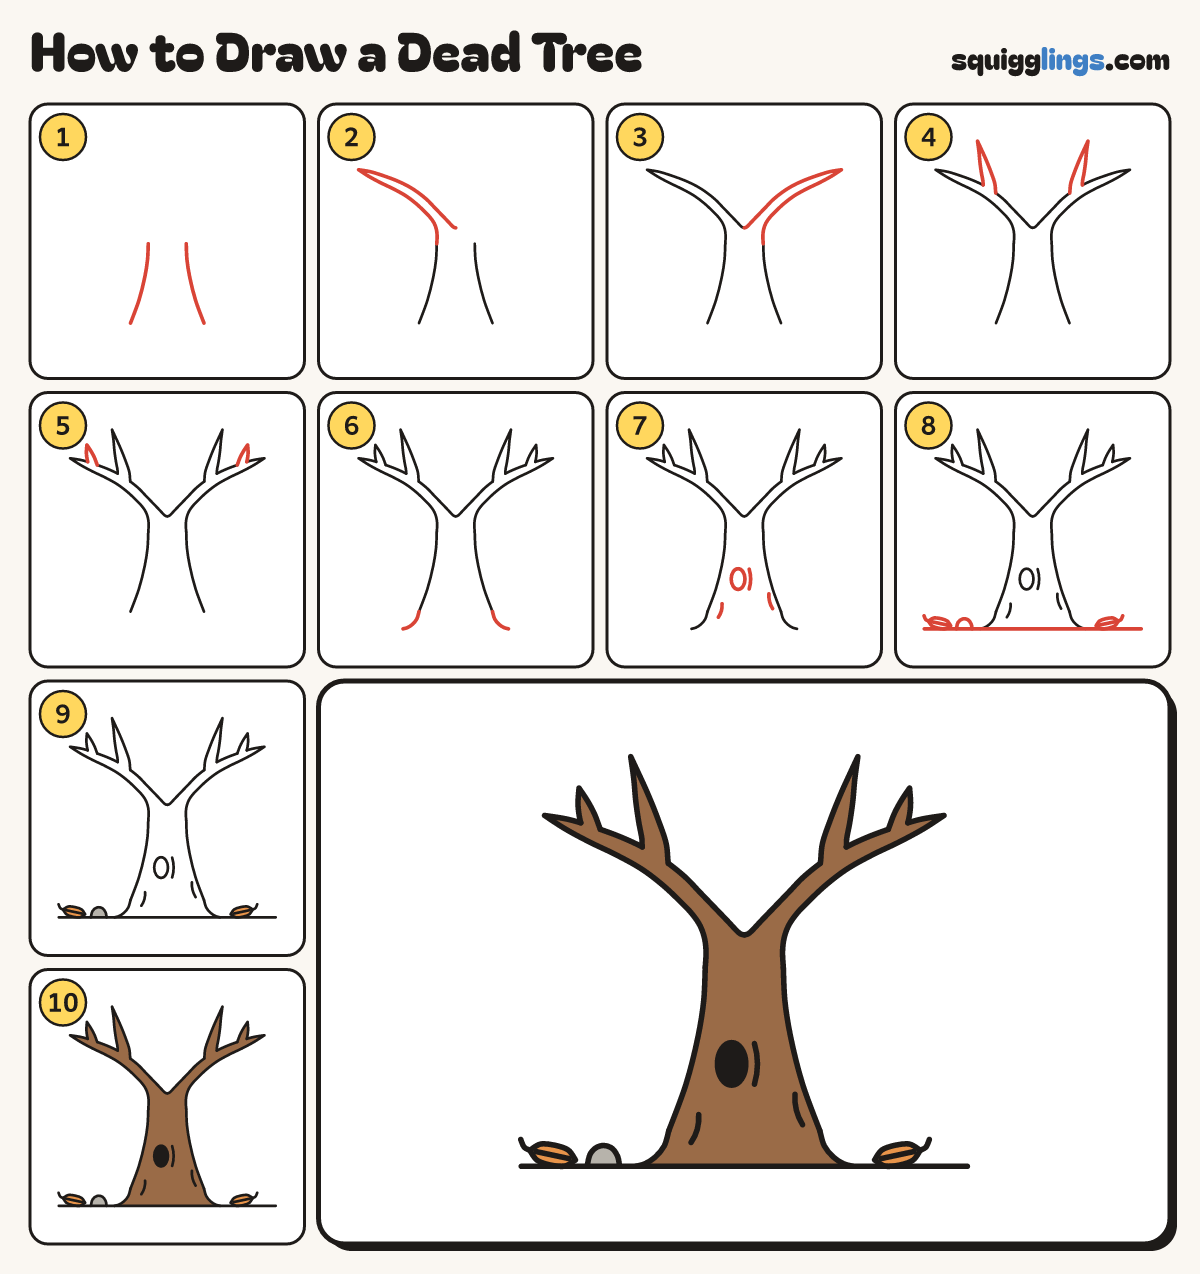
Each picture adds one red line. Draw that line, then scroll to the next picture. Rub out any dashed helper lines at the end. First up: the trunk.
Step 1: The trunk
Left of the middle, start near the bottom and draw a line up, leaning in. Stop halfway. Same again right.
Step 2: Left branch
Start at the top of the left line. Draw a curving branch up to a tip, back to the fork.
Step 3: Right branch
Start at the top of the right line. Draw a curving branch up to a tip, back to the fork.
Step 4: Side branches
Start on top of each branch where it bends. Draw a smaller branch up to a tip and back.
Step 5: Twigs
Start on top of each branch near its end. Draw a short twig up to a tip and back down.
Step 6: Roots
At the bottom of each trunk line draw a root that flares from the trunk out to the side.
Step 7: Knot hole and bark
In the middle of the trunk, draw a small egg for a knot hole. Add 3 short dashes for bark.
Step 8: Ground, leaves, rock
Draw a ground line, a leaf with a stem each side, and a rock: start and stop on the ground.
Step 9: Orange leaves, grey rock
Colour the leaves orange and the rock grey.
Step 10: Brown tree, black hole
Colour the tree brown around the knot hole, then the hole black. Go over your lines and you are done!
Your finished drawing
Follow the steps above and this is where you end up: a dead tree, drawn by you.
Every step in one picture