Watch it draw itself · tap to replay
How to Draw a Geometric Pattern
Draw a geometric pattern in 10 easy steps, about 8 minutes. Free, with a printable worksheet.
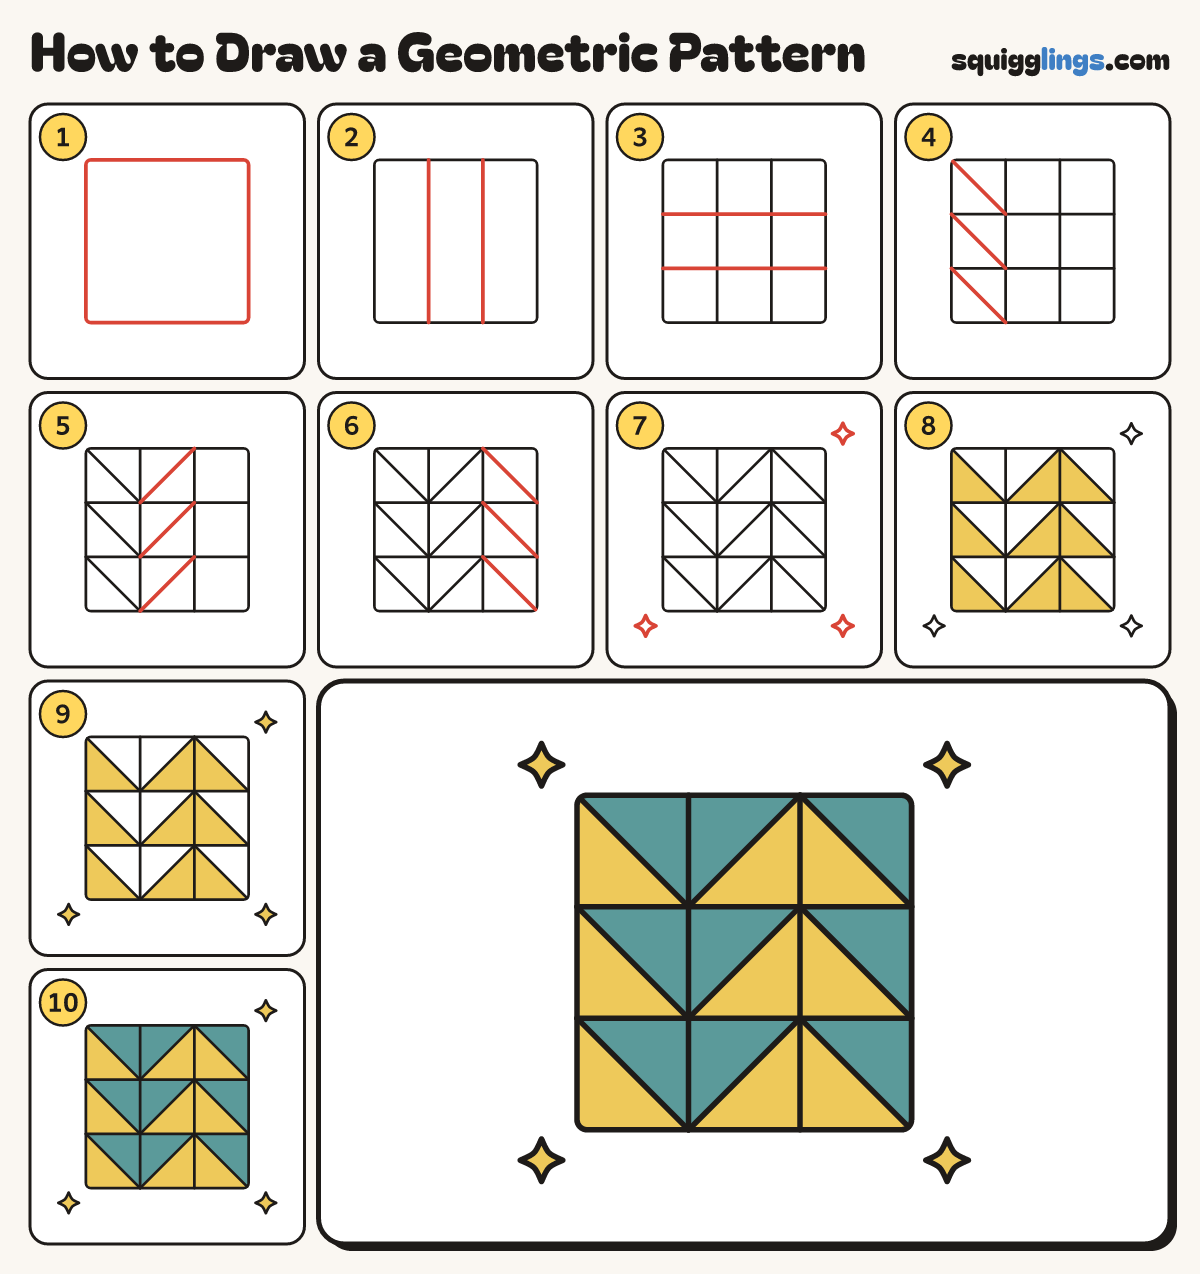
Each picture adds one red line. Draw that line, then scroll to the next picture. Rub out any dashed helper lines at the end. First up: the square.
Step 1: The square
In the middle draw a big square with soft corners, nearly as big as your page.
Tip Geometric patterns are made of straight lines and simple shapes repeated.
Step 2: 2 lines down
Draw 2 straight lines from the top edge down to the bottom edge, splitting the square into 3 equal strips.
Step 3: 2 lines across
Draw 2 straight lines from the left edge across to the right edge. Now there are 9 equal boxes.
Step 4: Slants on the left
In each of the 3 left boxes draw a slanted line from the top-left corner down to the bottom-right corner.
Step 5: Slants in the middle
In the middle column slant the lines the other way: from the top-right corner down to the bottom-left corner.
Step 6: Slants on the right
In the right column slant lines the first way again, from top-left down to bottom-right. Every box is 2 triangles.
Step 7: Sparkles
Draw 4 sparkle stars off the corners of the square.
Step 8: Yellow triangles
Go over your lines, then colour the bottom triangle of every box yellow.
Step 9: Yellow sparkles
Colour the 4 sparkles yellow too.
Step 10: Teal triangles
Colour the top triangle of every box teal, so teal and yellow make zigzags. Your pattern is done!
Your finished drawing
Follow the steps above and this is where you end up: a geometric pattern, drawn by you.
Every step in one picture