Watch it draw itself · tap to replay
How to Draw a Cyclops
Draw a cyclops in 11 easy steps, about 8 minutes. Free, with a printable worksheet.
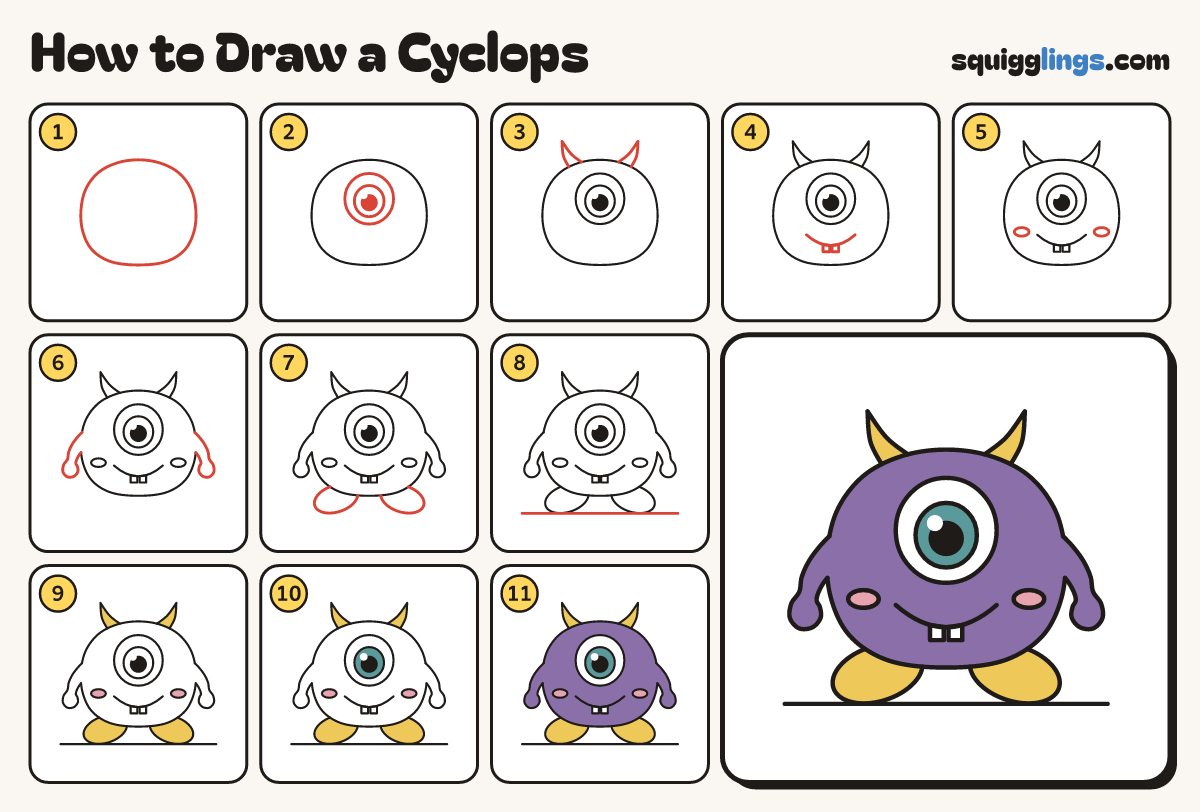
Each picture adds one red line. Draw that line, then scroll to the next picture. Rub out any dashed helper lines at the end. First up: squashy body.
Step 1: Squashy body
In the middle, draw one big squashy ball, wider than tall, with fat cheeks low on the sides.
Tip Fattest down by the cheeks, like a water balloon.
Step 2: One huge eye
Draw one huge round eye above the middle. Inside, draw a smaller circle and a black dot with a shine.
Step 3: Two little horns
On top of the ball, draw 2 short curved horns leaning outward, one each side of the middle.
Step 4: Grin with 2 teeth
Under the eye, draw a big wide U grin as wide as the eye. Hang 2 square teeth from it.
Step 5: Rosy cheeks
Beside the grin, low on each side of the ball, draw a wide sideways oval cheek.
Step 6: Two arms
Below the middle on each side, draw an arm hanging down and out, with a round little hand.
Tip Arms taper like carrots: fat at the shoulder, thin at the wrist.
Step 7: Two flat feet
Under the ball, draw a big flat bean foot poking out to each side.
Step 8: The ground
Start a hand left of the feet. Draw a straight ground line under them, stopping past the right foot.
Step 9: Horns, feet and cheeks
Colour both horns and both feet yellow, and the cheek ovals pink.
Step 10: Teal eye
Colour the ring round the black dot teal. Leave the shine, the rest of the eye and the teeth white.
Step 11: Purple cyclops
Go over your lines. Colour the body and arms purple, around the eye, teeth and cheeks. Your cyclops is done!
Your finished drawing
Follow the steps above and this is where you end up: a cyclops, drawn by you.
Every step in one picture