Watch it draw itself · tap to replay
How to Draw the Gateway Arch
Draw the Gateway Arch in 12 easy steps, about 9 minutes. Free, with a printable worksheet.
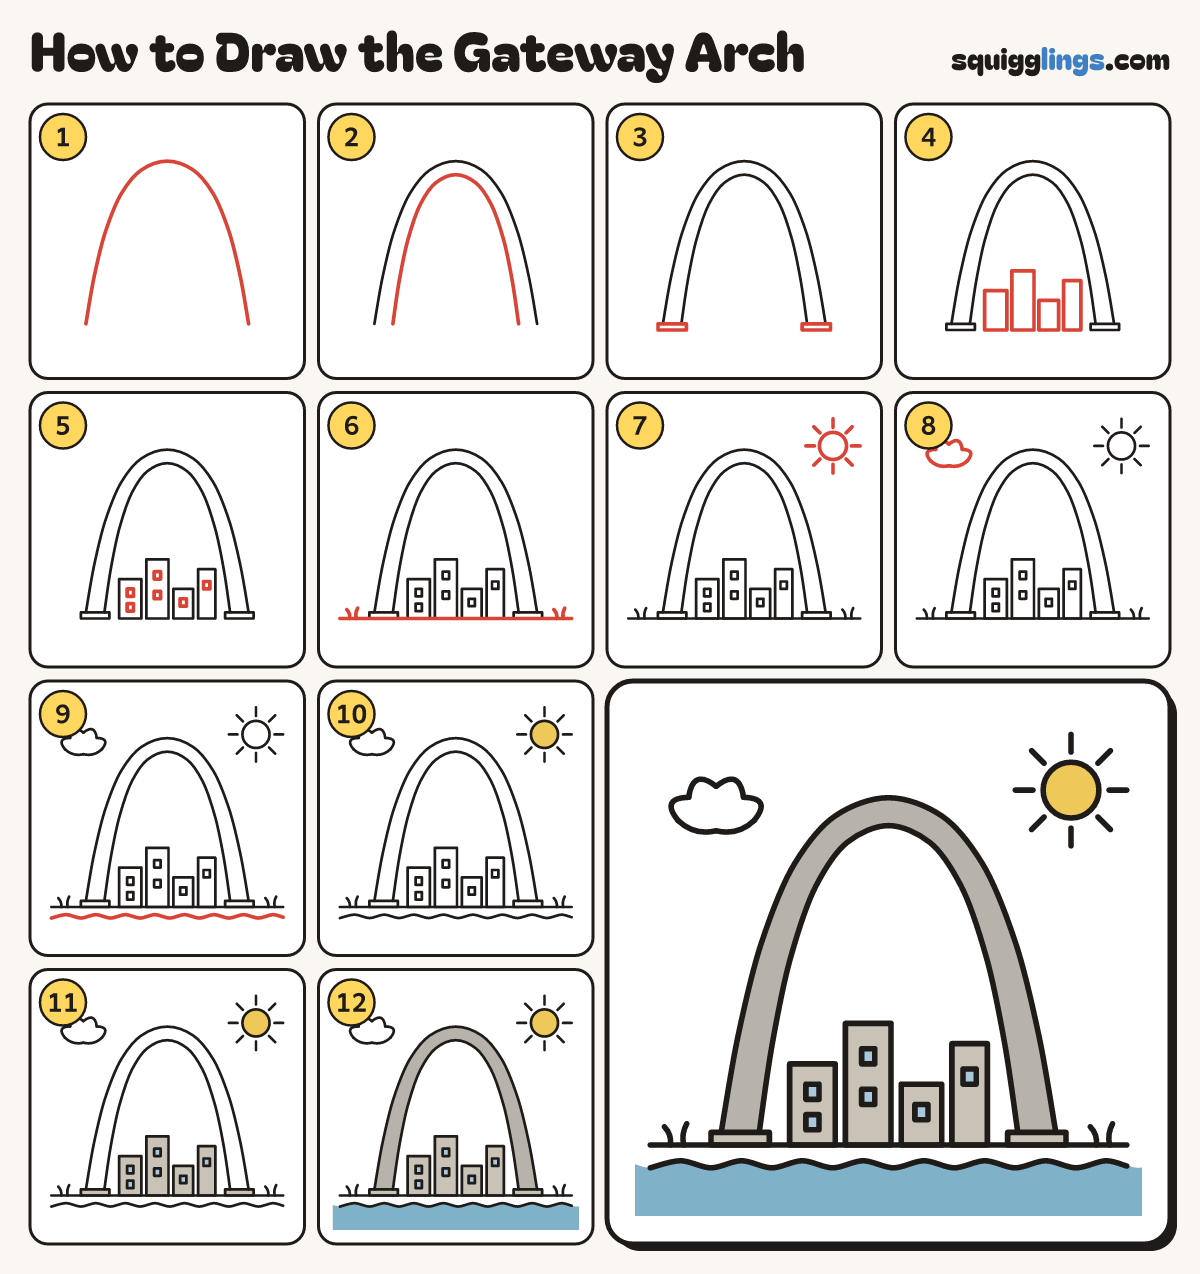
Each picture adds one red line. Draw that line, then scroll to the next picture. Rub out any dashed helper lines at the end. First up: the big arch.
Step 1: The big arch
Start low on the left, a hand in. Draw a tall pointy rainbow over, down to stop on the ground.
Tip The Gateway Arch is as tall as it is wide: pointier than a rainbow.
Step 2: The inside line
Start inside the left foot. Draw a smaller arch inside, closer at the top, and stop inside the right foot.
Step 3: The footings
Under each foot draw a low flat box, a little wider than the foot, for the stone footing.
Step 4: City buildings
Between the legs, on the ground, draw 4 boxes of different heights side by side for the city.
Step 5: Windows
Draw little square windows on the buildings, 1 or 2 in a column on each.
Step 6: Ground and grass
Draw the ground line from edge to edge under the feet and buildings. Add grass blades near each edge.
Step 7: The sun
Draw a sun high on the right with short rays all round.
Step 8: The cloud
High on the left, draw a puffy cloud: big bumps over the top, small bumps back to the start.
Step 9: The river
Just under the ground, draw a wavy river line from the left edge across to the right edge.
Step 10: Yellow sun, white cloud
Colour the sun yellow and the cloud white.
Step 11: Stone city, blue windows
Colour the buildings and the 2 footings light grey and the windows sky blue.
Step 12: Grey arch, blue river
Colour the arch grey like shiny steel and the river blue to the bottom. Your Gateway Arch is done!
Your finished drawing
Follow the steps above and this is where you end up: the Gateway Arch, drawn by you.
Every step in one picture