Watch it draw itself · tap to replay
How to Draw a Gate
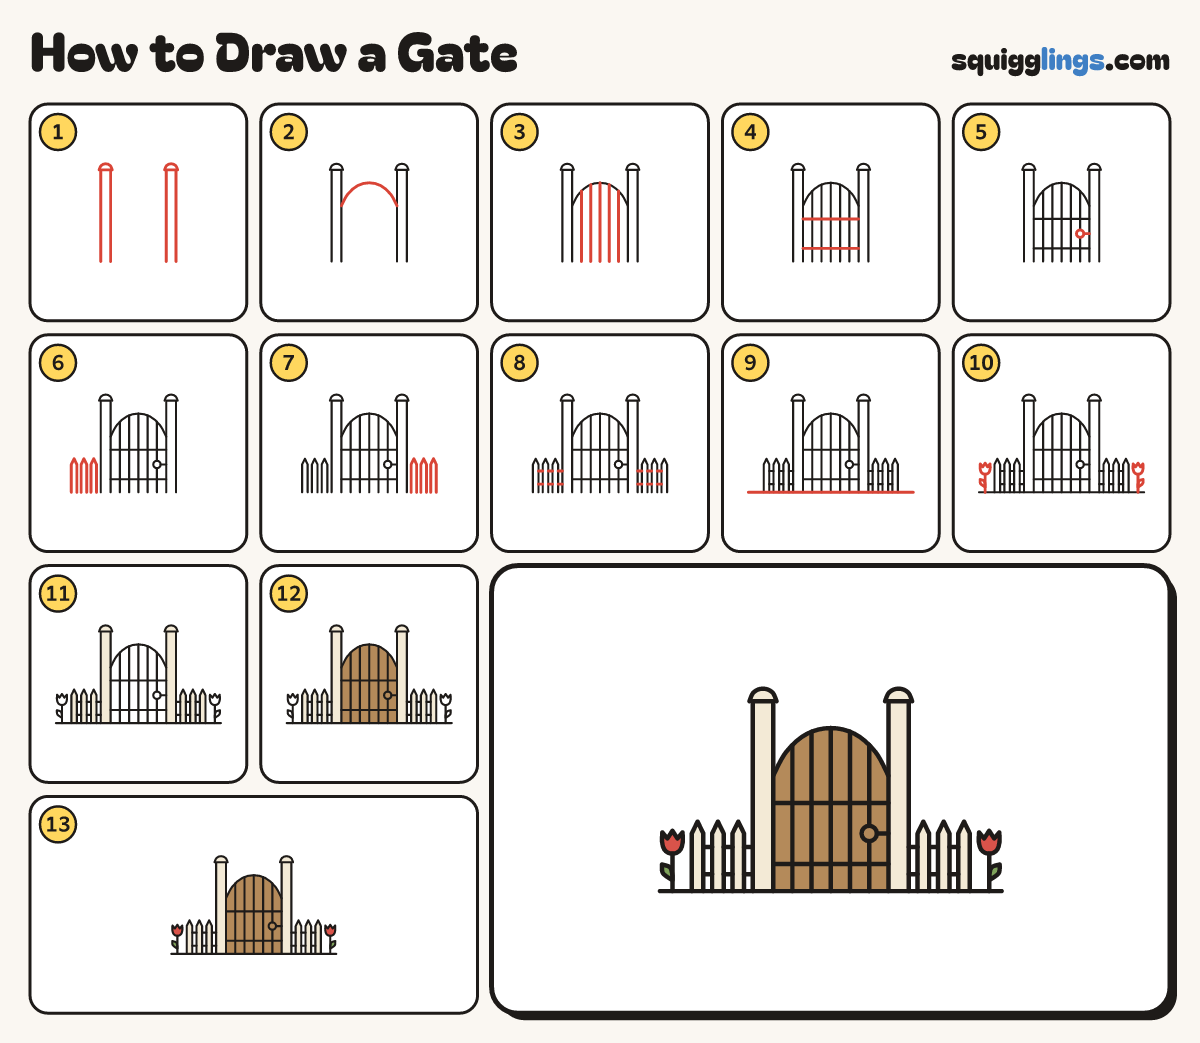
Draw a gate in 13 easy steps, about 10 minutes. Free, with a printable worksheet.
Each picture adds one red line. Draw that line, then scroll to the next picture. Rub out any dashed helper lines at the end. First up: two gate posts.
Step 1: Two gate posts
Draw 2 tall posts a hand apart: each starts low down, goes up, across, and back down to the bottom.
Tip Give each post a rounded cap. Posts are taller than the fence.
Step 2: The gate
Between the posts, draw a rainbow from one post over to the other for the gate's round top.
Step 3: Bars
Inside the gate draw 5 bars, evenly spaced, from the bottom of the posts up to the rainbow.
Step 4: Two rails
Draw 2 rails across the gate, one high and one low, each from one post across to the other.
Step 5: The latch
On the right-hand bar, between the rails, draw a round latch with a short bar to the post.
Step 6: Fence on the left
Close to the left post draw 3 pointy pickets, each from low down up to a point and back down.
Tip Space them evenly, like teeth on a comb.
Step 7: Fence on the right
Do the same close to the right post: 3 pointy pickets, each starting and stopping low down.
Step 8: Fence rails
Draw 2 short rails in every gap, one high and one low, from picket to picket and into the post.
Step 9: The ground
Draw the ground line from near the left edge to near the right edge, under the pickets, posts and gate.
Step 10: Two tulips
Beside each fence end draw a tulip: a stem from the ground, a cup with 3 points, a leaf.
Tip Leave a gap, so the tulips don't touch the fence.
Step 11: Cream posts and pickets
Colour the 2 posts and all 6 pickets cream, like painted wood.
Step 12: Wooden gate
Colour the gate, the bars and the rails wood brown.
Step 13: Red tulips
Colour the tulips red and their leaves green. Go over your lines and your gate is done!
Your finished drawing
Follow the steps above and this is where you end up: a gate, drawn by you.
Every step in one picture