Watch it draw itself · tap to replay
How to Draw an Alamo
Draw an alamo in 11 easy steps, about 8 minutes. Free, with a printable worksheet.
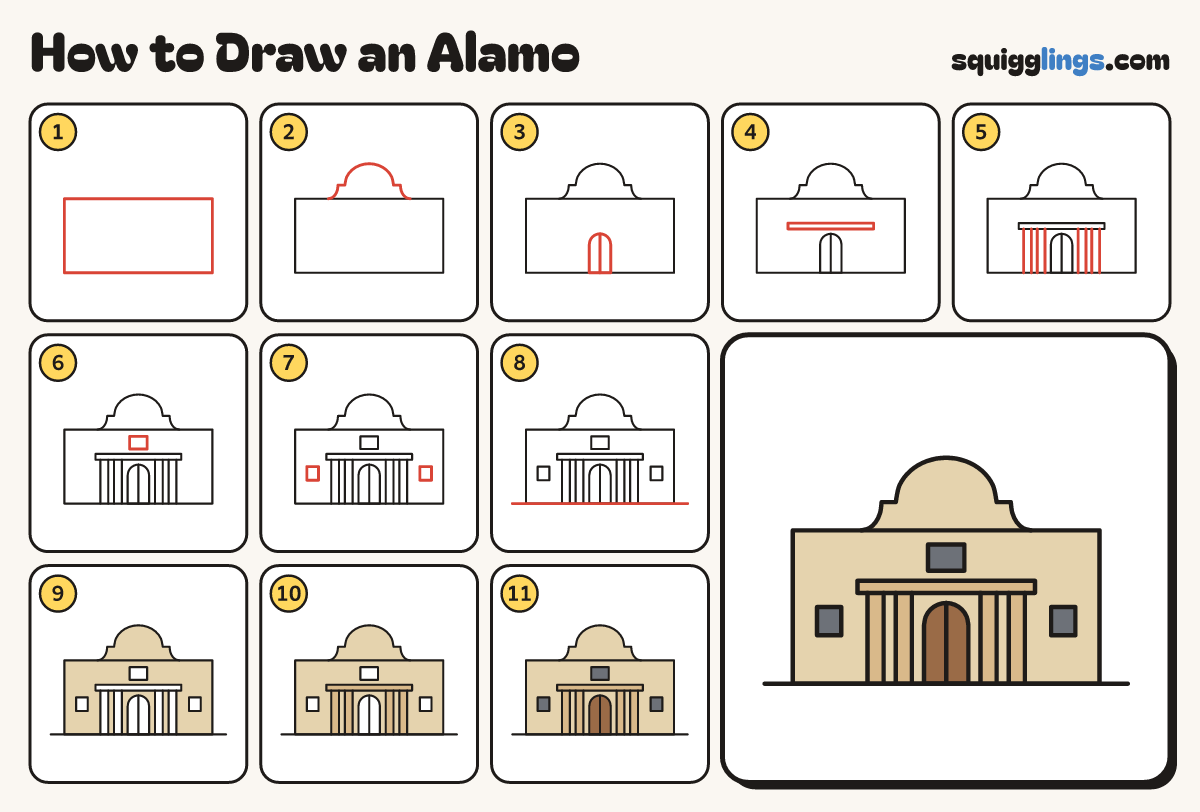
Each picture adds one red line. Draw that line, then scroll to the next picture. Rub out any dashed helper lines at the end. First up: the wall.
Step 1: The wall
Draw a long, low box across the page. Leave room above it for the round top.
Tip Make the box about twice as wide as it is tall.
Step 2: The round top
Start on the top line. Draw a curved step, a big round hump, another step, then stop on the line.
Tip The hump sits right in the middle, like a rainbow.
Step 3: The door
In the middle draw a tall round-topped door standing on the bottom line. Add a line down its middle.
Step 4: The ledge
Just above the door draw a long thin ledge, much wider than the door.
Step 5: Four columns
On each side of the door draw 2 thin columns, from the ledge down to the bottom line.
Tip Each column is 2 straight lines. Keep all 4 columns the same width.
Step 6: Top window
Above the ledge draw a small window, right over the door.
Step 7: Side windows
Near each end of the wall draw a small square window.
Step 8: The ground
Draw a long ground line under the wall, poking out a little on each side.
Step 9: Sandy walls
Colour the walls and the round top a light sandy colour, around the door, columns, ledge and windows.
Step 10: Columns and ledge
Colour the 4 columns and the ledge light brown.
Step 11: Door and windows
Colour the door brown and the 3 windows dark grey. Your Alamo is done!
Your finished drawing
Follow the steps above and this is where you end up: an alamo, drawn by you.
Every step in one picture