Watch it draw itself · tap to replay
How to Draw Garden Tools
Draw garden tools in 11 easy steps, about 8 minutes. Free, with a printable worksheet.
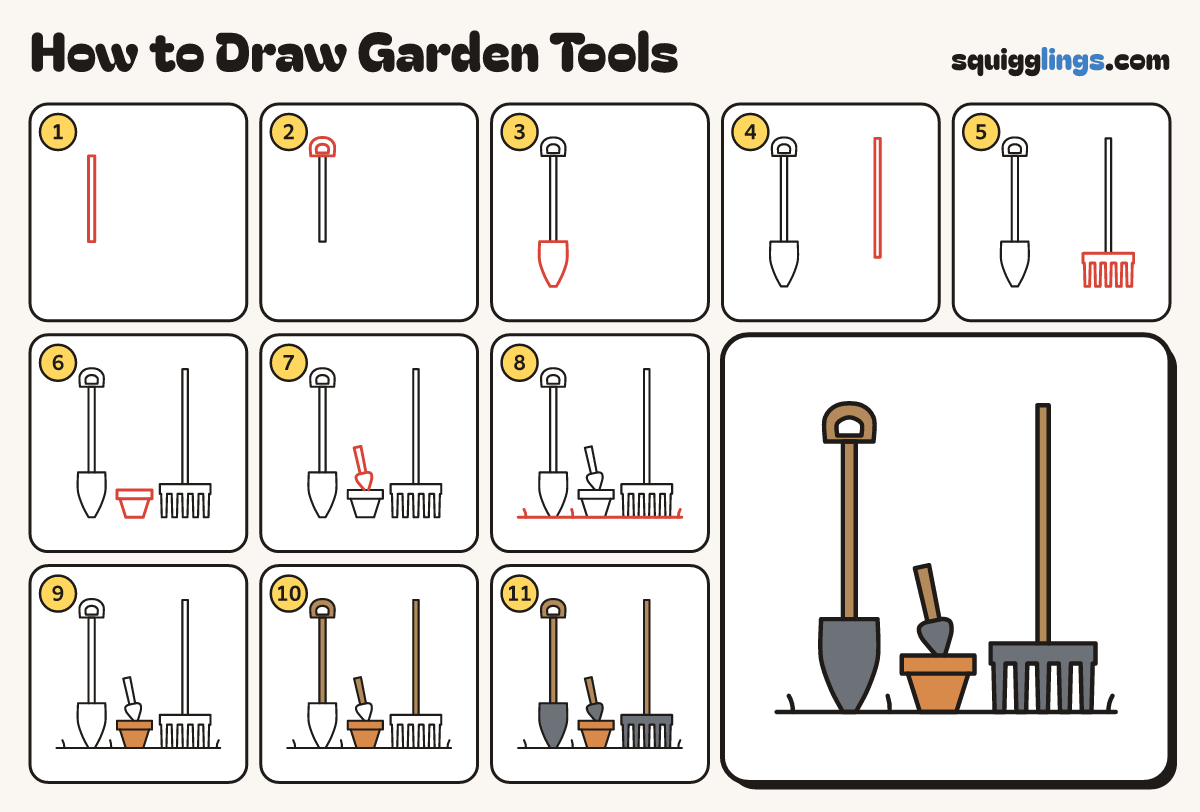
Each picture adds one red line. Draw that line, then scroll to the next picture. Rub out any dashed helper lines at the end. First up: spade handle.
Step 1: Spade handle
On the left draw a tall thin spade handle: 2 close lines from near the top down to the middle.
Step 2: D grip
On the handle draw a D grip: an upside-down U with a flat bottom, and a smaller D inside.
Step 3: The blade
Under the handle draw a shield-shaped blade: flat on top, curving in to a short flat bottom.
Step 4: Rake handle
On the right draw a taller thin rake handle: 2 close lines from near the top down to the middle.
Step 5: Rake head
Under the rake handle draw a wide flat bar. Hang 5 even teeth from its bottom, like a comb.
Step 6: Flower pot
Between the tools draw a flat rim box. From it draw a pot leaning in, down to a flat bottom.
Step 7: A trowel
Draw a trowel leaning left in the pot: a fat handle, and a pointed leaf blade tucked behind the rim.
Step 8: Ground and grass
Draw a ground line from near the left edge across to the right, under everything. Add 3 grass blades.
Step 9: Ginger pot
Go over your lines. Colour the pot and its rim ginger.
Step 10: Wood handles
Colour the spade handle and grip, the rake handle and the trowel handle wood brown.
Step 11: Slate metal
Colour the spade blade, the rake head and the trowel blade slate grey. Your garden tools are done!
Your finished drawing
Follow the steps above and this is where you end up: garden tools, drawn by you.
Every step in one picture