Watch it draw itself · tap to replay
How to Draw a Garden Cart
Draw a garden cart in 13 steps, about 10 minutes. Free, with a printable worksheet.
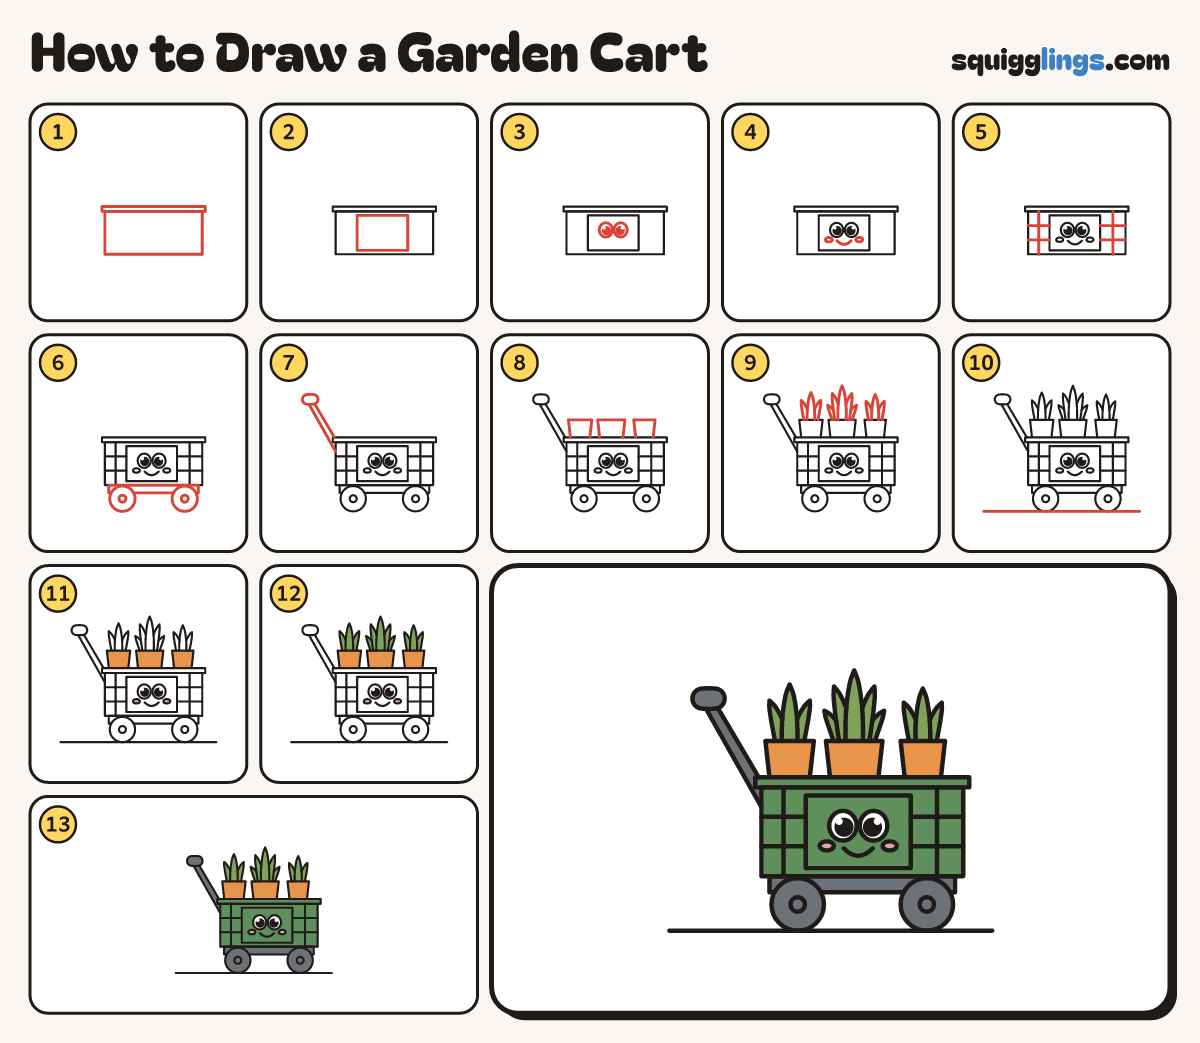
Each picture adds one red line. Draw that line, then scroll to the next picture. Rub out any dashed helper lines at the end. First up: the cart box.
Step 1: The cart box
In the middle draw a long box lying on its side, with a thin flat rim along its top.
Tip A garden cart has wheels and mesh sides for wheeling pots round the garden.
Step 2: The middle panel
Inside the box, in the middle, draw a rectangle for the solid panel, a little shorter than the box.
Step 3: Two big eyes
In the panel, near the middle, draw 2 round eyes side by side. Colour a big black dot in each.
Step 4: Smile and cheeks
Under the eyes draw a small U smile, and a small oval cheek beside each end of the smile.
Step 5: Mesh sides
On each side of the panel draw wire mesh: one line up and down, and 2 lines across.
Step 6: Axle and wheels
Under the box draw a thin axle bar, then 2 big round wheels on the ground with small middle circles.
Step 7: The handle
From the left end of the box draw a long handle slanting up left, ending in a flat pill-shaped grip.
Step 8: Three pots
Above the rim draw three flowerpots standing in the cart, wider at the top, their bottoms tucked behind the rim.
Step 9: Plants
From each pot draw a spiky bush of pointed leaves, 3 in the small pots, 5 in the middle.
Step 10: Ground
Draw a ground line under the wheels from left to right.
Step 11: Orange pots, pink cheeks
Go over your lines, then colour the pots orange and the cheeks pink.
Step 12: Leafy plants
Colour all the plant leaves leaf green, right to their points.
Step 13: Green cart, grey wheels
Colour the cart green around the cheeks, leaving the eyes white. Colour the handle, grip, axle and wheels slate grey.
Your finished drawing
Follow the steps above and this is where you end up: a garden cart, drawn by you.
Every step in one picture