Watch it draw itself · tap to replay
How to Draw a Moccasin
Draw a moccasin in 12 steps, about 9 minutes. Free, with a printable worksheet.
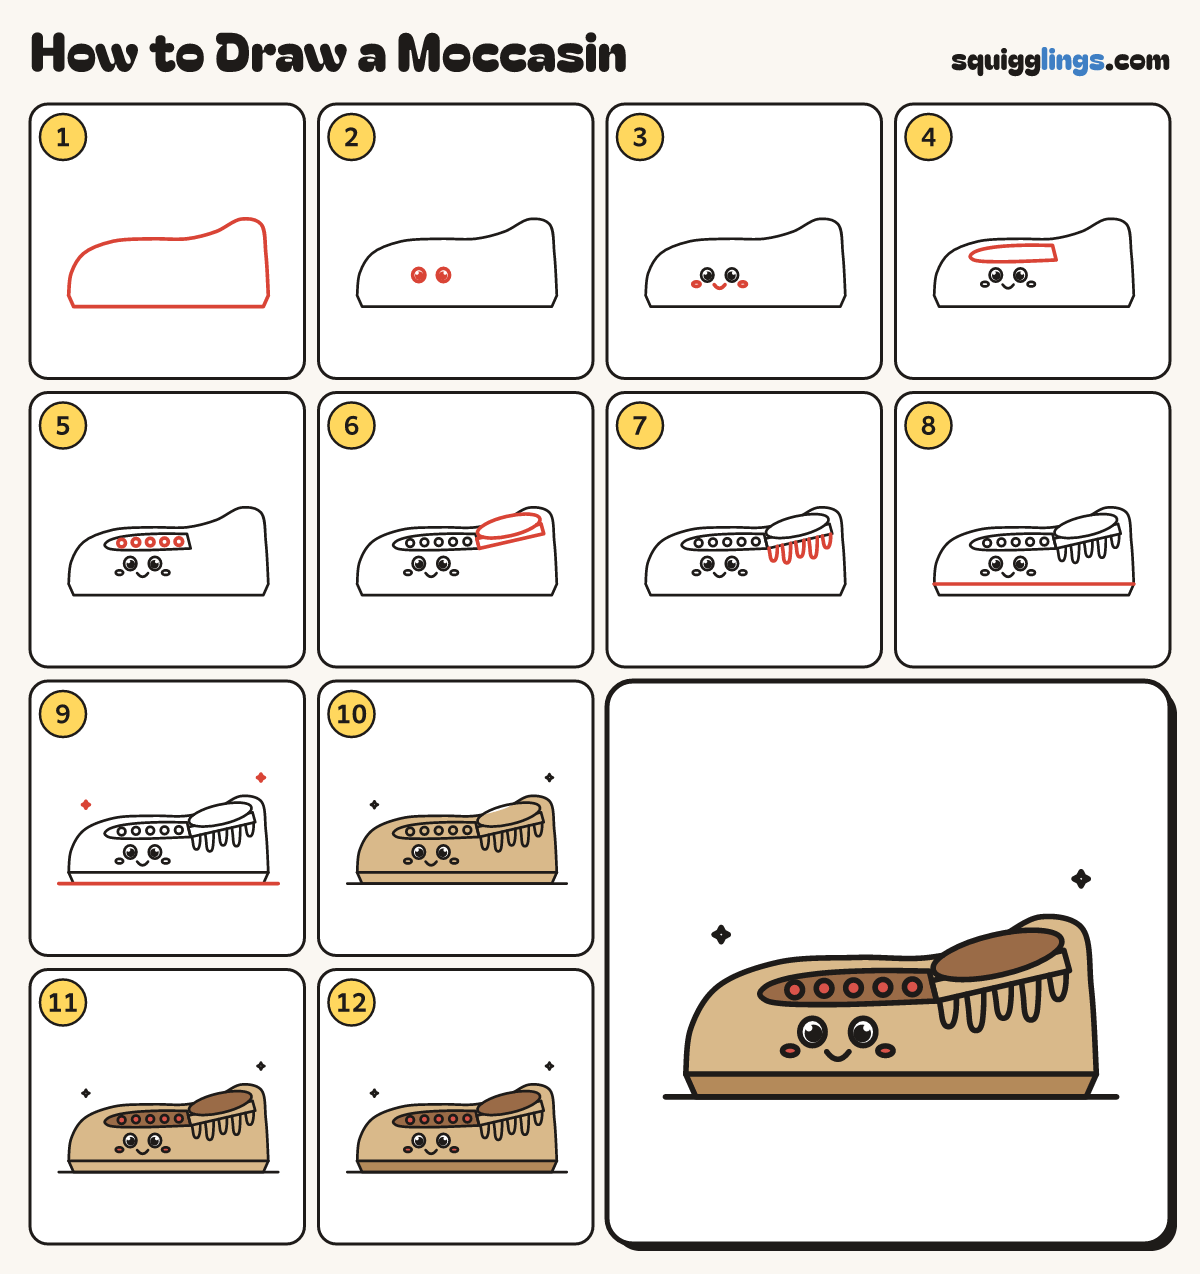
Each picture adds one red line. Draw that line, then scroll to the next picture. Rub out any dashed helper lines at the end. First up: the shoe.
Step 1: The shoe
Draw a soft side-view shoe across the page, with a round toe on the left and a higher heel.
Tip A moccasin is a soft leather shoe with beads and a fringe.
Step 2: 2 eyes
Low on the shoe's front half draw 2 round eyes, one eye apart, with a black dot and white shine.
Step 3: Smile and cheeks
Under the eyes draw a tiny U smile, and a tiny oval cheek beside each end.
Step 4: Top patch
Above the face, a little below the shoe's top line, draw a long soft patch, rounded at the front.
Step 5: Beads
Along the middle of the patch draw 5 round beads in a row, with a gap between each.
Step 6: Opening and cuff
Behind the patch draw a long tilted oval ankle opening, with a thin cuff band slanting down under its front.
Step 7: Fringe
From the cuff's bottom edge hang 5 soft fringe strips with gaps, each thinning to a rounded tip.
Step 8: Sole line
Draw a straight line along the bottom of the shoe, just above the ground, for the sole.
Step 9: Ground and twinkles
Draw a long ground line under the shoe, and a little 4-point twinkle in the air above each end.
Step 10: Tan leather
Go over your lines. Colour the shoe, cuff and fringe tan, going around the face and the patch.
Tip Keep the eyes white.
Step 11: Red beads, brown patch
Colour the beads and cheeks red, then the patch and the inside of the opening brown, around the beads.
Step 12: Wood sole
Colour the sole below its line dark wood brown. Soft steps!
Your finished drawing
Follow the steps above and this is where you end up: a moccasin, drawn by you.
Every step in one picture