Watch it draw itself · tap to replay
How to Draw a Fruitcake
Draw a fruitcake in 12 easy steps, about 9 minutes. Free, with a printable worksheet.
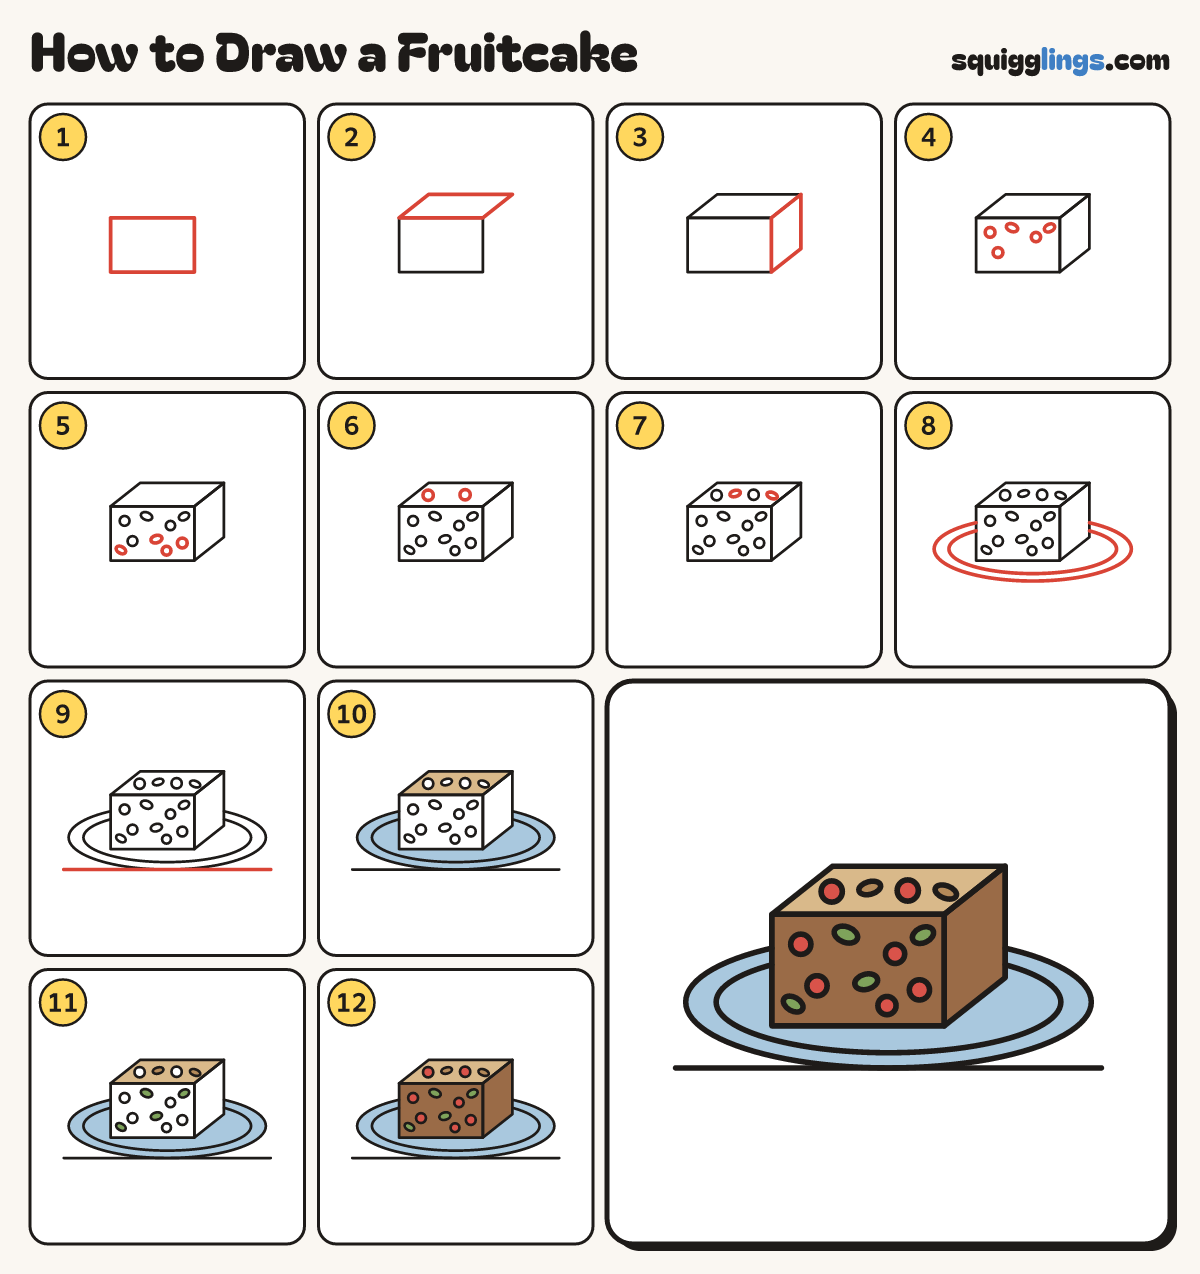
Each picture adds one red line. Draw that line, then scroll to the next picture. Rub out any dashed helper lines at the end. First up: the cut face.
Step 1: The cut face
In the middle draw a wide box for the cut end of the loaf, as wide as your hand.
Tip A fruitcake is a heavy cake stuffed with candied fruit and nuts.
Step 2: The top
From each top corner draw a line slanting up to the right. Join their ends across for the top.
Step 3: The side
From the bottom right corner draw a line slanting up to meet the top. Now the loaf is a block.
Step 4: Fruit in the cake
On the cut face draw five little rounds and ovals scattered about, tilted different ways, for candied fruit.
Step 5: More fruit
Draw four more, spread out in the lower part of the face, none too close to another.
Step 6: Cherries on top
On the top draw two round cherry halves, spaced apart and away from the edges.
Step 7: Nuts on top
Next to each cherry draw a small oval for an almond.
Step 8: A plate
Under the loaf draw a big oval plate passing behind it, with a second oval just inside for the rim.
Step 9: The table
Under the plate draw a long table line, touching its bottom, from near the left edge to near the right.
Step 10: Tan top, sky plate
Go over your lines. Colour the top tan, around the cherries and nuts, and the plate sky blue.
Step 11: Nuts and green fruit
Colour the almonds light brown and the ovals in the cake green.
Step 12: Red fruit, brown cake
Colour the cherries and the rounds in the cake red, then the cut face and side brown around the fruit.
Your finished drawing
Follow the steps above and this is where you end up: a fruitcake, drawn by you.
Every step in one picture