Watch it draw itself · tap to replay
How to Draw a Sushi Boat
Draw a sushi boat in 12 easy steps, about 9 minutes. Free, with a printable worksheet.
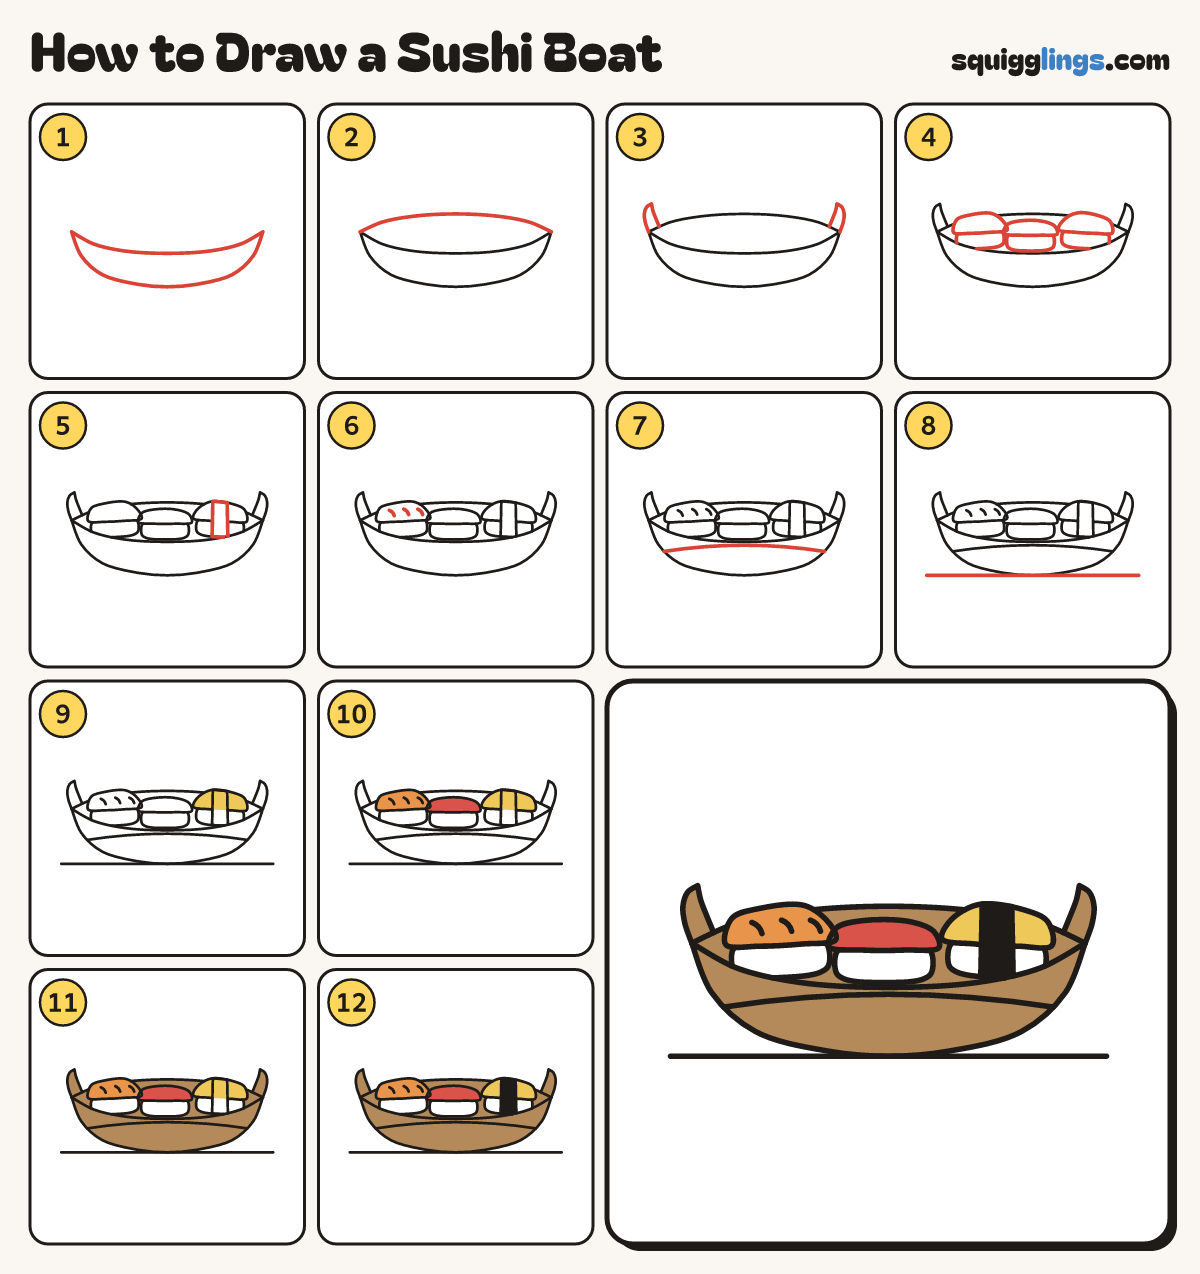
Each picture adds one red line. Draw that line, then scroll to the next picture. Rub out any dashed helper lines at the end. First up: the boat.
Step 1: The boat
Across the middle draw a long boat: a sagging curve from point to point, a deeper curve back under it.
Tip Sushi sometimes comes on a little wooden boat.
Step 2: The far side
From the left point draw a gentle rainbow over to the right point, for the far edge of the boat.
Step 3: The curled ends
At each end start on the point. Draw a short tip curling up, and stop on the far edge.
Step 4: Three nigiri
In the boat draw 3 rice pillows in a row, each with a flat slice draped on top.
Step 5: A seaweed band
Over the middle of the right piece draw a narrow band, from the slice top down to the rice bottom.
Step 6: Fat stripes
On the left slice draw 3 short slanted fat stripes, each one inside the slice.
Step 7: A plank
Start on the left side of the boat and draw a gently bowed line across to the right side.
Step 8: The table
Draw a table line under the boat, out past both sides, just touching its bottom.
Step 9: Yellow egg, white rice
Go over your lines. Colour the right slice yellow around the band, and leave the rice white.
Step 10: Orange salmon, red tuna
Colour the left slice orange and the middle slice red.
Step 11: Wood boat
Colour the boat, the curled ends and the far edge wood brown, around the sushi.
Step 12: Black seaweed
Colour the seaweed band black, and your sushi boat is done!
Your finished drawing
Follow the steps above and this is where you end up: a sushi boat, drawn by you.
Every step in one picture