Watch it draw itself · tap to replay
How to Draw a Candy Bag
Draw a candy bag in 11 easy steps, about 8 minutes. Free, with a printable worksheet.
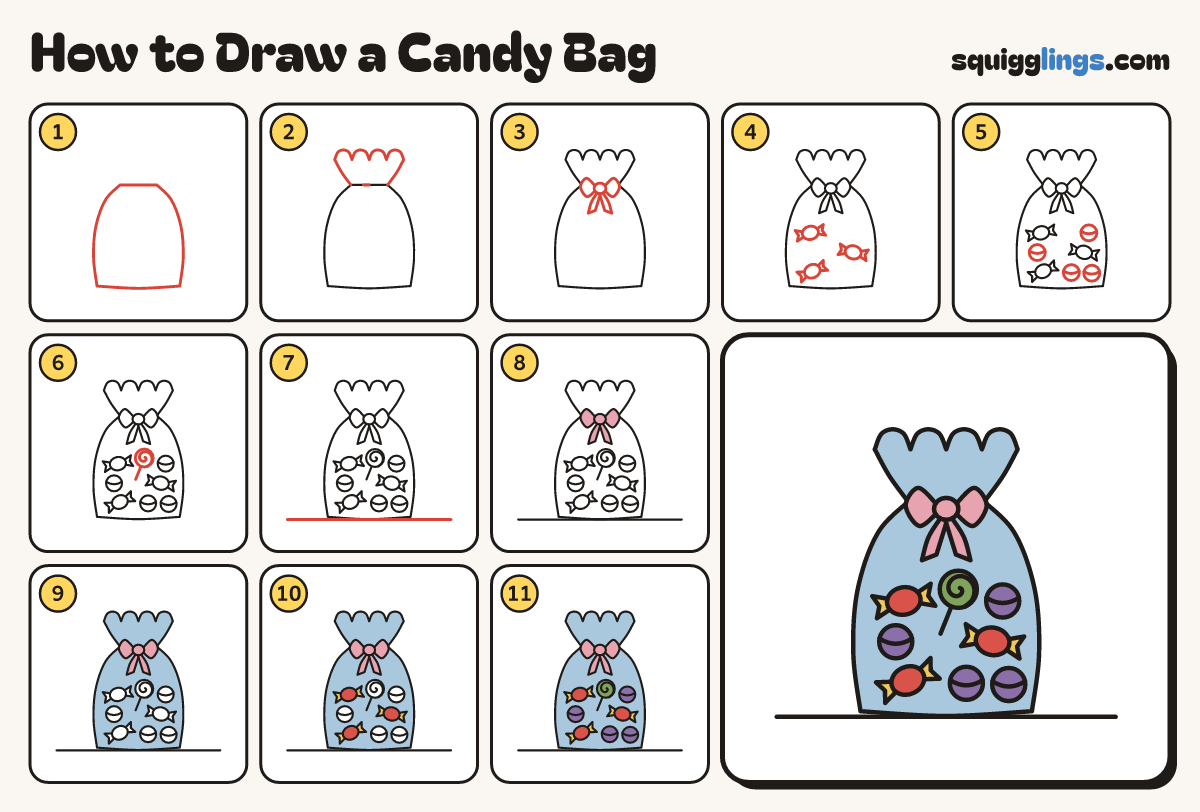
Each picture adds one red line. Draw that line, then scroll to the next picture. Rub out any dashed helper lines at the end. First up: the bag.
Step 1: The bag
In the middle of the paper, draw a tall bag. Make it fat, and pinched in near the top.
Step 2: Ruffle top
From the neck, draw the bag top fanning out. Put 4 soft bumps across it, like little clouds.
Step 3: A bow
On the neck, draw a bow: a small knot, a loop on each side and 2 short tails hanging down.
Step 4: Wrapped candies
Inside the bag, draw 3 wrapped candies with gaps between them: an oval with a twist at each end.
Step 5: Round candies
Draw 4 round candies in the gaps, not touching. Give each one a curved band across it.
Step 6: A lollipop
Under the bow, draw a round lollipop with a swirl. Its stick leans down into the gap and touches nothing.
Step 7: The ground
Draw a ground line under the bag, from well left to well right, just touching the bottom.
Step 8: Pink bow
Go over your lines. Colour the bow pink.
Step 9: Clear bag
Colour the bag and ruffle top sky blue, around the bow and the candies.
Step 10: Red and yellow candies
Colour the wrapped candies red with yellow wrappers.
Step 11: Purple and green rounds
Colour the round candies purple and the lollipop green, and your bag of candy is done!
Your finished drawing
Follow the steps above and this is where you end up: a candy bag, drawn by you.
Every step in one picture