Watch it draw itself · tap to replay
How to Draw a Fruit Basket
Draw a fruit basket in 12 easy steps, about 9 minutes. Free, with a printable worksheet.
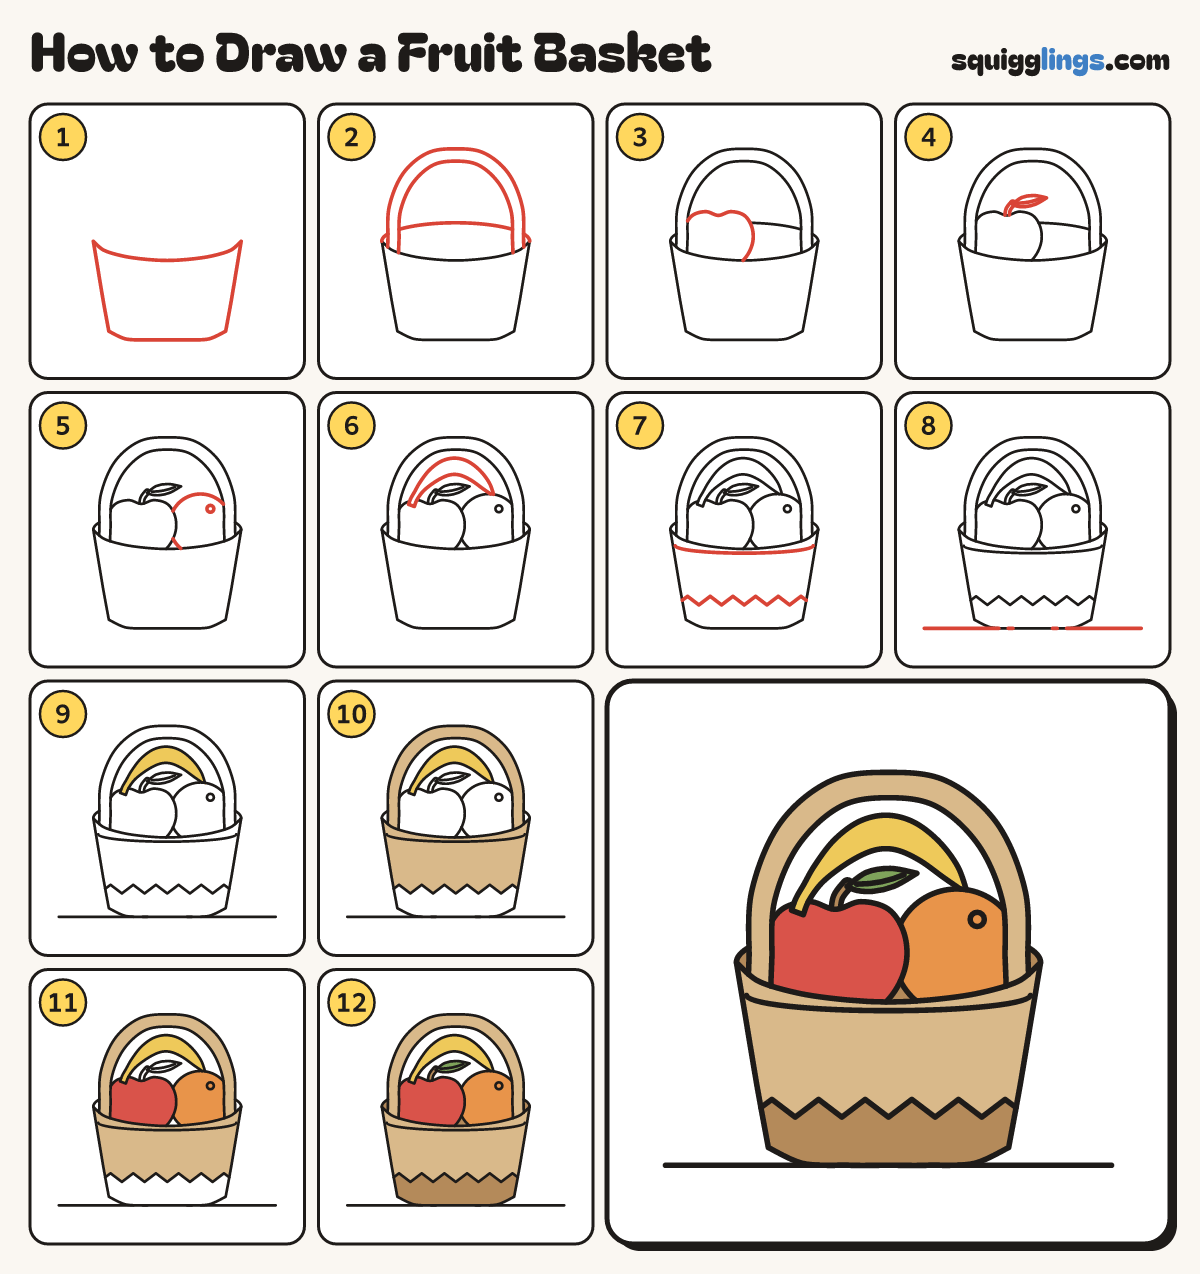
Each picture adds one red line. Draw that line, then scroll to the next picture. Rub out any dashed helper lines at the end. First up: the basket.
Step 1: The basket
In the middle draw a wide shallow smile for the rim. Draw a line down from each end, joined underneath.
Step 2: Back rim and handle
From the left end of the rim draw a low rainbow to the right end. Add a tall thick handle.
Step 3: An apple
In the basket, left of the middle, draw a big round apple with a dip on top.
Tip Only the top of the apple shows above the rim.
Step 4: Stem and leaf
From the dip draw a short stem curving up. Add a leaf pointing right, with a middle line.
Step 5: An orange
On the right draw a big round orange, from the apple round to the rim. Add a tiny navel circle.
Step 6: A banana
Draw a fat banana arching over the fruit, from a stalk on the apple to a point on the orange.
Step 7: Braid and weave
A finger under the rim, draw a smile from side to side. Lower down, add a zigzag of little mountains.
Step 8: The ground
Start near the left edge. Draw a ground line under the basket, stopping near the right edge.
Step 9: Yellow banana
Go over your lines. Colour the banana yellow.
Step 10: Tan basket and handle
Colour the handle and the basket tan, down to the zigzag.
Step 11: Red apple, orange orange
Colour the apple red around the stalk, and the orange orange.
Step 12: Green leaf, brown weave
Colour the leaf green, then the stem, the zigzag band and the inside wood brown, around the fruit.
Your finished drawing
Follow the steps above and this is where you end up: a fruit basket, drawn by you.
Every step in one picture