Watch it draw itself · tap to replay
How to Draw a Frozen Waterfall
Draw a frozen waterfall in 11 easy steps, about 8 minutes. Free, with a printable worksheet.
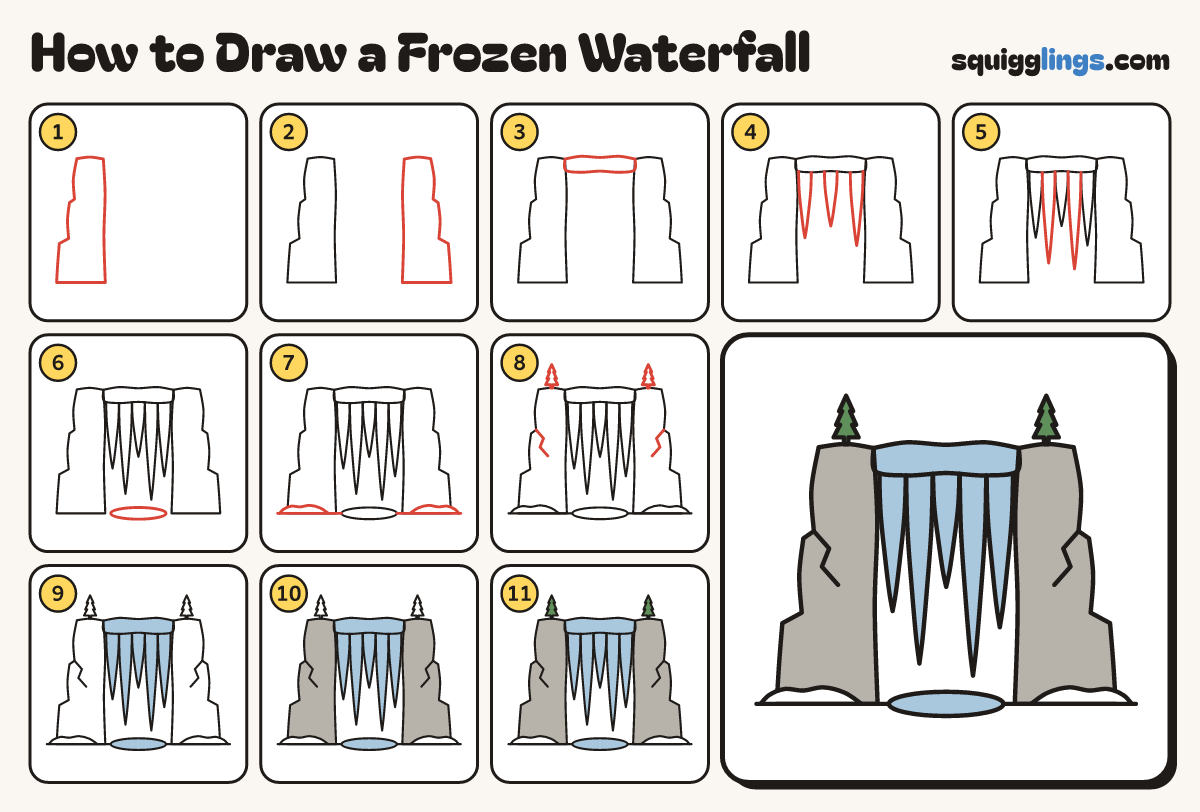
Each picture adds one red line. Draw that line, then scroll to the next picture. Rub out any dashed helper lines at the end. First up: the left cliff.
Step 1: The left cliff
On the left draw a tall rock cliff, flat on top, with 2 ledges down its left side.
Step 2: The right cliff
Draw the same cliff on the right, ledges facing out. Leave a wide gap for the waterfall.
Step 3: The frozen lip
Across the top of the gap draw a thick wavy band of ice joining the 2 cliffs.
Tip In a hard winter a waterfall can freeze into giant icicles.
Step 4: Three icicles
Under the lip draw 3 spaced-out icicles, each wide at the top with a sharp point. Middle one shortest.
Step 5: Two more icicles
In the gaps draw 2 longer icicles the same way, reaching almost to the bottom.
Step 6: The frozen pool
At the bottom, between the cliffs, draw a flat oval pool of ice that does not touch them.
Step 7: Ground and snow
Draw the ground line from edge to edge. Over each cliff's foot draw a snow mound, ending on the ground.
Step 8: Pines and cracks
Draw a pine tree on top of each cliff. Add a zigzag crack from each top ledge into the rock.
Step 9: Icy blue icicles
Colour the lip, the icicles and the pool pale sky blue, and the snow mounds white.
Step 10: Grey cliffs
Colour both cliffs grey, around the snow. Press softly so the cracks still show.
Step 11: Green pines
Colour the pine trees dark green. Go over all your lines and your frozen waterfall is done!
Your finished drawing
Follow the steps above and this is where you end up: a frozen waterfall, drawn by you.
Every step in one picture