Watch it draw itself · tap to replay
How to Draw a Jumping Fox
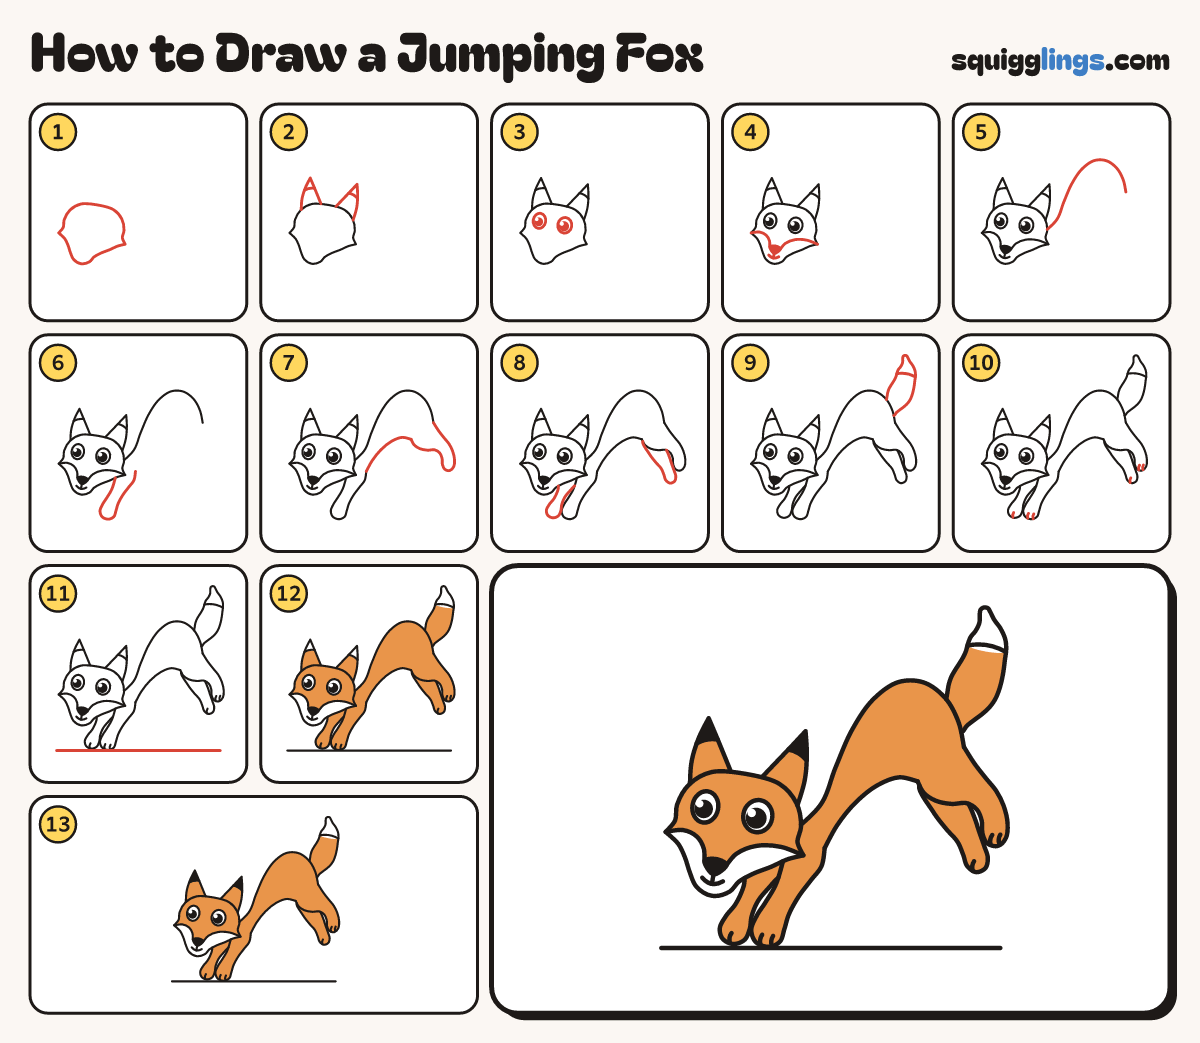
Draw a jumping fox in 13 easy steps, about 10 minutes. Free, with a printable worksheet.
Each picture adds one red line. Draw that line, then scroll to the next picture. Rub out any dashed helper lines at the end. First up: wide fox head.
Step 1: Wide fox head
On the left draw a wide head with a pointy fur tuft on each cheek and a small snout.
Tip The head tips forward: the fox is diving.
Step 2: Tall ears
On each top corner of the head draw a tall pointy ear. Draw a line across each tip.
Step 3: Big eyes
Halfway down the head draw 2 big oval eyes with black dots and tiny shines.
Step 4: Nose and cheeks
Draw a nose on the snout with a smile under it. From each cheek tuft, curve in to the nose.
Step 5: Arched back
Start on the right cheek. Draw a big arch up and over, like a rainbow. Stop at the rump.
Tip The rump is higher than the head.
Step 6: Reaching front leg
From under the head draw a leg reaching down to a paw, then up to the elbow.
Tip The leg leans forward, gets thinner and ends in a round paw.
Step 7: Tummy and back leg
From the elbow draw the tummy curving up. Then draw a back leg trailing behind, up to the rump.
Tip The back leg bends at the heel and its paw hangs in the air.
Step 8: Far legs
Draw 2 more legs peeking out: one beside the front leg, one beside the back leg.
Step 9: Bushy tail
Start on the rump. Draw a fat bushy tail pointing up to a soft tip. Add a line across it.
Step 10: Toes
Draw 2 short toe lines on each big paw and 1 on each small paw.
Step 11: Ground line
Under the front paws draw a flat ground line. It just touches the lowest paw.
Step 12: Orange fur
Colour the fox orange, around the cheeks, the ear tips and the tail tip. Leave the eyes white.
Step 13: Black ear tips
Colour the 2 ear tips black. Your jumping fox is done!
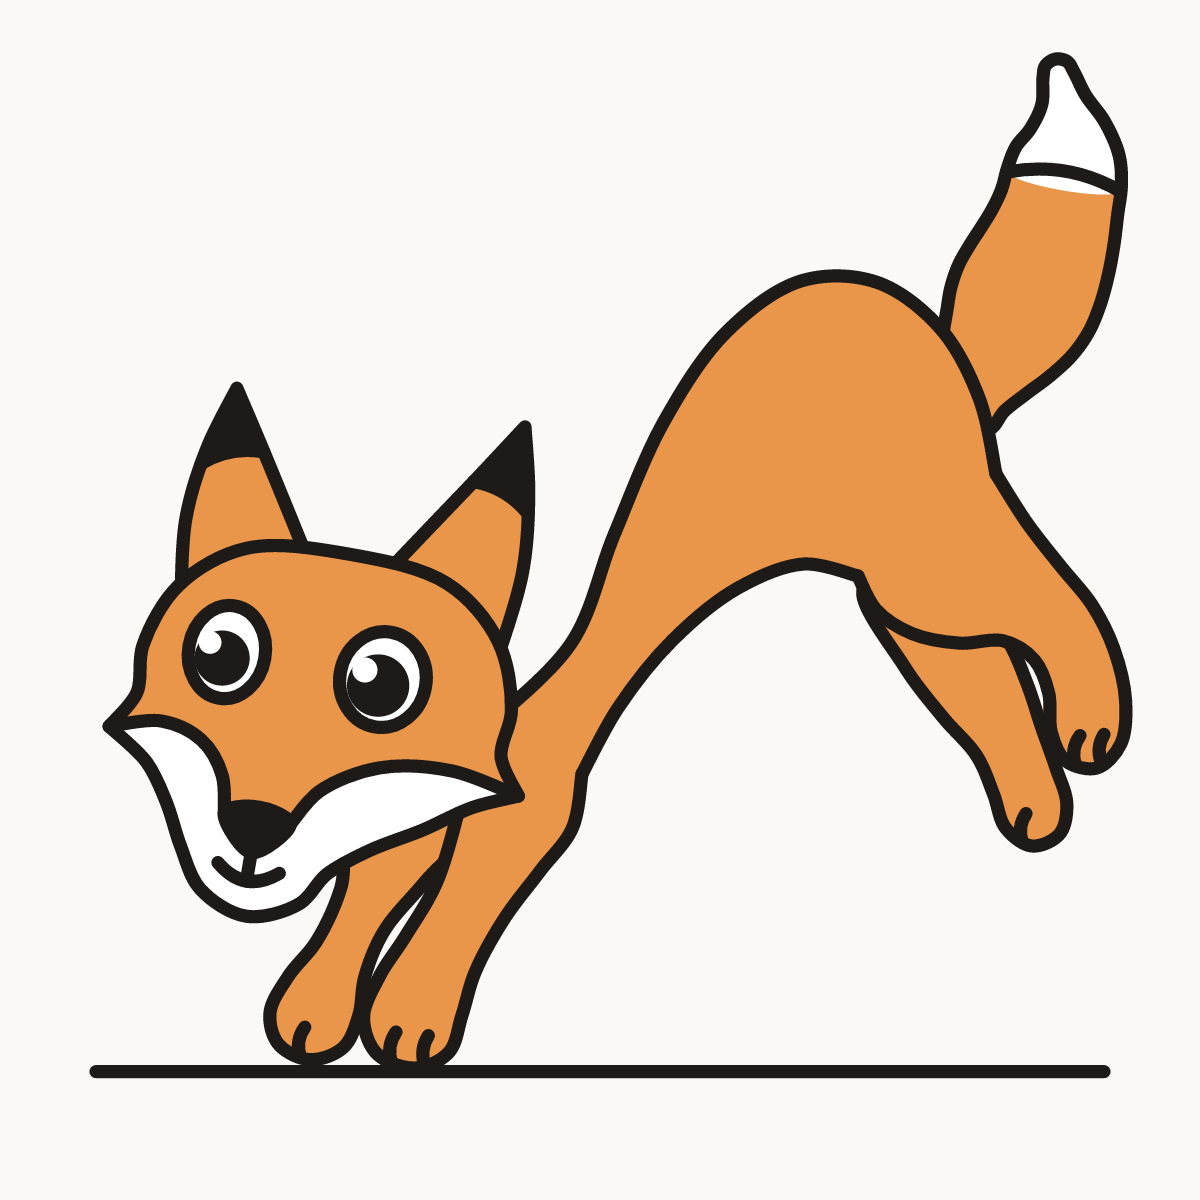
Your finished drawing
Follow the steps above and this is where you end up: a jumping fox, drawn by you.
Every step in one picture