Watch it draw itself · tap to replay
How to Draw a Forest Path
Draw a forest path in 11 easy steps, about 8 minutes. Free, with a printable worksheet.
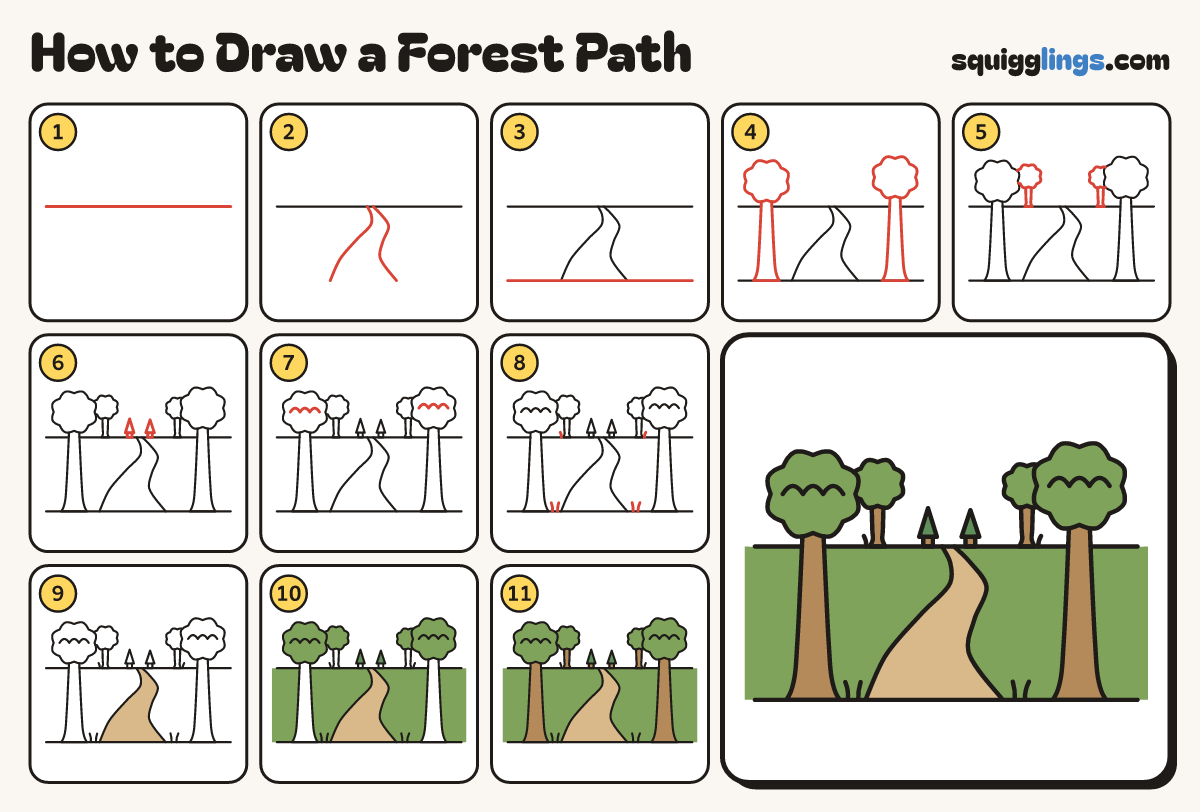
Each picture adds one red line. Draw that line, then scroll to the next picture. Rub out any dashed helper lines at the end. First up: the horizon.
Step 1: The horizon
Halfway down, draw a long straight line across the paper, almost from edge to edge.
Step 2: The path
Start bottom left. Draw a winding line up to the middle of the horizon. Do the same from bottom right.
Step 3: Near ground
Along the bottom, draw a ground line almost from edge to edge, through the 2 path ends.
Step 4: Two big trees
At each side, draw a big tree: a cloud of bumps high up, with a trunk down to the ground.
Step 5: Two smaller trees
On the horizon, each side of the path, draw a smaller tree the same way, tucked behind its big neighbour.
Step 6: Tiny pines
Each side of the path's end, draw a tiny triangle. Add a short trunk from it down to the horizon.
Step 7: Leafy hills
Inside each big tree top, halfway up, draw a row of 3 hill bumps.
Step 8: Grass
Flick 2 short grass blades up each side of the path near you, and 1 beside each smaller tree.
Step 9: Tan path
Colour the path tan, right up to the far point.
Step 10: Green grass and trees
Colour the grass green, around the path and trunks, then the tree tops. Make the tiny pines dark green.
Step 11: Wood trunks
Colour every trunk wood brown. Go over your lines and your forest path is done!
Your finished drawing
Follow the steps above and this is where you end up: a forest path, drawn by you.
Every step in one picture