Watch it draw itself · tap to replay
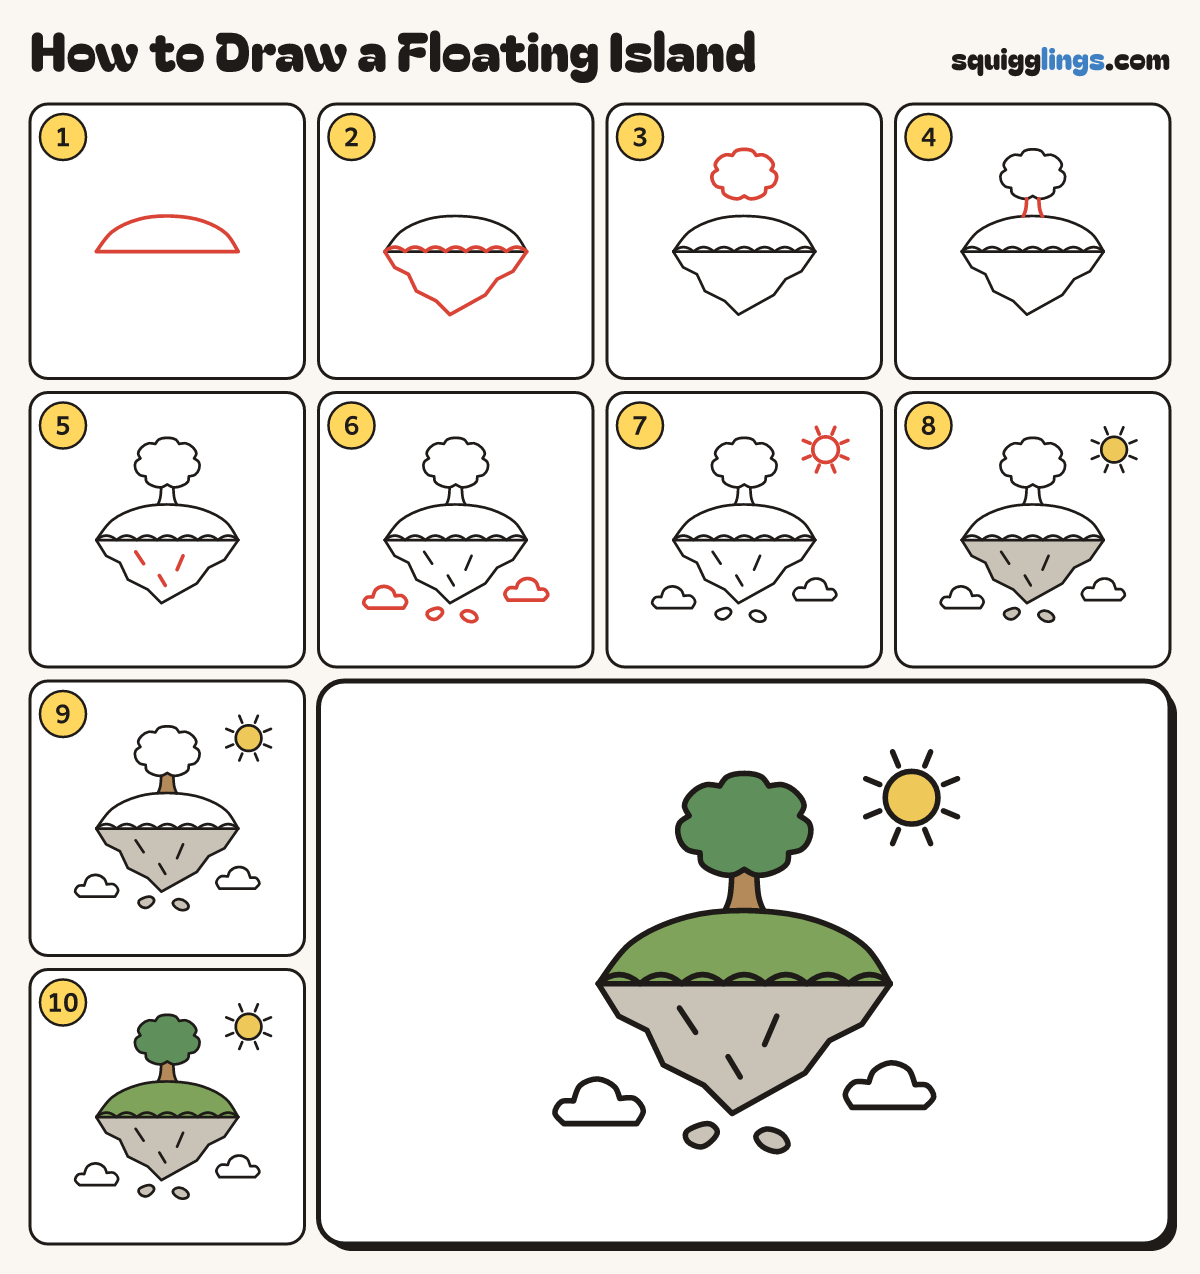
How to Draw a Floating Island
Draw a floating island in 10 easy steps, about 8 minutes. Free, with a printable worksheet.
Each picture adds one red line. Draw that line, then scroll to the next picture. Rub out any dashed helper lines at the end. First up: the grassy top.
Step 1: The grassy top
Above the middle of your paper, draw a wide low hill like a turtle's back, with a flat bottom.
Tip About 4 times as wide as it is tall.
Step 2: Grass and rock underneath
Hang grass bumps under the hill. Zigzag from the left end down to a point, then up to the right.
Tip The rock is like an upside-down mountain, about half as deep as the hill is wide.
Step 3: The leafy tree top
Above the middle of the hill, draw a round cloud of leaves: a ring of soft bumps, wider than tall.
Step 4: The trunk
From under the leaves, draw a trunk that gets wider as it goes down to the hill.
Step 5: Rock cracks
Inside the rock, draw 3 short straight cracks, keeping them away from the edges.
Step 6: Clouds and pebbles
Under the island, draw a fluffy cloud on each side. Then draw 2 lumpy pebbles floating below the rock point.
Tip They float and touch nothing: that shows everything is flying.
Step 7: The sun
In the top right corner, draw a sun as big as a plum, with 8 short rays all round it.
Step 8: Yellow sun, grey rock
Colour the sun yellow, and the rock and the 2 pebbles grey like stone.
Step 9: Brown trunk
Colour the trunk wood brown, stopping at the leaves and the grass.
Step 10: Green grass and leaves
Colour the hill top leaf green, the leaves deeper green. Leave the clouds white, and your island floats!
Your finished drawing
Follow the steps above and this is where you end up: a floating island, drawn by you.
Every step in one picture