Watch it draw itself · tap to replay
How to Draw a Rockslide
Draw a rockslide in 12 easy steps, about 9 minutes. Free, with a printable worksheet.
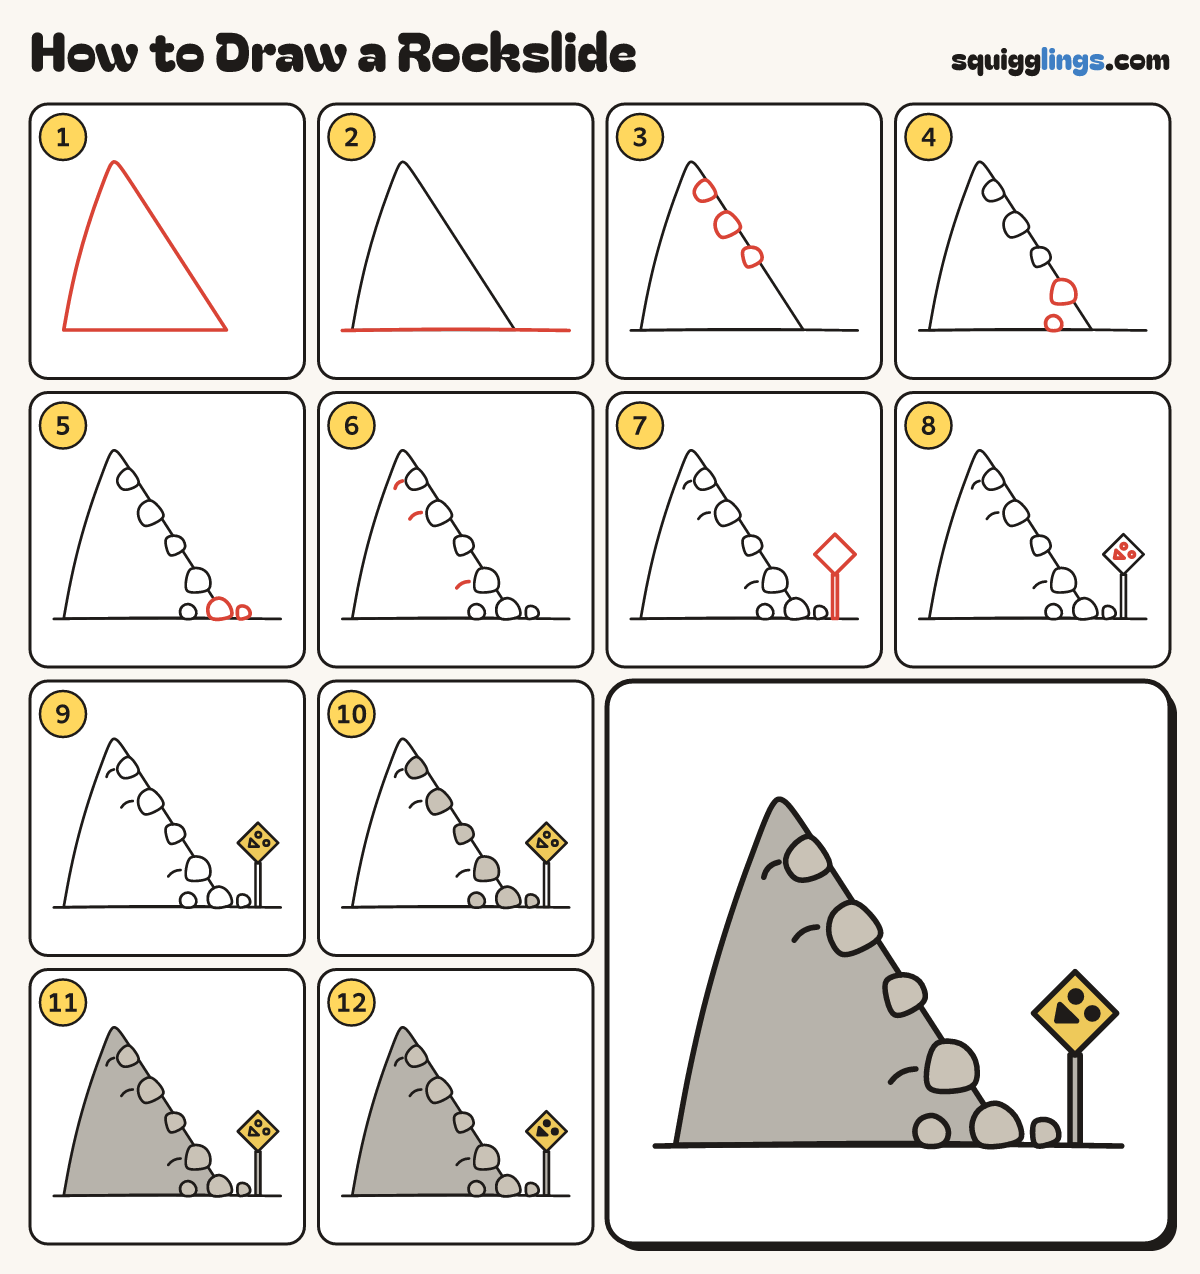
Each picture adds one red line. Draw that line, then scroll to the next picture. Rub out any dashed helper lines at the end. First up: the mountain.
Step 1: The mountain
Start low left. Draw up to a round peak, down the long steep side, then back along the bottom.
Tip A rockslide is loose rocks tumbling down a mountain.
Step 2: The ground
Draw the ground line across the bottom of the paper, under the mountain.
Step 3: 3 boulders
On the steep right slope draw 3 tumbling boulders, lumpy round rocks of different sizes, sitting across the slope line.
Step 4: 2 more boulders
Draw one bigger boulder further down the slope, and a small one that has rolled onto the ground.
Step 5: Boulders at the bottom
Draw 2 boulders that have already landed, sitting on the ground in front of the slope.
Step 6: Motion lines
Draw a short curved line up the slope behind 3 of the tumbling boulders to show them moving.
Step 7: A warning sign
On the right, beside the mountain, draw a tall post with a diamond sign on top.
Step 8: Falling rocks picture
Inside the sign draw a little mountain, with 2 small rocks tumbling off its right side.
Step 9: Yellow sign
Go over your lines. Colour the sign yellow, around the little mountain and rocks.
Step 10: Stone boulders
Colour all the boulders a light stone grey.
Step 11: Grey mountain
Colour the mountain and the post grey, around the boulders.
Step 12: Black falling rocks
Colour the little mountain and rocks on the sign black. Your rockslide is done!
Your finished drawing
Follow the steps above and this is where you end up: a rockslide, drawn by you.
Every step in one picture