Watch it draw itself · tap to replay
How to Draw a Flag
Draw a flag in 9 easy steps, about 7 minutes. Free, with a printable worksheet.
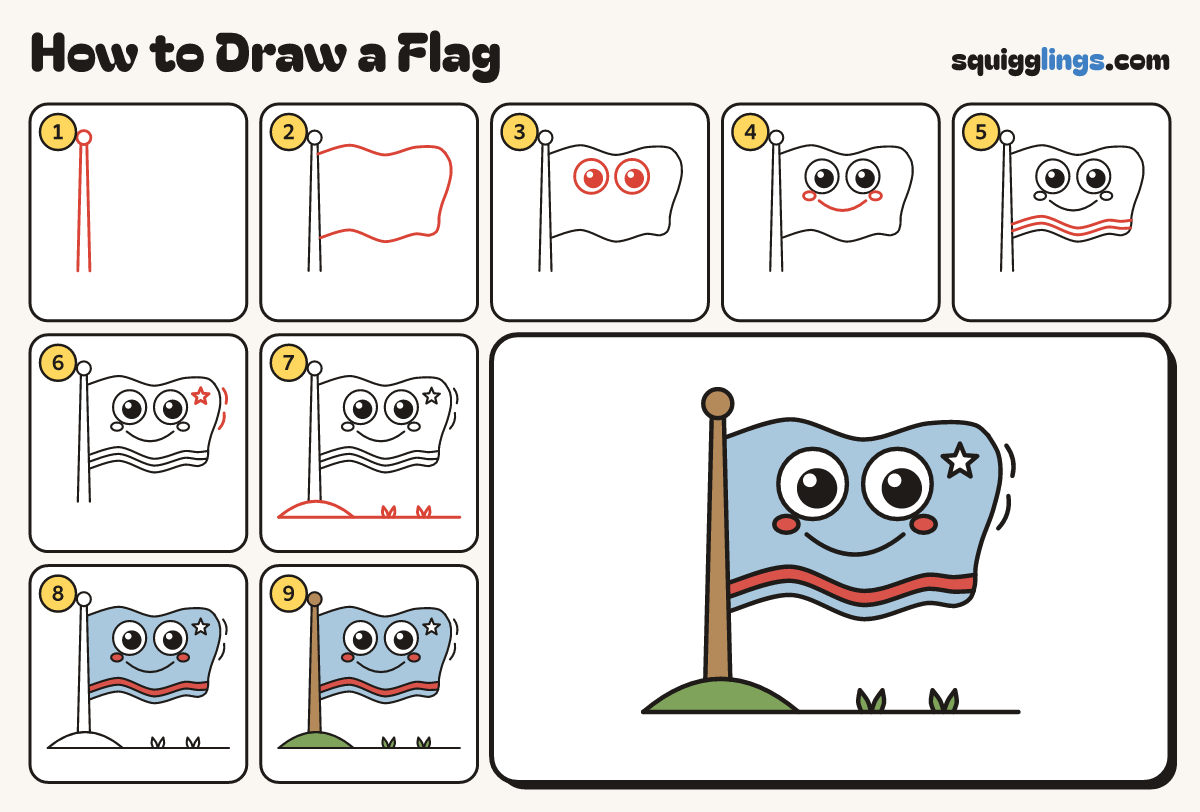
Each picture adds one red line. Draw that line, then scroll to the next picture. Rub out any dashed helper lines at the end. First up: knob and pole.
Step 1: Knob and pole
Top left: draw a small circle. Start under it and draw 2 long pole lines. Stop near the bottom.
Tip Leave the whole right side empty: the flag is big.
Step 2: The cloth
Start under the knob. Draw a wavy line out, a soft S down, and wave back to the pole.
Step 3: Two big eyes
In the middle of the cloth draw 2 big round eyes almost touching. Add black dots with a shine.
Tip Make the eyes huge: together they fill half the cloth.
Step 4: Smile and cheeks
Start under the left eye. Draw a big U smile and stop under the right eye. Add 2 cheeks.
Step 5: Wavy stripe
Start on the pole under the smile. Draw 2 wavy lines a finger apart and stop on the flapping edge.
Step 6: Star and flutter lines
In the top right of the cloth draw a 5-point star. Outside the flapping edge draw 2 short curved lines.
Step 7: Grass hill and ground
From the left, draw a hill through the pole ends, then a line to the right. Add 2 grass tufts.
Tip The hill runs through the pole ends, so the pole stands in the ground.
Step 8: Sky cloth, red stripe
Colour the cloth sky blue, leaving the stripe, cheeks, eyes and star white. Colour the stripe and cheeks red.
Step 9: Green hill, wooden pole
Colour the pole and knob brown like wood. Colour the hill and grass green.
Your finished drawing
Follow the steps above and this is where you end up: a flag, drawn by you.
Every step in one picture