Watch it draw itself · tap to replay
How to Draw a Fist Bump
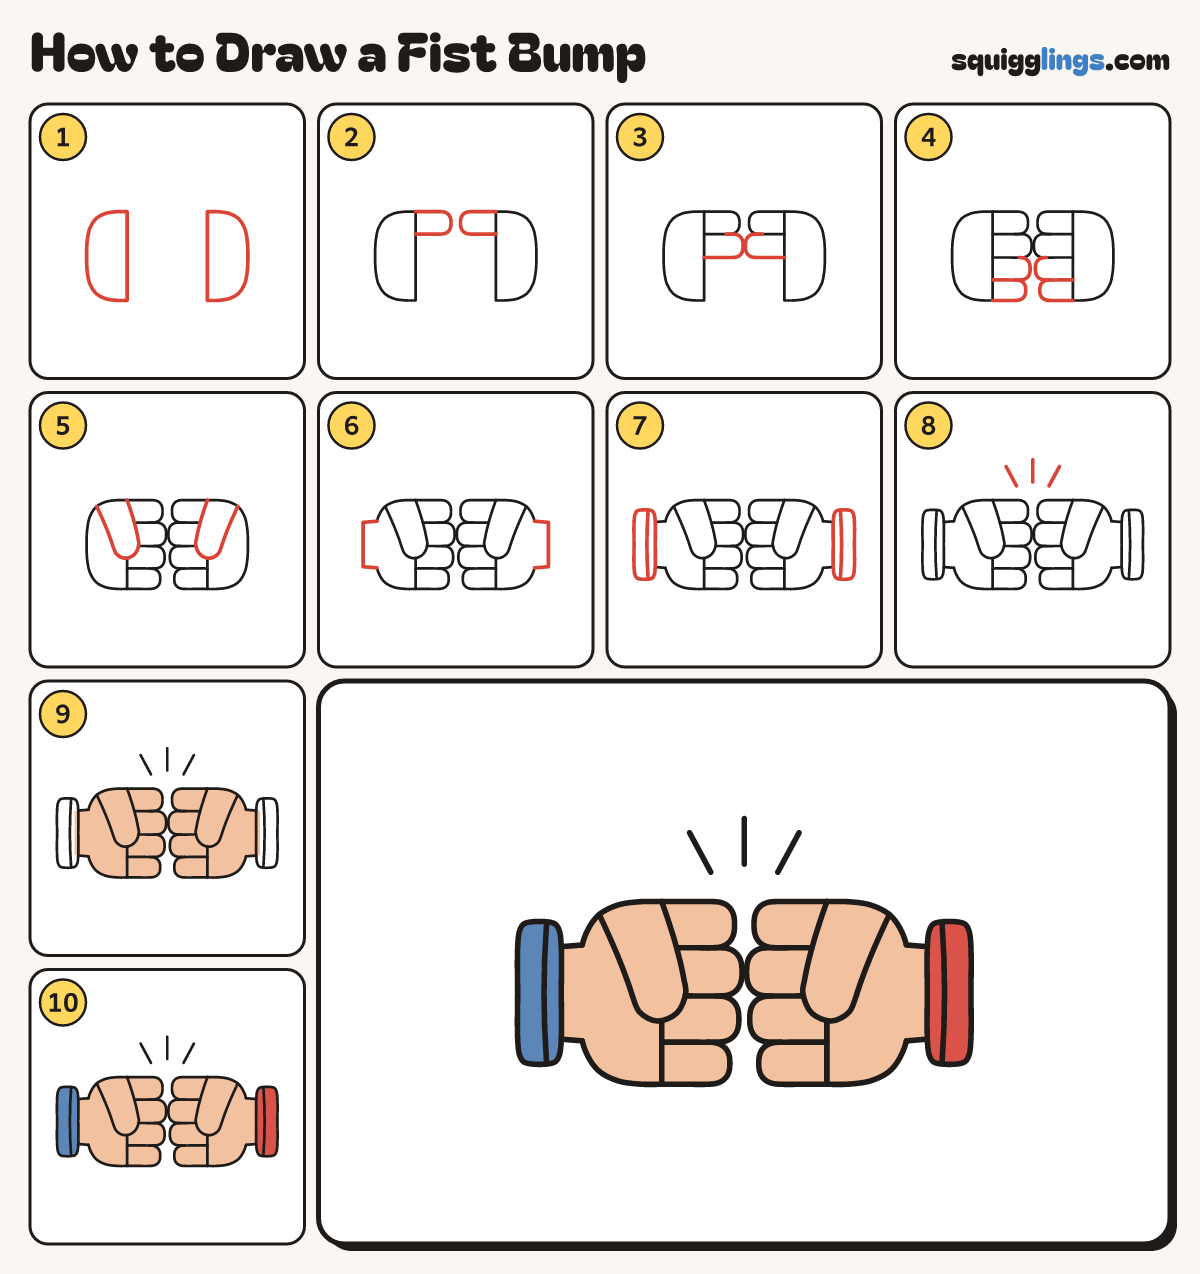
Draw a fist bump in 10 easy steps, about 8 minutes. Free, with a printable worksheet.
Each picture adds one red line. Draw that line, then scroll to the next picture. Rub out any dashed helper lines at the end. First up: two palms.
Step 1: Two palms
Draw 2 pockets on their sides, flat edges facing each other. Leave a wide gap for the fingers.
Tip Each pocket is flat towards the middle and round towards the edge of the paper.
Step 2: Top fingers
On each flat edge start at the top. Draw a fat finger towards the middle and back to the edge.
Step 3: Longest fingers
Start on the side of each top finger. Draw a longer finger under it. Stop on the flat edge.
Tip The 2 long fingertips touch in the middle: that is the bump.
Step 4: Two more fingers
Start on the last finger each time. Draw 2 more fingers on each hand. Stop at the pocket's corner.
Step 5: The thumbs
Start on each pocket's top edge. Draw a fat thumb down across 2 fingers. Stop back on the edge.
Tip Rub out the lines under each thumb.
Step 6: The wrists
From the round side of each pocket draw 2 wrist lines out. Rub out the pocket line between them.
Step 7: Sleeve cuffs
Where each wrist stops draw a soft tall cuff. Add a line down it near the hand.
Step 8: Bump lines
Above the 2 fists draw 3 short straight lines fanning up, for the bump.
Step 9: Peach fists
Colour both fists peach: the fingers, the thumbs, the pockets and the wrists.
Step 10: Blue and red cuffs
Colour the left cuff blue and the right cuff red. Go over your lines. Your fist bump is done!
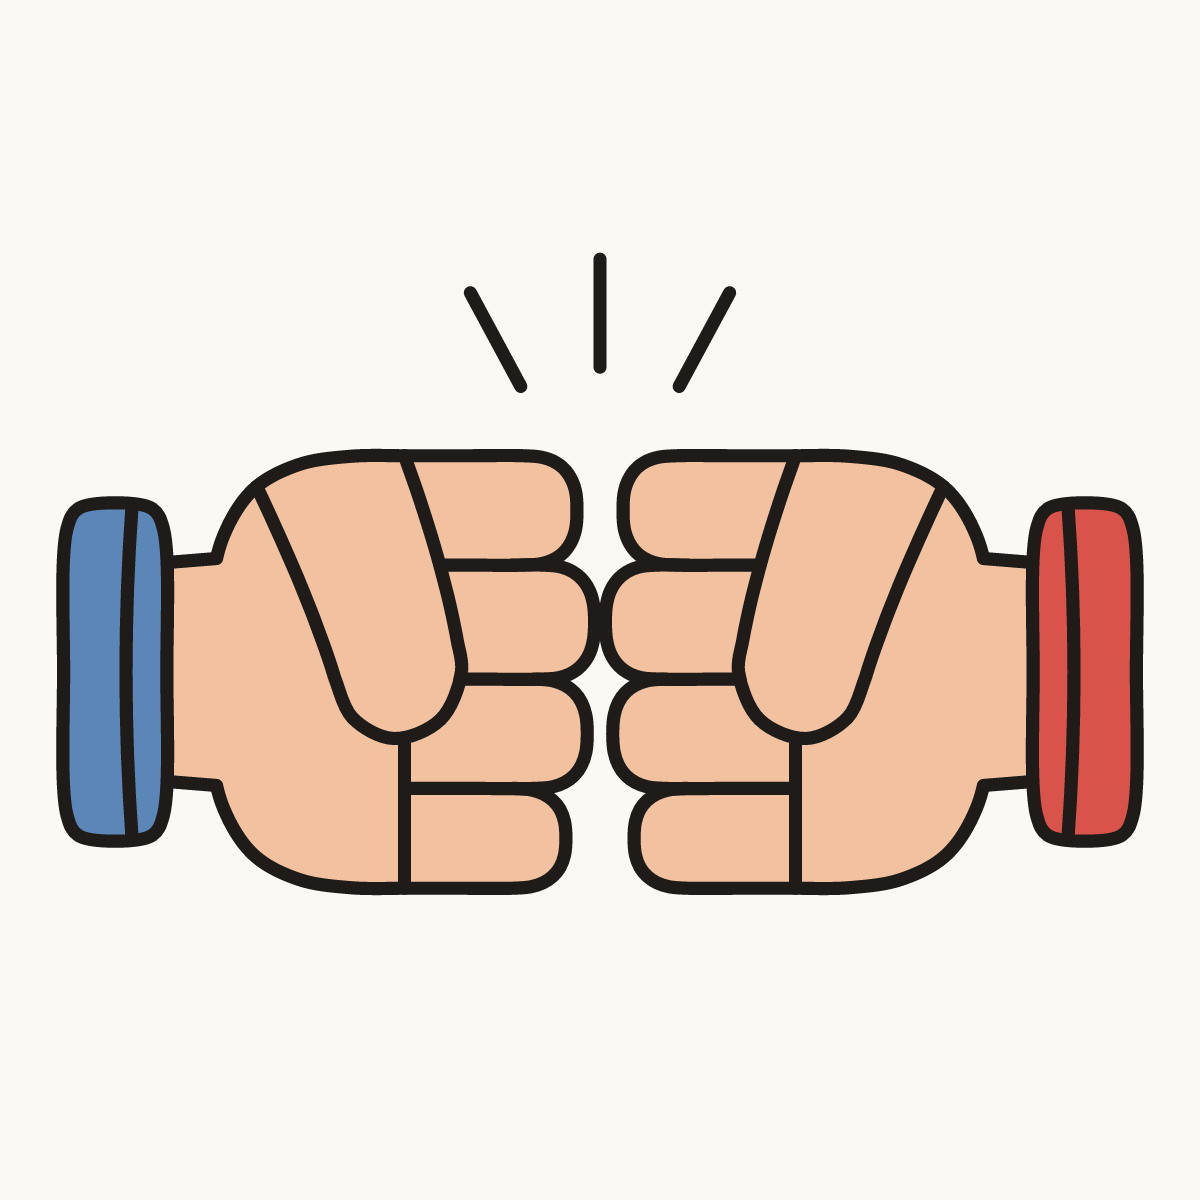
Your finished drawing
Follow the steps above and this is where you end up: a fist bump, drawn by you.
Every step in one picture