Watch it draw itself · tap to replay
How to Draw a Fish Hook
Draw a fish hook in 10 easy steps, about 8 minutes. Free, with a printable worksheet.
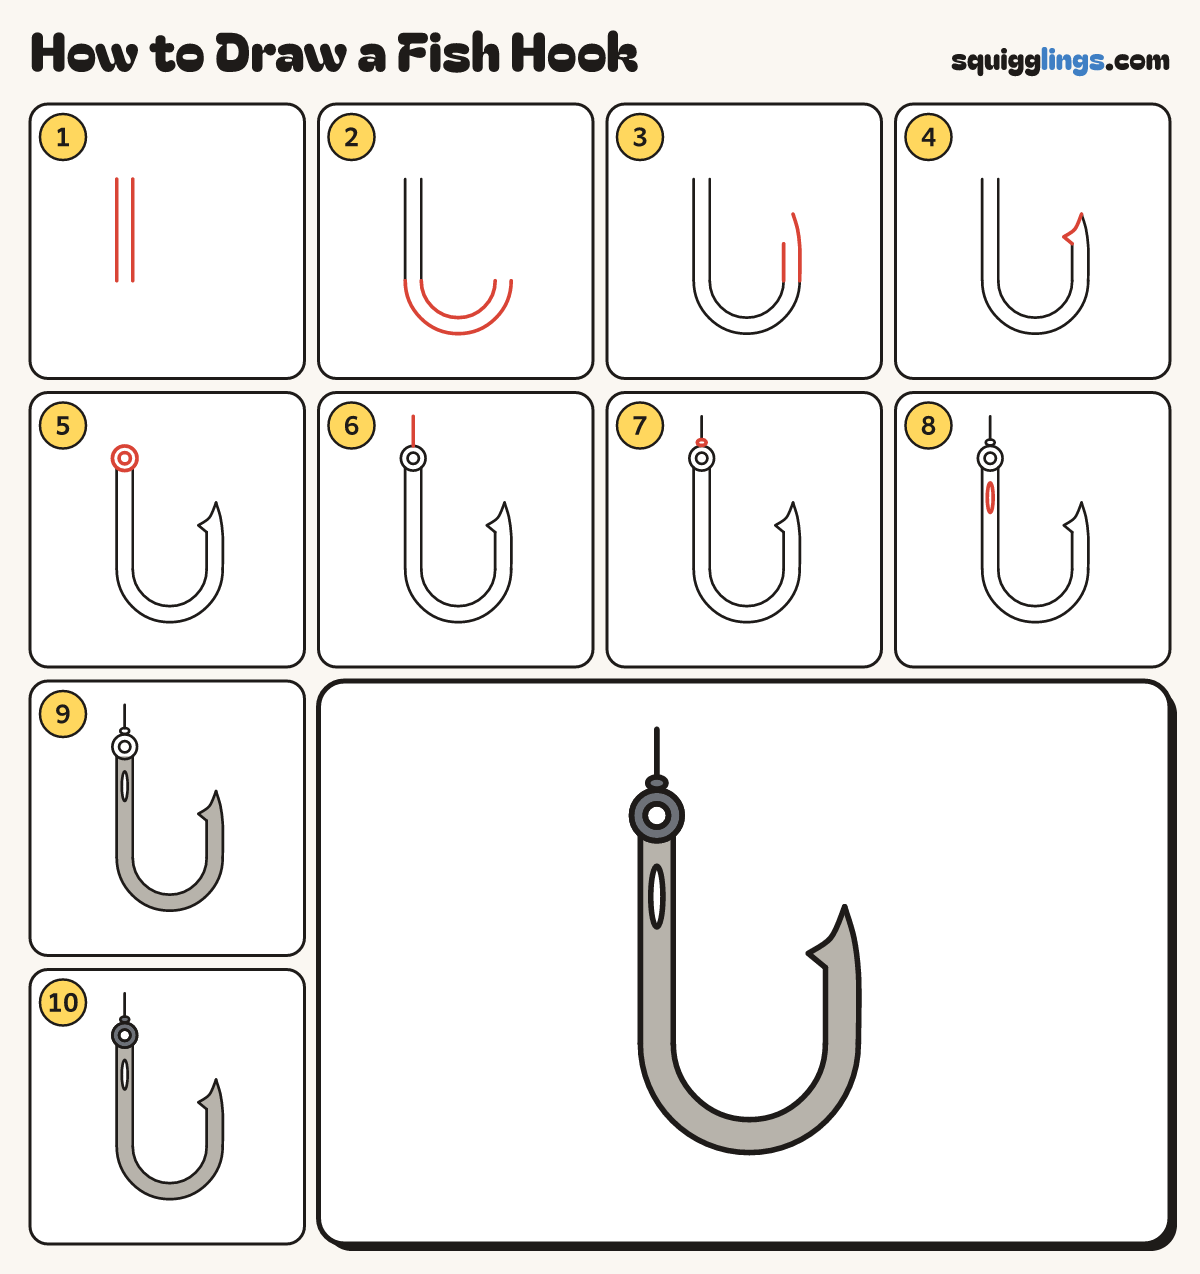
Each picture adds one red line. Draw that line, then scroll to the next picture. Rub out any dashed helper lines at the end. First up: the straight part.
Step 1: The straight part
Left of the middle, start near the top. Draw 2 lines straight down, a finger apart. Stop below the middle.
Step 2: The bend
From the left line draw a big U round to the right. From the right line add a smaller U.
Tip The bend is the round bottom of the J.
Step 3: The point
From the big U's end draw up to a sharp point. Draw a shorter line up from the small U.
Step 4: The barb
From the top of the inner line draw a little thorn spike, then back up to meet the point.
Tip The barb stops a fish slipping off.
Step 5: The eye
On top of the straight part draw a ring: a circle with a smaller circle inside for the hole.
Step 6: The line
From the top of the eye draw 1 line straight up, stopping just short of the top edge.
Step 7: The knot
Right on top of the eye draw a small oval across the line for the knot.
Step 8: A shine
In the middle of the straight part, near the top, draw a thin tall oval for a shine.
Step 9: Colour the hook grey
Go over your lines, then colour the whole hook grey, leaving the shine white.
Step 10: Dark eye and knot
Colour the ring of the eye and the knot dark grey, leaving the hole white.
Your finished drawing
Follow the steps above and this is where you end up: a fish hook, drawn by you.
Every step in one picture