Watch it draw itself · tap to replay
How to Draw a Snowman Face
Draw a snowman face in 10 easy steps, about 8 minutes. Free, with a printable worksheet.
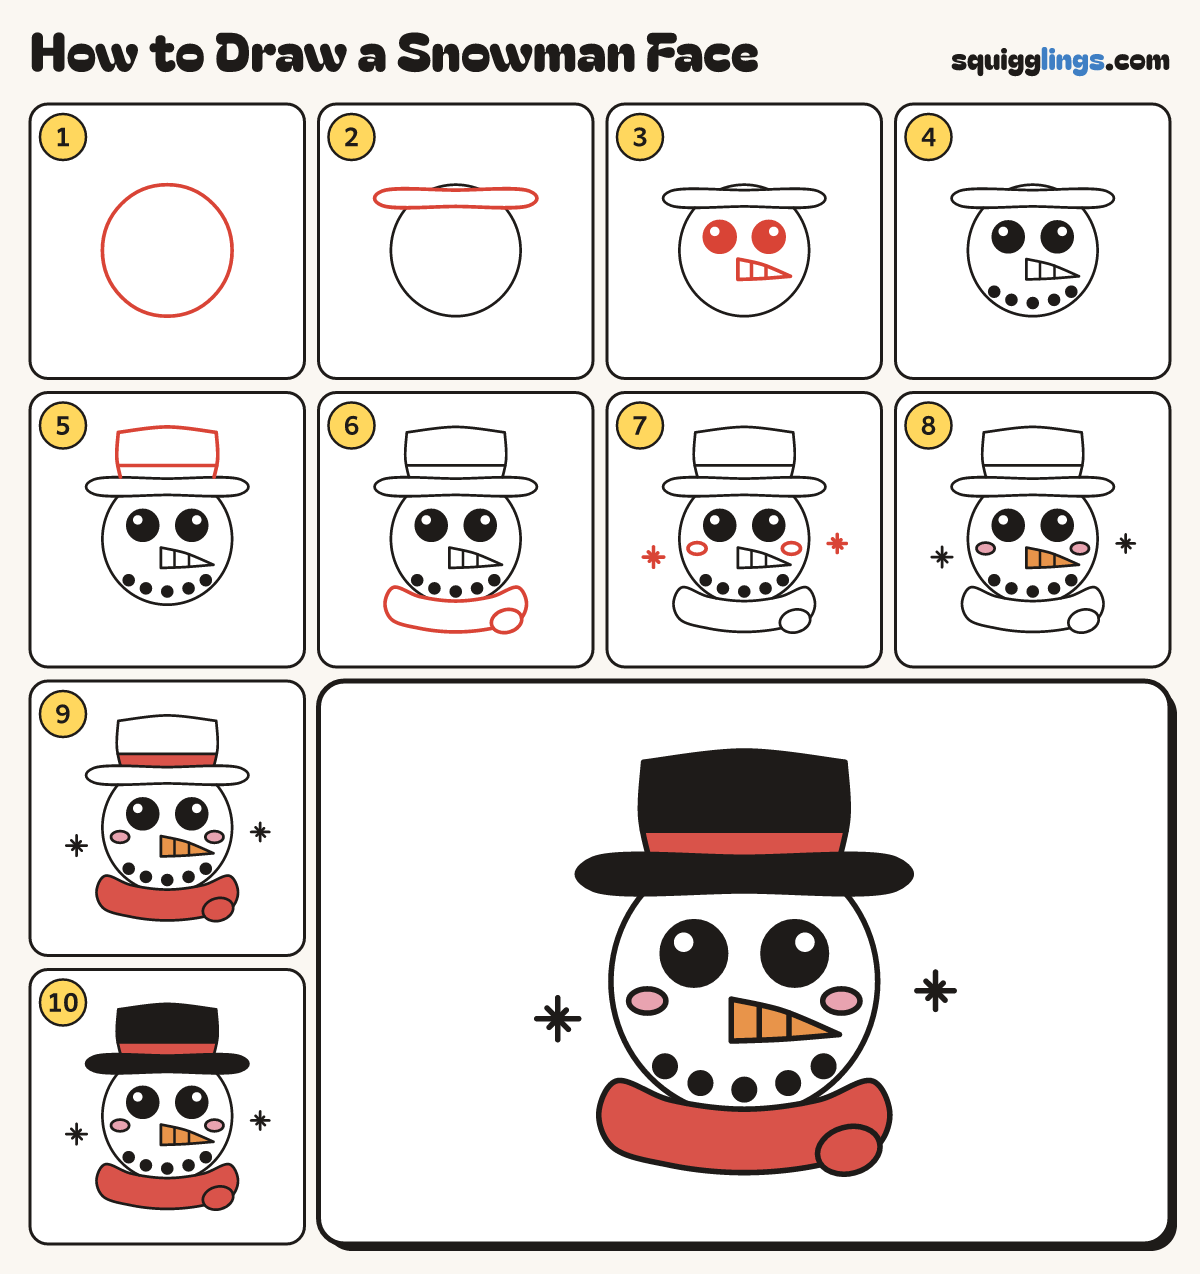
Each picture adds one red line. Draw that line, then scroll to the next picture. Rub out any dashed helper lines at the end. First up: the head.
Step 1: The head
Draw a big round head near the top of your paper, leaving room above for a tall hat.
Tip Snow is soft, so your circle does not have to be perfect.
Step 2: The hat brim
Across the top of the head, draw a flat brim like a long thin pill, sticking out past both sides.
Step 3: Coal eyes, carrot nose
High on the head, draw 2 big black coal eyes. Under them, draw a pointy carrot nose pointing right.
Tip The carrot is 2 eyes long, with a gap before the right eye.
Step 4: A coal smile
Under the nose, draw 5 black coal dots in a row that curves up at the ends, like a grin.
Tip The middle dot is lowest, the end dots highest.
Step 5: Tall hat and band
Draw a tall hat up from the brim, over and down. Add a band line across, just above the brim.
Step 6: The scarf
Under the chin, draw a scarf band like a wide smile, closed underneath. Add a knot at the right end.
Step 7: Cheeks and snowflakes
Draw a small oval cheek low on each side of the face, and 2 little star snowflakes beside the head.
Step 8: Pink cheeks, orange nose
Colour the cheeks pink and the carrot nose orange.
Step 9: Red scarf and band
Colour the scarf, the knot and the hat band red. Leave the snow white.
Step 10: Black hat
Colour the hat black around the red band, and your snowman face is done!
Your finished drawing
Follow the steps above and this is where you end up: a snowman face, drawn by you.
Every step in one picture