Watch it draw itself · tap to replay
How to Draw Clogs
Draw clogs in 13 easy steps, about 10 minutes. Free, with a printable worksheet.
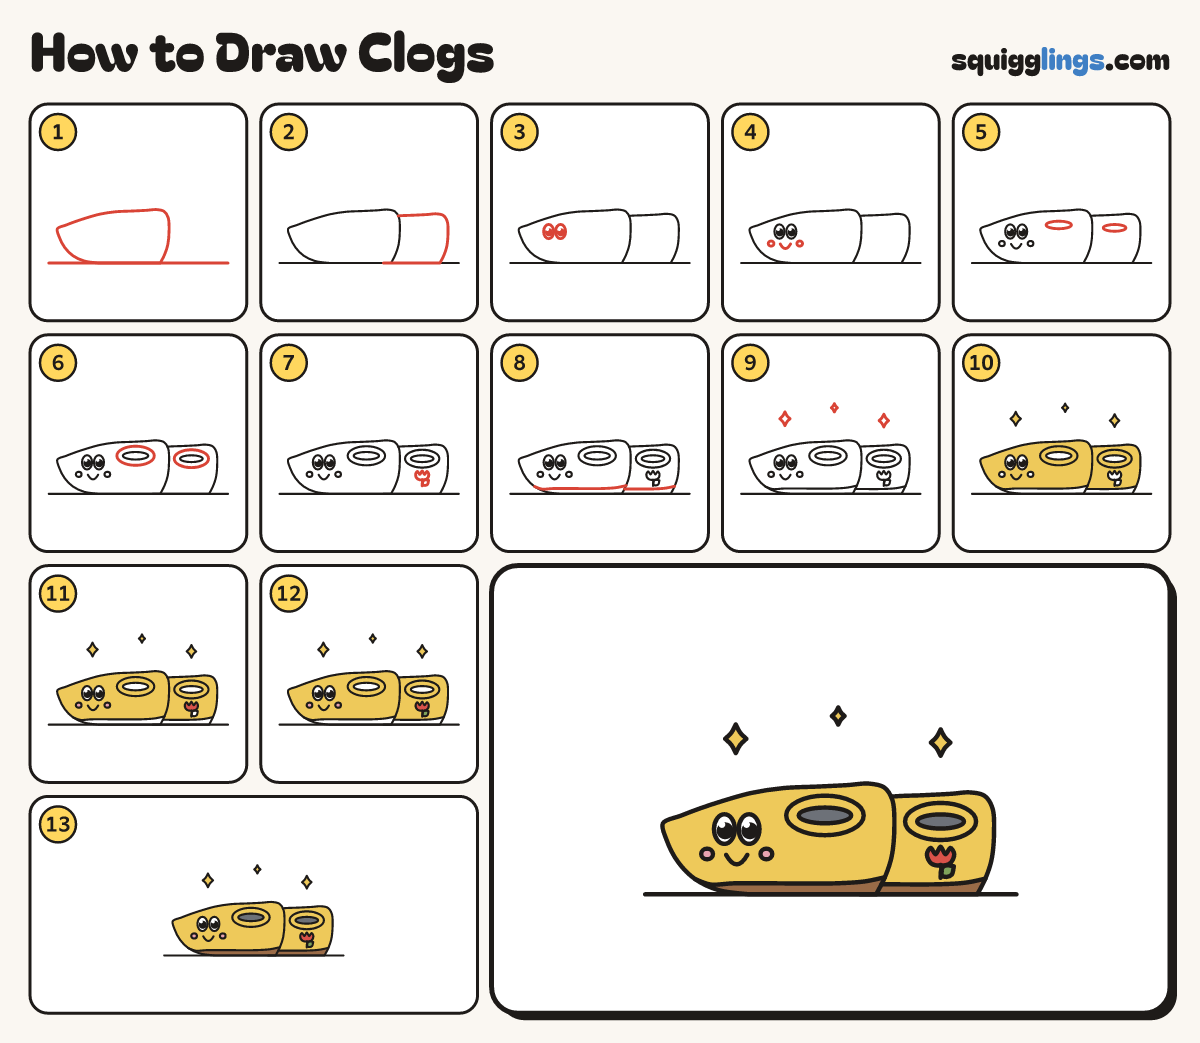
Each picture adds one red line. Draw that line, then scroll to the next picture. Rub out any dashed helper lines at the end. First up: ground and first clog.
Step 1: Ground and first clog
Draw a ground line near the bottom. On the left draw a wooden clog with a low pointy toe.
Tip Make the heel the tallest part of the clog.
Step 2: The second clog
Behind the first clog, to the right, draw a slightly smaller clog. Only its back half shows.
Tip Both clogs point the same way, like a pair by the door.
Step 3: Two big eyes
Draw 2 big egg eyes on the front clog. Add a black dot and a shine in each.
Step 4: Smile and cheeks
Under the eyes draw a small U smile. Add a little oval cheek beside each end.
Step 5: The foot holes
On the top of each clog, near the heel, draw a long flat oval for the foot hole.
Step 6: Thick rims
Around each foot hole draw a bigger oval for the thick wooden edge.
Step 7: A painted tulip
On the side of the back clog draw a small tulip: 3 pointed petals, a short stem and 1 leaf.
Step 8: Sole stripes
On each clog, start on the toe just above the ground. Draw a line along the bottom to the heel.
Step 9: Sparkles
Draw a sparkle star above each clog and a small one between them.
Step 10: Yellow wood and sparkles
Go over your lines, then colour the clogs and sparkles yellow, going round the eyes, cheeks, holes, tulip and soles.
Step 11: Pink cheeks, red tulip
Colour the cheeks pink and the tulip red.
Step 12: Green leaf
Colour the tulip leaf green.
Step 13: Grey holes, brown soles
Colour the foot holes grey and the soles under the stripes brown, and your clogs are done!
Your finished drawing
Follow the steps above and this is where you end up: clogs, drawn by you.
Every step in one picture