Watch it draw itself · tap to replay
How to Draw a Fingerprint
Draw a fingerprint in 11 easy steps, about 8 minutes. Free, with a printable worksheet.
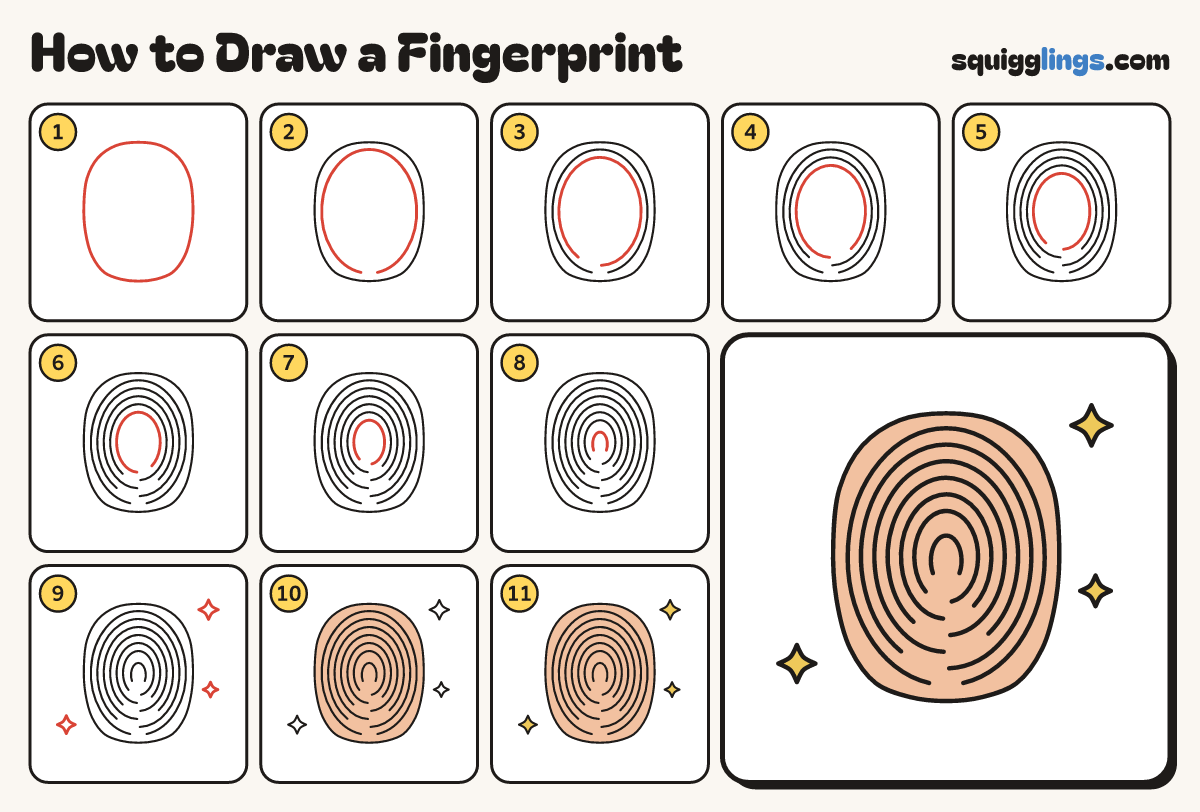
Each picture adds one red line. Draw that line, then scroll to the next picture. Rub out any dashed helper lines at the end. First up: fingertip shape.
Step 1: Fingertip shape
In the middle, draw a tall soft oval like your thumb tip, a little flatter at the bottom.
Step 2: Outer ridge
Just inside the oval, start at the bottom. Loop up over the top and back down, leaving a small gap.
Step 3: Second ridge
Inside it, draw a smaller loop the same way, with its gap a little to the left.
Step 4: Third ridge
Inside that, draw another loop the same way, with its gap a little to the right.
Step 5: Fourth ridge
Inside that, draw a smaller loop, keeping the lines close. Put its gap to the left.
Step 6: Fifth ridge
Inside that, draw a little loop with its gap to the right.
Step 7: Inner ridge
Inside that, draw one more little loop with its gap to the left.
Step 8: The core
In the very middle, draw a tiny upside-down U for the core.
Step 9: Sparkles
Draw 3 small sparkle stars: 2 on the right and 1 at the bottom left, not touching the print.
Step 10: Peach print
Go over your lines, then colour the whole fingerprint peach.
Step 11: Yellow stars
Colour the 3 stars yellow. Your fingerprint is done!
Your finished drawing
Follow the steps above and this is where you end up: a fingerprint, drawn by you.
Every step in one picture