Watch it draw itself · tap to replay
How to Draw a Xylophone
Draw a xylophone in 13 easy steps, about 10 minutes. Free, with a printable worksheet.
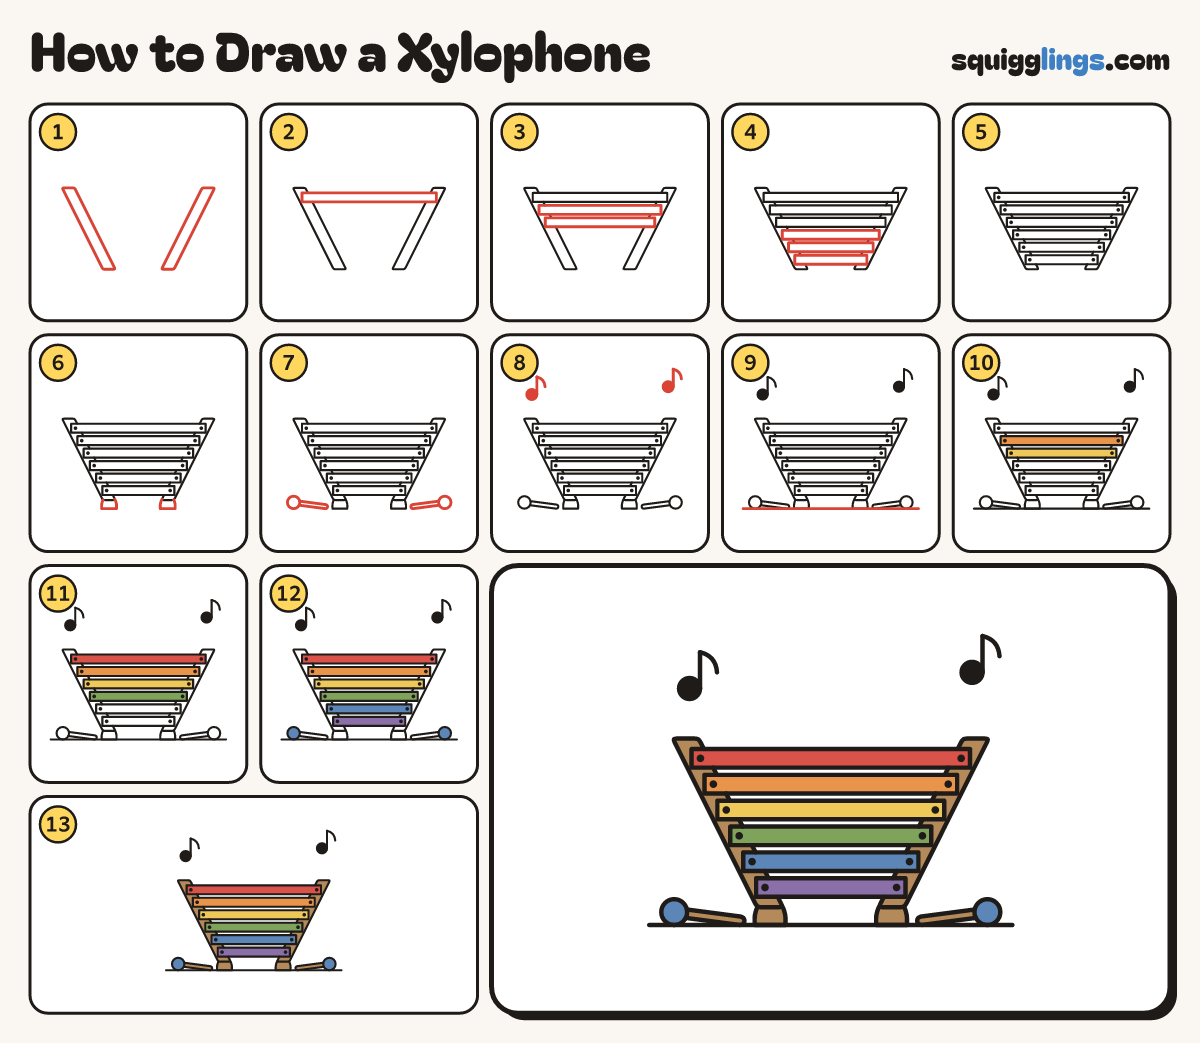
Each picture adds one red line. Draw that line, then scroll to the next picture. Rub out any dashed helper lines at the end. First up: two rails.
Step 1: Two rails
In the middle of your paper draw 2 long thin rails, wide apart at the top, closer at the bottom.
Step 2: The longest bar
Near the top draw a long flat bar lying across both rails, ending on the middle of each one.
Tip Rub out the rail lines inside the bar, so it lies on top.
Step 3: Two more bars
Under it draw 2 more bars across the rails, each a little shorter than the one above, a finger apart.
Step 4: Three more bars
Draw 3 more bars under those, each shorter again, so they make a staircase on both sides.
Step 5: Pins
On each bar put a little dot over each rail, for the pins that hold it on.
Step 6: Two round feet
Under the bottom end of each rail draw a small round foot, like half a bun.
Step 7: Two mallets
Low down beside each foot draw a mallet lying down: a round ball on the outside and a thin stick.
Tip Keep the bottoms of the balls level with the feet, so the mallets lie on the ground.
Step 8: Music notes
Draw a music note floating on each side: a black dot with a stem up and a little flag.
Step 9: The ground
Start out on the left. Draw a long straight ground line under the feet and mallets. Stop on the right.
Step 10: Yellow and orange bars
Go over your lines, then colour the third bar yellow and the second bar orange.
Step 11: Green and red bars
Colour the fourth bar green and the top bar red.
Step 12: Blue and purple bars
Colour the fifth bar blue, the bottom bar purple and the mallet balls blue.
Step 13: Wood rails
Colour the rails, the feet and the mallet sticks wood brown, around the bars. Ready to play!
Your finished drawing
Follow the steps above and this is where you end up: a xylophone, drawn by you.
Every step in one picture