Watch it draw itself · tap to replay
How to Draw a Fidget Toy
Draw a fidget toy in 12 easy steps, about 9 minutes. Free, with a printable worksheet.
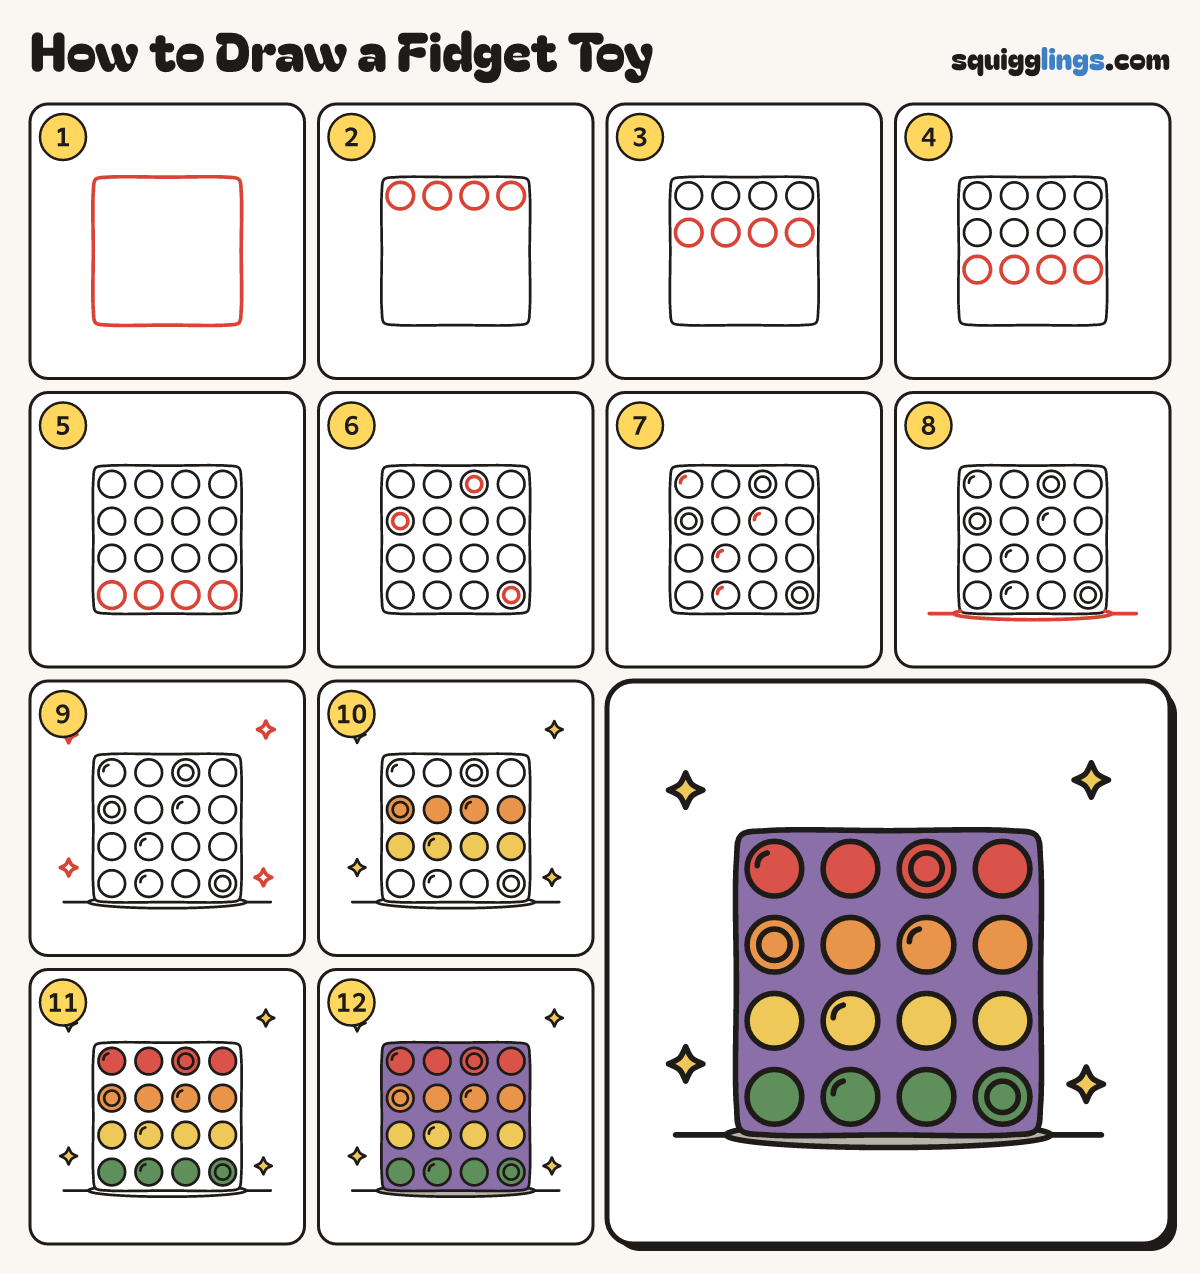
Each picture adds one red line. Draw that line, then scroll to the next picture. Rub out any dashed helper lines at the end. First up: the board.
Step 1: The board
In the middle, draw a big square with softly rounded corners, about 2 hands wide.
Tip A pop-it is a soft square full of bubbles you push in and out.
Step 2: Top row of bubbles
Inside the square, near the top, draw a row of 4 round bubbles, evenly spaced, each a thumb wide.
Step 3: Second row
Under them, draw another row of 4 bubbles the same size, lined up under the first.
Step 4: Third row
Draw a third row of 4 bubbles under those.
Step 5: Bottom row
Draw the last row of 4 bubbles near the bottom, so you have 4 rows of 4.
Step 6: Popped bubbles
Pick 3 bubbles, not side by side. Draw a smaller circle inside each to show it is popped.
Tip Popped bubbles dip in, so they get a little ring inside.
Step 7: Shines
On 4 other bubbles, draw a tiny curved shine near the top-left edge, like a little rainbow.
Step 8: Shadow and ground
Draw a flat oval shadow under the square. From each end of it, draw a ground line out sideways.
Step 9: Sparkles
Add 4 little sparkle stars around the pop-it, not touching it or the ground.
Step 10: Yellow and orange
Colour the third row and the sparkles yellow, then the second row orange.
Step 11: Red and green rows
Colour the top row red and the bottom row green.
Step 12: Grey shadow, purple board
Colour the shadow grey, then the board purple around every bubble. Your pop-it is ready to pop!
Your finished drawing
Follow the steps above and this is where you end up: a fidget toy, drawn by you.
Every step in one picture