Watch it draw itself · tap to replay
How to Draw Feet
Draw feet in 10 easy steps, about 8 minutes. Free, with a printable worksheet.
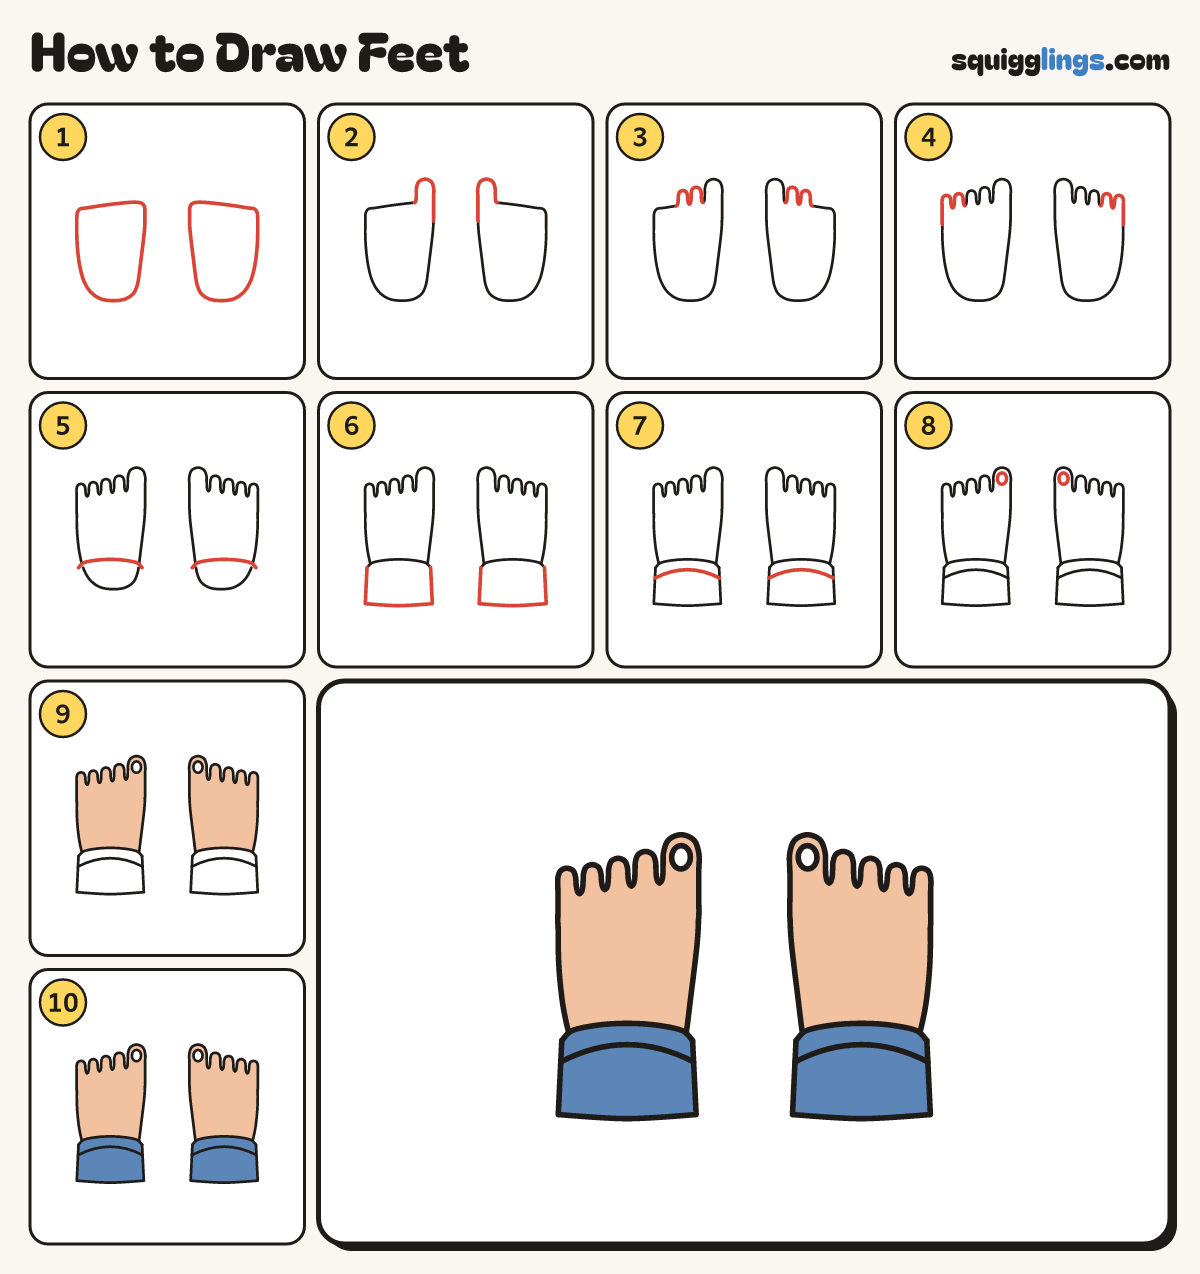
Each picture adds one red line. Draw that line, then scroll to the next picture. Rub out any dashed helper lines at the end. First up: two feet.
Step 1: Two feet
Draw 2 tall rounded shapes side by side, wide at the top and dipping in on the inside.
Tip The big toes go on the inside, next to each other.
Step 2: Big toes
Start on top of each foot, on the inside. Draw a fat upside-down U and stop on the foot line.
Tip The big toe is the fattest and tallest.
Step 3: Two more toes
Next to each big toe, draw 2 shorter toes, starting on the toe before and stopping on the foot line.
Step 4: Last two toes
Outside each foot, draw the 2 smallest toes, starting on the toe before and stopping on the foot line.
Tip The toes get smaller like a row of steps.
Step 5: Trouser hems
Across the back of each foot, draw a rainbow curve, starting on one side and stopping on the other.
Step 6: Trouser legs
From each end of the rainbow, draw a line down past the heel. Join the 2 lines at the bottom.
Step 7: Rolled cuffs
Just under each rainbow, draw another curve from side to side for the rolled-up cuff.
Step 8: Toenails
On each big toe, draw a small oval toenail near the tip.
Step 9: Colour the feet peach
Colour both feet and all the toes peach, leaving the toenails white.
Step 10: Blue trousers
Colour the trouser legs blue. Go over your lines and your feet are done.
Your finished drawing
Follow the steps above and this is where you end up: feet, drawn by you.
Every step in one picture